Tangy Key Lime Pie Bars offer a vibrant, zesty flavor that is incredibly refreshing. This simple 5-step recipe makes creating these sweet homemade treats a pure delight. Perfect for gatherings or a personal dessert, these bars are a crowd-pleaser, delivering a burst of citrus in every bite. Enjoy making this easy recipe.
Key Takeaways
- Achieve perfectly tangy Key Lime Pie bars in just five steps.
- Utilize fresh key limes for the best zesty flavor.
- Proper chilling is crucial for firm, delicious bars.
- Ideal for a sweet treat or special occasions.
These citrusy bars are truly delightful. Their bright flavor awakens taste buds. Simple ingredients yield amazing results. A refreshing dessert for everyone. Enjoy every single zesty bite.
Start Your Tangy Key Lime Bars
Beginning any baking project with proper preparation sets the stage for success, and making delicious Tangy Key Lime Pie Bars is no different. The first steps ensure your kitchen is ready and your equipment is prepped, allowing for a smooth and enjoyable baking process. Taking a few moments for these initial preparations can significantly impact the final texture and presentation of your delightful dessert, ensuring that your efforts culminate in a truly satisfying culinary creation. This methodical approach minimizes stress and maximizes the chances of a perfect outcome, establishing a strong foundation for the deliciousness to come.
Preheat Your Oven
Before you even think about mixing ingredients, preheating your oven is crucial. Set your oven to the specified temperature (typically around 350°F or 175°C for the crust, then potentially adjusted for the filling). A properly preheated oven ensures even baking from the moment your dish enters, preventing uneven cooking and guaranteeing a perfectly golden-brown graham cracker crust. Allow at least 15-20 minutes for your oven to reach and stabilize at the desired temperature. This small waiting period is vital for achieving optimal results, as it helps create a consistent environment for your bars to bake beautifully. An oven that isn’t fully preheated can lead to a chewy or pale crust, detracting from the overall texture of your tangy treat.
Prepare Baking Dish
Selecting the right baking dish and preparing it correctly is another foundational step for your Key Lime Pie Bars. For these bars, an 8×8 or 9×9 inch square baking dish is ideal. To make removal and serving effortless, line your baking dish with parchment paper, leaving an overhang on two sides. This creates “slings” that you can use to lift the entire batch of bars out of the dish once cooled. Lightly greasing the dish before adding the parchment can help it stick better, ensuring the paper stays in place as you press in the crust. This simple preparation prevents sticking and makes cutting your bars much cleaner and easier, contributing to a professional finish for your homemade tangy treat. Proper dish prep also ensures the crust bakes evenly without adhering to the pan.
Gather Key Lime Bar Ingredients First
The secret to truly outstanding Tangy Key Lime Pie Bars lies in the quality and freshness of your ingredients. Before you begin mixing, ensure you have all components measured and ready. This “mise en place” approach makes the baking process seamless and helps prevent last-minute rushes, allowing you to focus on the joy of creating. Understanding the role of each ingredient will also help you appreciate the balance of flavors and textures in this classic dessert, highlighting why each element is essential for achieving the perfect sweet and tangy harmony.
Crumb Base Items
The foundation of these delightful bars is a sturdy and flavorful graham cracker crust. You will need a good quantity of graham crackers, crushed into fine crumbs. You can achieve this using a food processor for a consistent texture or by placing them in a Ziploc bag and crushing them with a rolling pin for a more rustic feel. Complementing the graham cracker crumbs are melted unsalted butter, which binds the crumbs together, and a touch of granulated sugar to enhance the sweetness and encourage crispness. Using unsalted butter allows you to control the overall saltiness, ensuring a perfectly balanced crust that complements the tangy filling without being too salty. The quality of your graham crackers can also influence the depth of flavor in your crust, so choose a brand you enjoy.
Filling Essentials
The star of the show, the tangy Key lime filling, requires just a few key components. The most important is, of course, fresh Key lime juice. While bottled versions exist, nothing compares to the vibrant, aromatic zest and juice from actual Key limes for that authentic, unmistakable flavor. Sweetened condensed milk provides the necessary sweetness and creamy texture, reacting with the acidic lime juice to thicken the filling. Egg yolks act as an emulsifier and thickener, contributing to the rich, smooth consistency of the custard. Finally, fresh Key lime zest is crucial for intensifying the citrus aroma and adding tiny bursts of concentrated lime flavor throughout the filling, making every bite truly delightful and zesty. Always zest your limes before juicing them for ease, ensuring you capture maximum flavor. This combination yields a perfectly balanced, irresistible Key lime flavor.
Mixing The Perfect Crumb Crust
The crumb crust is more than just a base; it’s an integral part of the Key Lime Pie Bar experience, offering a delightful crunch that perfectly contrasts with the smooth, creamy filling. Creating a well-mixed and firmly pressed crust ensures structural integrity and prevents sogginess, which is especially important for bars that need to hold their shape when sliced. Achieving this perfection is simple with the right technique, combining dry and wet ingredients carefully and pressing them into an even layer in your prepared baking dish. This meticulous approach guarantees a sturdy and flavorful foundation for your tangy dessert.
Combine Dry And Wet
Start by combining your finely crushed graham cracker crumbs with granulated sugar in a medium mixing bowl. Stir these dry ingredients together until they are well integrated. Then, pour in the melted unsalted butter. Mix thoroughly with a spoon or your hands until all the crumbs are evenly moistened and resemble wet sand. This step is critical; every crumb needs to be coated with butter to ensure the crust holds together properly after baking. The mixture should be cohesive enough that when you press a handful together, it forms a clump, yet it should still be crumbly enough to spread easily in your baking dish. This balance is key to a successful, sturdy base that won’t fall apart when cut. Ensure there are no dry spots remaining to avoid a crumbly, unappealing crust.
Press Into Dish
Once your crumb mixture is perfectly moistened, transfer it to your prepared baking dish. Distribute the crumbs evenly across the bottom. Then, using the bottom of a flat glass or your fingers, firmly press the mixture down to create a compact and even layer. Ensure the edges are also well-pressed, potentially pushing some crumbs slightly up the sides to form a slight border, although this is optional. The goal is a dense, uniform crust that will bake into a crisp, stable foundation for your tangy filling. After pressing, bake the crust as directed in the recipe (usually for about 8-10 minutes) until lightly golden and fragrant. This pre-baking step helps set the crust and prevents it from becoming soggy once the filling is added, contributing to the overall integrity and deliciousness of your bars. For other amazing dessert foundations, check out our collection of dessert recipes for inspiration and more baking ideas.
Create Tangy Key Lime Pie Bar Filling
The heart of these Key Lime Pie Bars is undoubtedly the vibrant, zesty, and irresistibly tangy filling. Achieving the perfect balance of sweet and tart, along with a silky-smooth texture, is what elevates this dessert from good to absolutely phenomenal. This section will walk you through crafting that signature Key lime flavor profile, ensuring a filling that’s both creamy and bright. Every step is designed to maximize flavor and achieve the desired custardy consistency, promising a truly delightful experience with each bite.
Whisk Together Liquids
In a large mixing bowl, combine the sweetened condensed milk, fresh Key lime juice, and egg yolks. Use a whisk to vigorously combine these ingredients until the mixture is completely smooth and uniform. You’ll notice almost immediately that the acidity of the Key lime juice begins to react with the sweetened condensed milk, causing the mixture to thicken. This is a natural chemical reaction that contributes to the custard-like consistency of the finished bars, an exciting part of the process. Continue whisking until no streaks of egg yolk remain and the mixture has a consistent, slightly thickened texture. This thorough mixing ensures that the flavors are evenly distributed and that the filling will set properly when baked, providing that satisfying creamy experience in every bite. Proper blending is key to avoiding a grainy texture in your final product.
Add Fresh Lime Zest
After whisking the liquids, it’s time to incorporate the fresh Key lime zest. Using a microplane or a fine grater, carefully zest the outer green layer of the Key limes, being sure to avoid the white pith underneath, which can be bitter. Gently fold the zest into the prepared filling mixture. The zest adds an intense burst of concentrated lime flavor and a beautiful aromatic quality that cannot be achieved with juice alone. It also adds tiny flecks of green, enhancing the visual appeal of your bars. While optional for some, incorporating zest is highly recommended for achieving the most authentic and powerfully tangy Key Lime Pie Bar experience. The aroma alone will transport you to a tropical paradise, setting the stage for a truly delightful dessert. This careful addition ensures a rich, multi-layered citrus flavor, making the bars even more appealing to the senses.
Assembling Your Delightful Pie Bar Layers
With your perfectly baked crumb crust and your wonderfully tangy Key lime filling prepared, the next step is to bring these two components together. This stage is straightforward but crucial for ensuring that your Key Lime Pie Bars bake evenly and present beautifully. Proper assembly guarantees that each slice offers a harmonious blend of the crisp crust and the creamy, zesty filling, creating a truly delightful dessert experience. It’s the moment where the individual elements unite to form a cohesive, mouth-watering treat, promising a burst of citrus flavor with every single bite. Taking care at this point ensures the finished product is both structurally sound and aesthetically pleasing.
Pour Filling Over Crust
Carefully retrieve your pre-baked graham cracker crust from the oven (it should have cooled slightly if baked recently, or be completely cool if prepared in advance). Place the baking dish on a flat, stable surface. Gently and evenly pour the prepared Key lime filling mixture over the warm or cooled crust. Take your time to ensure the filling spreads from edge to edge, creating a uniform layer. If your crust has slightly raised edges, the filling will nestle perfectly within them. A spatula can be used to gently guide the filling to cover any bare spots, but typically, the liquid consistency allows it to spread naturally. Avoid overfilling the dish, as this could lead to spillage during baking. The goal is an even distribution that allows both layers to cook and set beautifully, resulting in visually appealing and consistently flavorful bars that will impress any crowd. An even pour prevents thinner spots that might overbake.
Baking Your Key Lime Pie Bars
Baking is where the magic happens, transforming your liquid filling into a set, luscious custard atop the crisp graham cracker crust. Precision in temperature and timing is paramount to achieve the perfect texture for your Tangy Key Lime Pie Bars. Overbaking can lead to a rubbery consistency, while underbaking will result in a runny filling that won’t set. Follow these guidelines to ensure your bars are cooked to absolute perfection, delivering that coveted creamy interior with a subtle jiggle. This stage requires your careful attention to detail for the best possible outcome, turning simple ingredients into a sophisticated dessert.
Oven Temperature And Time
Once the filling is poured over the crust, it’s time to bake. Lower your oven temperature slightly from the crust-baking temperature, typically to around 325°F (160°C). This gentler heat allows the custard to set slowly and evenly without curdling or browning excessively. Bake the bars for approximately 15-20 minutes. The exact time can vary slightly depending on your oven and the thickness of your filling, so keep a close eye on them as they approach the minimum baking time. A lower temperature and precise timing are crucial for maintaining the delicate balance of ingredients and achieving the signature creamy texture of Key lime filling. This step ensures that the natural acidity of the lime juice effectively thickens the sweetened condensed milk and egg yolks, resulting in a perfectly set bar that retains its vibrant flavor and smooth consistency.
Check For Doneness
Determining when your Key Lime Pie Bars are perfectly done requires a keen eye. The edges of the filling should appear set and slightly puffed, while the very center should still have a slight jiggle when you gently shake the pan. It’s similar to checking a cheesecake for doneness; you want it set but not firm all the way through, as it will continue to firm up as it cools. Avoid baking until the entire surface is completely firm and still, as this indicates overbaking, which can lead to a tough or rubbery texture. Once you observe the characteristic slight jiggle in the center, carefully remove the baking dish from the oven. The residual heat will continue to cook the bars as they cool, ensuring a perfectly set, yet still incredibly smooth and creamy, filling. For another delightful baked treat, consider making a batch of peanut butter brownie swirl cookies.
Cooling And Chilling Pie Bars
Patience is a virtue, especially when it comes to desserts like Tangy Key Lime Pie Bars. The cooling and chilling phases are just as critical as the baking itself. These steps allow the filling to fully set, the flavors to meld, and the bars to firm up, making them easy to slice and incredibly enjoyable to eat. Rushing this process can lead to a messy presentation and a less satisfying texture, compromising all the hard work you put into baking. Proper cooling and chilling are non-negotiable for achieving the ideal creamy consistency and clean cuts.
Let Bars Cool Down
Immediately after removing your Key Lime Pie Bars from the oven, resist the urge to cut into them. Place the baking dish on a wire rack and allow the bars to cool completely at room temperature. This gradual cooling process is essential for the filling to continue setting and for the bars to slowly come down to a safe temperature before refrigeration. Attempting to chill warm bars can introduce condensation, which might affect the crispness of the crust, and it can also warm up your refrigerator unnecessarily, impacting other foods. Give them ample time, usually at least 1 to 2 hours, until the dish is cool to the touch. This initial cooling helps prevent thermal shock to the delicate filling, preserving its smooth texture.
Refrigerate Until Firm
Once the bars have cooled to room temperature, cover the baking dish loosely with plastic wrap or aluminum foil. Then, transfer them to the refrigerator for at least 3-4 hours, or ideally, overnight. This prolonged chilling period is non-negotiable for achieving perfectly firm, sliceable Key Lime Pie Bars. The cold temperature allows the custard to fully set and firm up, ensuring clean cuts and a stable structure. It also enhances the refreshing quality of the dessert, making it even more delightful to eat, especially on a warm day. When properly chilled, the bars will be easy to lift out of the pan using the parchment paper slings, ready to be cut into neat, delicious portions. This firming process is vital for the optimal texture and taste experience. If you enjoy rich, creamy desserts, you might also like our vanilla bean creme brulee cheesecake cupcakes.
Serving Your Tangy Key Lime Bars
After all your careful preparation and patient chilling, the moment arrives to serve your exquisite Tangy Key Lime Pie Bars. Proper presentation enhances the appeal of this already delicious dessert, making it even more inviting. Whether for a casual gathering or a special occasion, these simple serving tips will ensure your bars look as good as they taste, leaving a lasting impression on your guests. The final touches elevate the experience, transforming a simple dessert into a memorable culinary highlight.
Cut Into Bars
Once your Key Lime Pie Bars are thoroughly chilled and firm, use the parchment paper overhangs to carefully lift the entire slab out of the baking dish and place it on a cutting board. For clean, precise cuts, use a sharp knife that has been run under hot water and wiped dry between each slice. This technique helps prevent the filling from sticking to the knife and ensures smooth edges, resulting in professional-looking bars. Cut the large slab into your desired bar size – typically 16 or 24 squares, depending on how large you want each serving. Wipe your knife clean after every few cuts to maintain neatness. The crisp graham cracker crust combined with the firm, zesty filling makes for a delightful contrast in every bite, perfect for individual enjoyment or sharing with friends and family. For another sweet treat that cuts well, try our quick Italian cream cake.
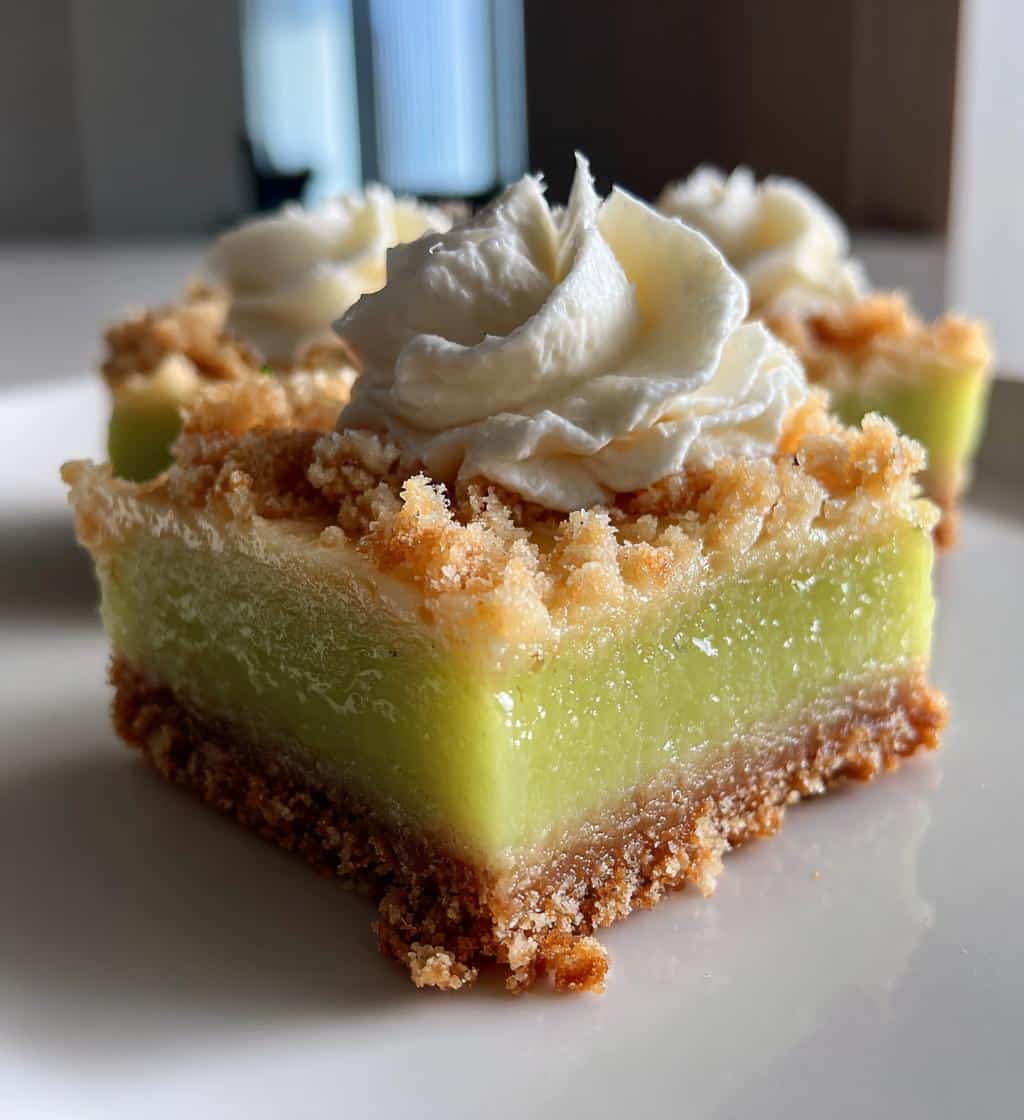
Optional Whipped Cream
While Tangy Key Lime Pie Bars are utterly delicious on their own, a dollop of fresh whipped cream can elevate them to another level of indulgence. The rich, airy sweetness of whipped cream provides a beautiful counterpoint to the sharp tanginess of the lime, creating a balanced and luxurious flavor profile. You can make homemade whipped cream by whisking heavy cream with a touch of powdered sugar and vanilla extract until soft peaks form, or opt for a good quality store-bought version for convenience. Garnish each bar with a generous swirl or dollop just before serving. A tiny sprinkle of extra Key lime zest on top of the whipped cream can add another pop of color and aroma, completing the sophisticated presentation of your homemade dessert. This extra touch of garnish makes the bars feel truly special and restaurant-worthy, providing a lovely creamy texture contrast.
Tips For Best Key Lime Bars
Crafting the perfect batch of Tangy Key Lime Pie Bars involves attention to a few key details that can significantly impact their flavor and texture. Beyond simply following the recipe, understanding these nuances will help you achieve consistently outstanding results, turning a good dessert into an unforgettable one. These expert tips ensure your bars are always bursting with fresh, vibrant citrus flavor and possess an an ideal, creamy consistency, making every effort worthwhile. Paying attention to these small but crucial elements will elevate your baking game and impress anyone who tastes your creations.
Use Fresh Key Limes
This cannot be stressed enough: for the most authentic and vibrant flavor, always use fresh Key limes. While regular limes can be substituted in a pinch, their flavor profile is distinct, often less aromatic and intensely tart. Fresh Key limes offer a unique, slightly sweeter, and more floral zest and juice that is quintessential to this dessert. Bottled Key lime juice is a convenient option, but it often lacks the brightness and complexity of freshly squeezed juice. Take the extra time to squeeze the limes yourself; the difference in taste is truly worth the effort, delivering a more profound and aromatic citrus note. You’ll notice the distinct aroma and unparalleled zest that only fresh fruit can provide, making your bars genuinely stand out from any made with inferior ingredients.
Don’t Overbake
Overbaking is a common pitfall that can ruin the texture of your Key Lime Pie Bars. When baked for too long, the delicate custard filling can become rubbery and lose its signature creamy, smooth consistency. Instead of a luscious, melt-in-mouth experience, you’ll end up with a denser, less appealing texture. As mentioned earlier, watch for the edges to be set, but the center should still have a slight jiggle. The residual heat from the baking dish will continue to cook the filling as it cools after being removed from the oven. Trust the jiggle! Removing them from the oven at this point ensures a perfectly set yet wonderfully tender and creamy filling that is the hallmark of a perfectly made Key Lime Pie Bar. This careful monitoring prevents any undesirable textural changes, ensuring your bars remain silky and delectable.
Storing Leftover Key Lime Bars Properly
If you’re lucky enough to have any Tangy Key Lime Pie Bars left over, knowing how to store them correctly is crucial to maintain their freshness, flavor, and delightful texture. Proper storage ensures that each subsequent bite is as enjoyable as the first, preserving the zesty tang and creamy consistency for days to come. This section provides essential advice on keeping your homemade treats at their best, ready for whenever a craving strikes. Adhering to these simple storage guidelines will help extend the life of your delicious dessert, allowing you to savor it longer without compromise.
Keep In Refrigerator
Due to the dairy and egg components in the Key lime filling, these bars absolutely require refrigeration. After cutting your bars, arrange them in a single layer in an airtight container. If you need to stack them, place a piece of parchment paper between the layers to prevent them from sticking together. Store the container in the refrigerator for up to 3-4 days. The airtight container is vital for preventing the bars from drying out and absorbing odors from other foods in the fridge, which could alter their delicate flavor. For longer storage, you can freeze Key Lime Pie Bars. Wrap individual bars tightly in plastic wrap, then place them in a freezer-safe airtight container or bag. They can be frozen for up to 1 month. Thaw them in the refrigerator for several hours before serving. This method helps maintain their integrity, ensuring that the crust remains crisp and the filling stays creamy, making them a perfect make-ahead dessert or a treat to savor over several days.
Nutrition Facts Key Lime Pie Bars
For those mindful of their dietary intake, understanding the nutritional profile of Tangy Key Lime Pie Bars can be helpful. While these bars are undeniably a delightful treat, they are also a dessert, meaning they typically contain a fair amount of sugar and fat. The exact nutritional values can vary significantly based on ingredient brands, portion sizes, and any modifications made to the recipe. This section offers a general overview to help you enjoy these sweet and tangy delights responsibly and in moderation, fitting them into your balanced lifestyle. It’s about savoring the experience while being informed.
Per Serving Details
When considering the nutritional facts, it’s important to remember that these are estimates. A typical serving of Key Lime Pie Bars (usually defined as one 2×2 inch square from a 9×9 inch pan, yielding 16 servings) will contain calories, carbohydrates, fats, and some protein. The primary contributors to the calorie count are the sweetened condensed milk, butter in the crust, and sugar. While Key limes themselves are a source of Vitamin C, the amount in a single bar after baking is minimal. These bars are best enjoyed as an occasional treat rather than a daily staple, offering a rich, satisfying experience that justifies its caloric content. Always refer to a reliable nutrition calculator if you require precise values based on your specific ingredients and portion sizes, as individual recipes can vary significantly in their make-up.
Calories And Macronutrients
On average, one serving of Tangy Key Lime Pie Bars might range from 250 to 350 calories. The majority of these calories will come from carbohydrates (primarily sugar) and fats. Expect a significant amount of saturated fat from the butter and condensed milk, contributing to the rich, creamy texture. Protein content will be relatively low, mainly from the egg yolks and some dairy. While certainly not a health food, these bars provide a wonderful sensory experience that fits perfectly into a balanced diet when consumed mindfully. They are a testament to how simple, quality ingredients can combine to create something truly indulgent and memorable. For more delicious recipes and visual inspiration, make sure to follow us on Pinterest and Instagram!
Enjoy These Tangy Key Lime Bars
Having journeyed through the creation of these vibrant Tangy Key Lime Pie Bars, from gathering ingredients to the final slice, you are now equipped to produce a truly magnificent dessert. This recipe promises not just a treat for the taste buds, but also a rewarding baking experience that builds confidence in the kitchen. The combination of a crisp graham cracker crust and a creamy, zesty Key lime filling creates a symphony of textures and flavors that is both refreshing and deeply satisfying. These bars are more than just a dessert; they are a celebration of citrusy delight, perfect for brightening any day or occasion, bringing a little sunshine to your table. Share them with loved ones, or savor them yourself, knowing you’ve crafted a homemade masterpiece that delivers pure joy in every bite. Go ahead, take that first tangy bite and let the flavors transport you to a sunny, tropical paradise. We hope you cherish making and enjoying this easy recipe as much as we do, and that it becomes a cherished addition to your recipe collection.