Easy rice pilaf is a wonderful addition to any meal, known for its fluffy texture and rich flavor. This simple side dish transforms basic rice into something special. With our straightforward cooking tips, you can master homemade rice pilaf effortlessly, making it a perfect accompaniment for various main courses.
Key Takeaways
- Sauté aromatics and toast rice for depth of flavor.
- Maintain the correct liquid-to-rice ratio for ideal consistency.
- Master heat control, boiling then simmering, for even cooking.
- Resting the pilaf off heat is crucial for a fluffy texture.
- Fluffing with a fork at the end perfects the presentation.
- Enjoy versatile variations, ideal meal pairings, and simple storage.
Making perfect rice pilaf is simple. A few steps create amazing flavor. Toasting grains adds a unique depth. Proper simmering makes it fluffy. It’s a great dish for anyone.
What is Easy Rice Pilaf?
Simple Definition
Easy rice pilaf is a popular side dish where rice grains are first sautéed in butter or oil, often with aromatics like onions or garlic, before a flavorful broth is added. Unlike plain boiled rice, pilaf features separate, fluffy grains and a richer taste due to the initial sautéing and the absorption of seasoned liquid. It’s a culinary technique that elevates everyday rice into a more engaging and delicious accompaniment, making it a staple in many cuisines worldwide. For more background, you can learn about the history and variations of pilaf on Wikipedia.
Why Make This Dish
Making this flavorful pilaf recipe is an excellent choice for several reasons. Firstly, it offers a significant flavor upgrade compared to plain rice, turning a humble ingredient into a memorable part of your meal. The process adds depth and complexity, creating a truly delicious experience. Secondly, it’s incredibly versatile; pilaf can complement almost any main course, from roasted chicken to grilled fish, making it a perfect side dish. Lastly, despite its gourmet taste, our easy cooking method makes it approachable for even beginner cooks. It’s a fantastic way to introduce new textures and flavors to your family dinner table without a lot of fuss. It pairs wonderfully with dishes like crispy parmesan chicken, enhancing the overall dining experience.
Ingredients for This Rice Pilaf
The Basic List
Creating homemade rice pilaf requires just a few simple ingredients, most of which you likely already have in your pantry. For the foundation, you’ll need:
- Long-grain white rice: Such as Basmati or Jasmine, known for cooking up fluffy and separate.
- Olive oil or butter: For sautéing and adding richness.
- Onion: Finely diced, for aromatic flavor.
- Broth: Chicken, vegetable, or beef broth works best, providing much more flavor than plain water.
- Salt and Pepper: To taste, enhancing all the other flavors.
This core combination ensures a delicious and consistently fluffy rice pilaf every time. The quality of your broth especially impacts the final taste, so choose one you enjoy.
Optional Items
While the basic list delivers a fantastic pilaf, there are many ways to customize and enhance your dish. Consider adding these optional items to elevate your easy rice pilaf:
- Garlic: Minced and added with the onions for an extra aromatic kick.
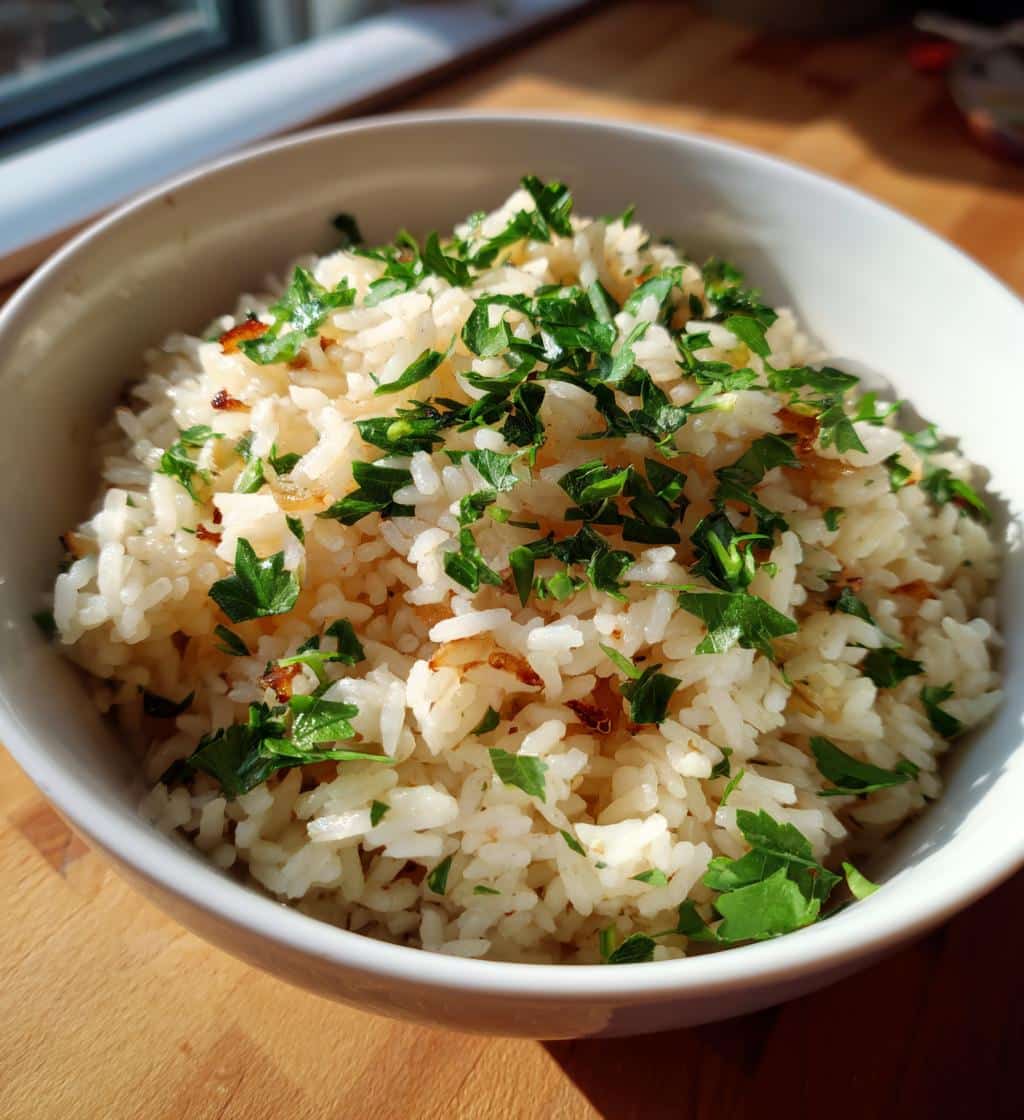
- Fresh herbs: Parsley, cilantro, or dill stirred in at the end for freshness.
- Vegetables: Diced carrots, peas, or corn can be added with the broth for color and nutrients.
- Spices: A pinch of turmeric for color, or a dash of cumin for an earthy note.
- Nuts or dried fruit: Toasted slivered almonds or dried cranberries can add texture and a touch of sweetness, especially if you’re serving it with a hearty chicken and rice casserole.
These additions allow you to adapt the pilaf to your specific preferences or the main course you’re serving, making it truly your own.
Tools for Fluffy Rice Pilaf
Essential Kitchen Items
You don’t need a specialized gadget collection to prepare a delightful fluffy rice pilaf. A few basic kitchen tools are all it takes to achieve perfectly cooked grains. Ensure you have:
- Heavy-bottomed pot with a tight-fitting lid: This is crucial for even heat distribution and trapping steam, which is vital for proper rice cooking. A 2-3 quart pot is usually sufficient for standard recipes.
- Measuring cups and spoons: Accuracy in liquid-to-rice ratios is one of the most important cooking tips for pilaf success.
- Wooden spoon or spatula: For sautéing aromatics and gently stirring the rice.
- Fine-mesh sieve (optional but recommended): For rinsing the rice thoroughly before cooking, which helps remove excess starch and contributes to separate grains.
Having these items ready before you start will streamline your cooking process and help you achieve the best results for your homemade rice pilaf.
Easy Steps to Cook Rice Pilaf
Prep Time: 10 Minutes
Preparing for your easy rice pilaf is quick and simple. First, measure out your rice and rinse it under cold water until the water runs clear; this removes excess starch and helps achieve that desired fluffy texture. Dice your onion finely and mince any garlic you plan to use. Measure out your broth and have it ready near the stovetop. This prep ensures a smooth cooking process, allowing you to focus on the key techniques for a perfect side dish.
Cook Time: 25 Minutes
The actual cooking time for your pilaf is surprisingly short, making this a great option for weeknight family dinner. Most of the cooking happens during the gentle simmer, followed by a crucial resting period off the heat. This timeframe does not include the 10-minute resting period after cooking, which is essential for the final texture. With just 25 minutes on the stove, you’ll be well on your way to a delightful and flavorful pilaf recipe.
Full Instructions
- Rinse Rice: Place your measured rice in a fine-mesh sieve and rinse thoroughly under cold running water until the water is clear. Drain well.
- Sauté Aromatics: In a heavy-bottomed pot with a tight-fitting lid, melt 1-2 tablespoons of butter or heat olive oil over medium heat. Add the diced onion (and minced garlic, if using) and sauté for 3-5 minutes until softened and translucent.
- Toast Rice: Add the rinsed and drained rice to the pot with the onions. Stir constantly for 2-3 minutes, toasting the grains until they appear slightly opaque or lightly golden. This step is key for texture and flavor.
- Add Liquid: Carefully pour in your measured broth. Add salt and pepper to taste. Bring the mixture to a rolling boil over medium-high heat.
- Reduce Heat and Simmer: Once boiling, immediately reduce the heat to the lowest setting. Cover the pot tightly with the lid. Let it simmer undisturbed for 15-18 minutes. Resist the urge to lift the lid!
- Rest Off Heat: After the simmering time, remove the pot from the heat. Keep the lid on and let the pilaf rest for another 10 minutes. This allows the remaining steam to fully absorb, resulting in truly fluffy rice.
- Fluff and Serve: Finally, remove the lid and gently fluff the rice with a fork. This separates the grains and adds air. Serve your delicious homemade rice pilaf immediately as a perfect side dish. For more side dish ideas, check out our side dishes category.
Secret 1: Sauté Onions for Flavor
How to Sauté Onions
The first secret to a truly flavorful pilaf recipe lies in properly sautéing your aromatics. Starting with onions (and often garlic) creates a foundational layer of savory goodness that permeates every grain of rice. To achieve this, heat your chosen fat—butter or olive oil—in the pot over medium heat. Add your finely diced onions and cook them gently until they become translucent and softened, which usually takes about 3 to 5 minutes. You’re not looking for deep caramelization here, just a gentle softening that releases their sweet, savory essence. This initial step builds the complexity that distinguishes a simple rice dish from a remarkable fluffy rice pilaf.
Secret 2: Toast Rice for Texture
Browning the Grains
Another crucial cooking tip for achieving an exceptional homemade rice pilaf is to toast the rice grains before adding any liquid. After sautéing your onions, add the rinsed and drained rice directly to the pot. Stir the grains continuously over medium heat for 2-3 minutes. You’ll notice them becoming more opaque, and some might even turn a very light golden color. This browning process does two wonderful things: it imparts a subtle, nutty flavor to the rice, deepening its taste profile, and it helps to seal the individual grains, preventing them from clumping together and ensuring a beautifully fluffy, separate texture in the final dish. It’s a simple step with a significant impact on your easy rice pilaf.
Secret 3: The Right Broth Ratio
2 Cups Liquid Per Rice Cup
Achieving perfectly cooked, fluffy rice pilaf largely depends on the correct liquid-to-rice ratio. For most long-grain white rice, the golden rule is two cups of liquid for every one cup of uncooked rice. This ratio ensures that the rice has enough moisture to cook thoroughly without becoming mushy or dry. Using a flavorful broth instead of plain water intensifies the taste, contributing significantly to a truly flavorful pilaf recipe. Chicken, vegetable, or beef broth each offer unique nuances, so choose one that complements your meal. Sticking to this precise measurement is one of the most vital cooking tips for consistent, excellent results.
Secret 4: Master Cooking Heat
Boil Then Simmer
Proper heat management is key to preventing burnt bottoms and undercooked tops in your homemade rice pilaf. The process involves two distinct phases: an initial boil followed by a gentle simmer. After adding the broth to your toasted rice, bring the mixture to a rapid, rolling boil over medium-high heat. This high heat quickly brings the liquid to temperature and initiates the cooking process. As soon as it boils, reduce the heat immediately to the lowest setting. This ensures the rice cooks gently, absorbing the liquid evenly and slowly, preventing scorching and promoting that desirable fluffy texture. This careful transition is a cornerstone of our easy cooking method.
Secret 5: Simmer Rice Covered
Keep Lid On
Once you’ve brought your pilaf to a boil and reduced the heat to a simmer, the most important rule is to keep the pot tightly covered. The lid traps the steam inside, which is what gently cooks the rice grains to perfection. This creates a moist, consistent cooking environment, allowing the rice to absorb the broth fully and evenly. Resisting the urge to peek or stir during the 15-18 minute simmering period is crucial. Each time you lift the lid, precious steam escapes, extending the cooking time and potentially leading to unevenly cooked or dry rice. Trust the process; the covered simmer is a fundamental cooking tip for the best fluffy rice pilaf.
Secret 6: Let Rice Rest Off Heat
Importance of Resting
After your rice pilaf has simmered, don’t rush to serve it. One of the most overlooked secrets to truly fluffy rice pilaf is letting it rest off the heat, with the lid still on, for at least 10 minutes. This crucial resting period allows the steam to redistribute and any remaining moisture to be fully absorbed by the grains. It also gives the rice a chance to firm up slightly, preventing it from becoming mushy when fluffed. Skipping this step can result in rice that’s still a bit wet or sticky. Patience during this short rest is a small effort for a big reward, ensuring every grain is separate, tender, and perfectly cooked in your flavorful pilaf recipe.
Secret 7: The Final Fluffing Step
Using a Fork
The very last step in preparing your homemade rice pilaf is often underestimated but vital for achieving that signature fluffy texture. Once the pilaf has rested off the heat, gently remove the lid. Instead of stirring with a spoon, use a fork to lightly fluff the rice. Glide the tines of the fork through the grains, lifting and separating them. This aerates the pilaf, releasing any trapped steam and ensuring each grain is distinct and light, not packed together. Avoid pressing or mashing, as this can make the rice gummy. A gentle fluff with a fork is the final touch for a picture-perfect and wonderfully textured easy rice pilaf.
Variations, Serving, and Storage
Try New Flavors
The beauty of this easy rice pilaf recipe is its adaptability. Once you master the basic cooking method, the possibilities for customization are endless. For a Mediterranean twist, add a pinch of saffron and some dried currants. For an Indian-inspired pilaf, sauté with whole spices like cardamom pods, cloves, and cinnamon sticks. You can also stir in cooked vegetables such as peas, diced carrots, or spinach at the end for added nutrition and color. Consider adding a sprinkle of toasted nuts like almonds or pistachios for extra crunch. Don’t be afraid to experiment with different broths, herbs, and spices to create your unique flavorful pilaf recipe.
Meal Pairings
Fluffy rice pilaf is truly a perfect side dish, versatile enough to complement a wide array of main courses. It’s excellent alongside roasted or grilled meats like chicken, lamb, or beef. Imagine it next to a juicy steak or some delicate baked fish. It also pairs wonderfully with hearty vegetarian stews or lentil dishes, absorbing their flavors beautifully. For a complete family dinner, serve it with a simple green salad or roasted vegetables. Its delicate yet rich flavor never overpowers, making it a reliable and welcome addition to almost any meal. You can find more dinner ideas to pair with your pilaf on our Carina Recipes dinner section, or get inspired by our Pinterest page.
Keeping Leftovers
One of the best things about homemade rice pilaf is that leftovers are just as delicious! To store, allow the pilaf to cool completely to room temperature within two hours of cooking. Transfer it to an airtight container and refrigerate for up to 3-4 days. When reheating, you might find the rice a little dry. To rehydrate, add a tablespoon or two of water or broth per cup of rice, cover, and gently reheat in the microwave or on the stovetop over low heat until warmed through. This easy cooking method for storage ensures you can enjoy your flavorful pilaf recipe again later. For more culinary inspiration and recipe ideas, follow us on Instagram!