Red velvet cookies are a delightful treat, known for their vibrant color and rich, soft texture. This easy red velvet cookie recipe guides you through creating these homemade delights, complete with a luscious cream cheese frosting. Whether for a holiday gathering or a simple dessert, these soft red velvet cookies are sure to impress.
Key Takeaways
- Master an easy recipe for vibrant red velvet cookies.
- Learn to make a smooth, sweet cream cheese frosting.
- Follow simple, step-by-step baking instructions.
- Get valuable baking tips for perfect results every time.
- Discover how to store your cookies to keep them fresh.
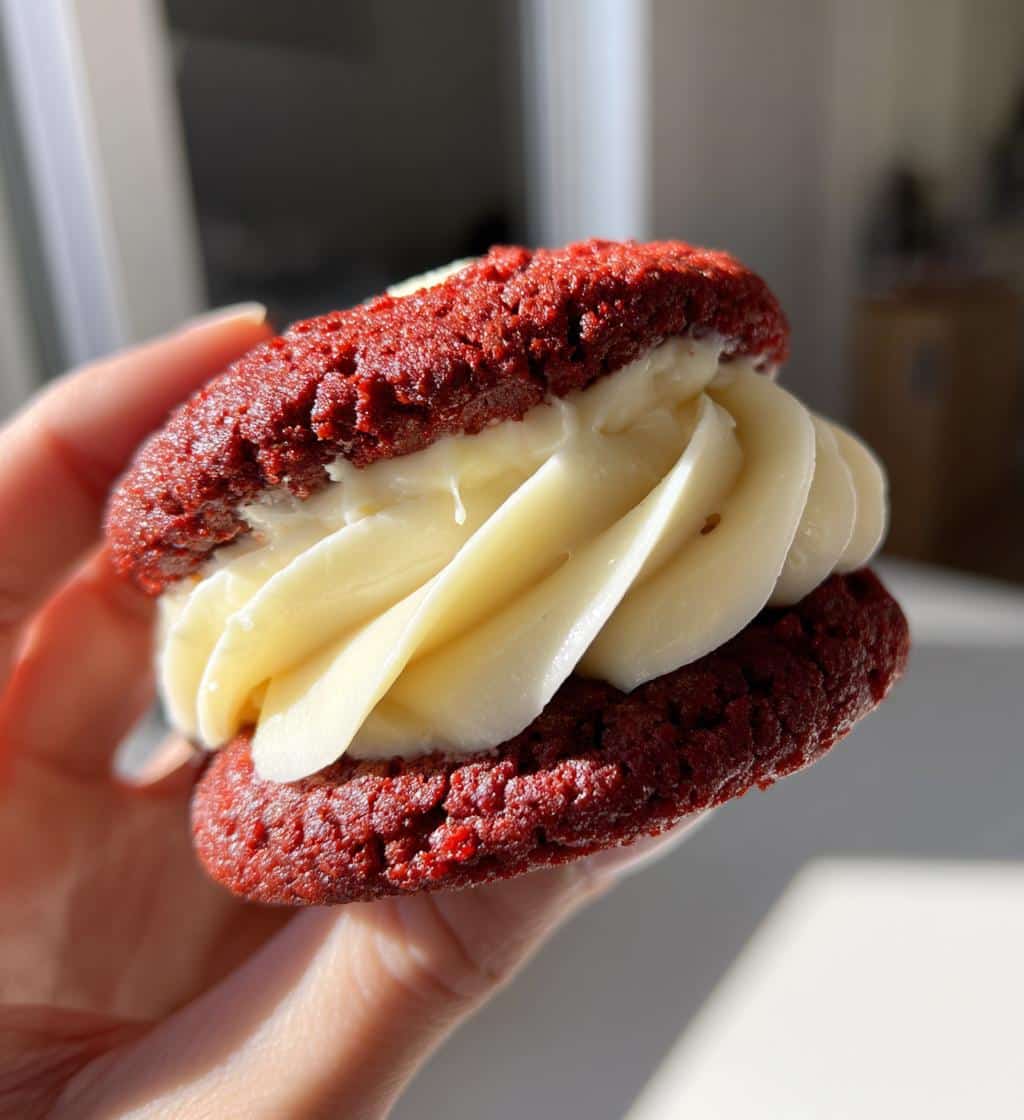
Red velvet cookies offer a unique charm. Their crimson hue always catches the eye. The subtle cocoa flavor is truly comforting. Paired with tangy cream cheese, it’s pure bliss. A simple pleasure for any occasion.
Welcome to Red Velvet Cookie Magic
Sweet Treat Overview
Step into the delightful world of red velvet cookies, a truly enchanting dessert that captivates with its striking crimson hue and incredibly soft, chewy texture. These cookies are not just a treat for the taste buds but also a feast for the eyes, making them perfect for any celebration, holiday gathering, or simply as a special indulgence. Our easy red velvet cookie recipe simplifies the process, ensuring that even novice bakers can achieve bakery-quality results right in their own kitchens. You’ll learn how to craft not only the perfectly baked, soft red velvet cookies but also a luscious, tangy-sweet cream cheese frosting that complements their subtle cocoa flavor beautifully. This guide focuses on creating homemade red velvet cookies that are both memorable and surprisingly straightforward to prepare, allowing you to bring a touch of magic to your dessert table. For more delightful dessert ideas, check out our desserts category.
Gather Ingredients for Perfect Cookies
What You Need for Cookies
To create these irresistible red velvet cookies, you’ll need a selection of standard baking ingredients, each playing a crucial role in achieving the desired flavor and texture. For the dry mix, gather all-purpose flour, a small amount of unsweetened cocoa powder (which gives red velvet its signature subtle chocolate note), baking soda for lift, and a pinch of salt to balance the sweetness. The wet ingredients typically include unsalted butter, granulated sugar, a large egg, vanilla extract for warmth, and buttermilk, which provides a tender crumb and a slight tang. Of course, the star of the show is red food coloring – gel food coloring is often preferred for its vibrant pigment without adding excessive liquid. Having all these components at room temperature is one of the key baking tips for a smooth, homogenous dough, leading to consistently perfect cookies. The combination of ingredients ensures your homemade red velvet cookies will be both visually stunning and incredibly delicious.
Sweet Cream Cheese Frosting Needs
No red velvet cookie would be complete without its iconic cream cheese frosting. This frosting is known for its rich, creamy texture and delightful balance of sweet and tangy flavors. For this, you will need softened cream cheese – full-fat cream cheese is recommended for the best flavor and consistency. You’ll also need unsalted butter, softened to room temperature, which contributes to the frosting’s smooth texture and richness. Powdered sugar (confectioners’ sugar) is essential for sweetness and a silky-smooth finish, as it dissolves easily. Finally, a dash of pure vanilla extract enhances all the flavors. Ensuring both the cream cheese and butter are adequately softened before mixing is crucial for achieving a lump-free, spreadable frosting that will perfectly top your soft red velvet cookies.
Baking Red Velvet Cookies Easy Steps
Creating these delightful red velvet cookies is a process that’s broken down into simple, manageable steps, ensuring a stress-free baking experience. From preparing your workspace to mixing ingredients and finally baking, each stage is designed for ease and enjoyment. Follow along to make these easy red velvet cookie recipe come to life in your kitchen.
Prepare Your Oven and Dry Mix
Preheat Oven to 350°F (175°C)
The first crucial step in baking perfect red velvet cookies is to preheat your oven. Set your oven to 350°F (175°C) and allow it ample time to reach and stabilize at this temperature, typically 15-20 minutes. A properly preheated oven ensures that your cookies begin baking at the correct temperature immediately, which is vital for even rising and browning. If the oven isn’t hot enough, cookies can spread too much and become flat, losing their ideal soft texture. Always ensure your oven is fully preheated before placing the cookie dough inside for consistent results.
Combine Flour, Cocoa, Baking Soda
While your oven is preheating, prepare your dry ingredients. In a medium-sized bowl, whisk together the all-purpose flour, unsweetened cocoa powder, baking soda, and salt. Whisking or sifting these ingredients together serves several purposes: it breaks up any lumps, ensures that the leavening agent (baking soda) and cocoa powder are evenly distributed throughout the flour, and aerates the mixture. This step is important for achieving a uniform texture in your homemade red velvet cookies. An even distribution of baking soda means your cookies will rise consistently, contributing to their signature soft and slightly chewy interior.
Mix Wet Cookie Ingredients Smoothly
Cream Butter and Sugar Together
The foundation of many great cookie recipes, including these easy red velvet cookies, begins with properly creaming the butter and sugar. In a large mixing bowl, using an electric mixer, beat the softened unsalted butter and granulated sugar together on medium speed. Continue mixing until the mixture becomes light, fluffy, and pale yellow, usually taking 2-3 minutes. This process incorporates air into the butter, which will create pockets that expand during baking, resulting in a tender and soft texture in your finished cookies. This creaming method is a fundamental baking tip for achieving light and airy baked goods.
Add Egg, Color, and Vanilla
Once your butter and sugar are perfectly creamed, it’s time to add the remaining wet ingredients. Beat in the large egg until it is fully incorporated, ensuring a smooth and consistent base for your dough. Next, add the red food coloring. This is where your red velvet cookies get their iconic vibrant hue! Start with a generous amount and add more until you achieve your desired deep red color. Finally, stir in the vanilla extract, which enhances the overall flavor profile of the cookies. For a taste of another rich dessert, you might enjoy our Quick Italian Cream Cake.
Combine Wet and Dry Cookie Mixes
Gently Mix Dough Until Combined
Now, it’s time to bring together the wet and dry ingredients to form your red velvet cookie dough. Gradually add the dry flour mixture to the wet butter-sugar mixture, mixing on low speed until just combined. It is absolutely crucial to mix gently and avoid overmixing. Overmixing develops the gluten in the flour too much, which can lead to tough, dense cookies instead of the desired soft red velvet cookies. Stop mixing as soon as no streaks of flour remain, even if the dough still looks a little shaggy. A light hand here is one of the most important baking tips for tender cookies.
Drop Dough onto Baking Sheet
Once your dough is perfectly mixed, it’s ready for the baking sheet. Line a baking sheet with parchment paper or a silicone baking mat to prevent sticking and ensure easy cleanup. Using a small cookie scoop (about 1.5 to 2 tablespoons) or two spoons, drop rounded balls of dough onto the prepared baking sheet, leaving about 2 inches of space between each cookie. This spacing allows the cookies to spread slightly without merging into one another. The consistent size of the dough balls will also help ensure that all your homemade red velvet cookies bake evenly, resulting in a batch of beautifully uniform treats.
Bake Red Velvet Cookies to Perfection
How Long to Bake Cookies
Baking red velvet cookies to perfection requires careful attention to timing. Place your baking sheet in the preheated 350°F (175°C) oven. Bake for approximately 9-12 minutes. The exact baking time can vary depending on your oven and the size of your cookies. You’ll know they’re done when the edges are set and slightly firm, but the centers still look soft and perhaps a little puffy. They might not look fully set in the middle, but they will continue to firm up as they cool. Avoid overbaking, as this will lead to dry, hard cookies instead of the soft red velvet cookies you’re aiming for. Rotating the baking sheet halfway through baking can help ensure even cooking.
Cool Cookies Completely
Once baked, remove the cookies from the oven and let them cool on the baking sheet for about 5 minutes. This initial cooling period allows the cookies to set further and become more stable, making them easier to transfer. After 5 minutes, carefully transfer the cookies to a wire rack to cool completely. This step is vital, especially if you plan to frost them with cream cheese frosting. Applying frosting to warm cookies will cause the frosting to melt and slide off, creating a messy situation. Patience during the cooling process ensures your finished cookies are beautiful and hold their shape, allowing the frosting to adhere perfectly to your homemade red velvet cookies.
Make Cream Cheese Frosting Simple
Soften Cream Cheese and Sugar
Creating the perfect cream cheese frosting starts with the right preparation of your key ingredients. Ensure both your full-fat cream cheese and unsalted butter are softened to true room temperature. This is a critical baking tip for achieving a smooth, lump-free frosting. In a medium bowl, combine the softened cream cheese and butter. Beat them together with an electric mixer on medium speed until the mixture is completely smooth and creamy, with no lumps of cream cheese remaining. This usually takes 2-3 minutes. This creamy base is essential for the texture of your sweet cream cheese frosting, providing a delightful contrast to the soft red velvet cookies.
Mix Until Smooth and Creamy
Once the cream cheese and butter are perfectly blended, it’s time to add the powdered sugar and vanilla extract. Gradually add the powdered sugar, one cup at a time, beating on low speed until it’s fully incorporated before adding more. This prevents a cloud of sugar from erupting in your kitchen. Once all the powdered sugar is added, increase the speed to medium-high and beat for another 2-3 minutes until the frosting is light, fluffy, and exceptionally smooth. Finally, stir in the vanilla extract. Scrape down the sides of the bowl as needed to ensure everything is thoroughly mixed. This process yields a dreamy, spreadable cream cheese frosting that’s perfect for your easy red velvet cookie recipe.
Finish Red Velvet Cookies with Frosting
Spread Frosting on Cooled Treats
The final, delightful step in preparing your red velvet cookies is to adorn them with that irresistible cream cheese frosting. Ensure your cookies are completely cooled before you begin, as warm cookies will cause the frosting to melt. You can spread the frosting using a small offset spatula or a butter knife for a rustic look, or for a more refined finish, pipe it onto each cookie using a pastry bag fitted with your favorite tip. Apply a generous dollop to the center of each soft red velvet cookie and gently spread it outwards, leaving a small border of red cookie visible. These beautifully frosted treats are perfect for sharing or enjoying on your own. For another classic comfort dessert, consider baking a Snickerdoodle Cobbler.
Quick Times and Servings Info
Fast Prep and Cook Times
One of the many appeals of this easy red velvet cookie recipe is its relatively quick turnaround. The active preparation time, including mixing both the cookie dough and the cream cheese frosting, typically ranges from 20 to 30 minutes. The baking time itself is quite fast, usually between 9 to 12 minutes per batch. While there’s additional time needed for cooling the cookies completely, the hands-on effort is minimal, making these homemade red velvet cookies a fantastic choice when you need a delicious dessert without spending hours in the kitchen. Plan for about an hour from start to finish for baking and cooling, before the final frosting step.
How Many Cookies You Get
This red velvet cookies recipe is designed to yield a generous batch, perfect for sharing with family and friends or keeping a stash for yourself. On average, this recipe will produce approximately 24 to 30 medium-sized cookies, assuming you use a standard 1.5 to 2-tablespoon cookie scoop. The exact number can vary slightly based on the size you make each cookie. This yield makes them ideal for holiday cookie platters, potlucks, or simply ensuring you have enough delightful soft red velvet cookies with cream cheese frosting to last a few days. For more baking inspiration, feel free to visit us on Pinterest!
Helpful Tips for Cookie Success
Use Room Temperature Ingredients
Achieving perfect soft red velvet cookies often boils down to a few key baking tips, and using room temperature ingredients is paramount. When butter, cream cheese, and eggs are at room temperature, they emulsify much more easily with other ingredients, creating a smoother, more uniform batter or frosting. Cold ingredients, on the other hand, can lead to a lumpy mixture and a less consistent final product. For cookies, room temperature butter creams beautifully with sugar, incorporating air for a lighter texture. For frosting, softened cream cheese and butter ensure a silky-smooth cream cheese frosting without any unsightly lumps. This simple step makes a significant difference in the quality of your homemade red velvet cookies.
Don’t Overmix Cookie Dough
Perhaps one of the most critical baking tips for tender cookies is to avoid overmixing the dough. Once you add the dry ingredients to the wet, mix only until just combined. Overmixing develops the gluten in the flour excessively, which can result in tough, chewy (and not in a good way) cookies. You’ll want your red velvet cookies to be soft and delicate, melting in your mouth, not requiring a strong bite. Stop your mixer as soon as you no longer see streaks of flour. A slightly shaggy dough is perfectly fine; it will finish combining as you scoop the portions. This technique is especially important for achieving the signature soft texture of these red velvet cookies.
Let Cookies Cool Fully
Patience is a virtue, especially when it comes to baking, and letting your cookies cool completely is one of those essential baking tips you shouldn’t skip. After baking, allow your red velvet cookies to cool on the baking sheet for a few minutes before transferring them to a wire rack to finish cooling. This helps them firm up and prevents breakage. More importantly, if you plan to add the delectable cream cheese frosting, the cookies must be completely cool. Applying frosting to warm cookies will cause the frosting to melt, slide off, and create a sticky, unappetizing mess. A fully cooled cookie provides a stable base for the frosting, ensuring your easy red velvet cookie recipe looks as good as it tastes. For other delightful cookie ideas, see our Peanut Butter Brownie Swirl Cookies.
Store Red Velvet Cookies Safely
Keep Them Fresh and Tasty
Once your delicious red velvet cookies are baked and frosted, proper storage is key to keeping them fresh and maintaining their soft texture and delicious flavor. Because they are topped with cream cheese frosting, these cookies require refrigeration. Store your frosted homemade red velvet cookies in an airtight container in the refrigerator for up to 3-5 days. Bringing them to room temperature for about 15-20 minutes before serving can enhance their softness and bring out their flavors. This method ensures your cream cheese frosting remains stable and your easy red velvet cookie recipe stays as delightful as the day it was baked.
Freezing for Later Enjoyment
If you’ve baked a large batch or simply want to enjoy these red velvet cookies at a later date, they freeze beautifully. For frosted cookies, place them on a baking sheet in a single layer and freeze for about an hour until the frosting is firm. Then, transfer them to an airtight freezer-safe container, separating layers with parchment paper to prevent sticking. They can be frozen for up to 1-2 months. Thaw them in the refrigerator overnight or at room temperature for a few hours before serving. You can also freeze unfrosted cookie dough balls: simply scoop the dough onto a parchment-lined tray, freeze until solid, then transfer to a freezer bag. Bake from frozen, adding a couple of minutes to the baking time. Share your cookie creations with us on Instagram!