Pink Velvet Raspberry Cheesecake brings delightful flavor and stunning visual appeal to any dessert table. This creamy, vibrant treat is perfect for special occasions or when you simply crave something extraordinary. Learn how to bake this impressive cheesecake with our easy-to-follow instructions.
Key Takeaways
- Achieve a flawless graham cracker crust with proper pressing techniques.
- Create a smooth, vibrant pink raspberry cheesecake filling using room temperature ingredients.
- Master the baking and cooling process to prevent cracks and ensure a creamy texture.
- Chill your cheesecake thoroughly for the best possible flavor and consistency.
- Apply sweet secrets like garnishing and adjusting color for a truly memorable dessert.
Baking this beautiful cheesecake is a rewarding experience. The vibrant hue captures attention. Each bite delivers pure joy. Share this delicious creation. Make memories today.
Welcome to Pink Velvet Raspberry Cheesecake
Prepare to create a truly spectacular dessert that combines the classic richness of cheesecake with a delightful raspberry twist and a stunning pink velvet appearance. This recipe isn’t just about baking; it’s about crafting a centerpiece that will impress everyone who sees and tastes it. The harmonious blend of tangy raspberries and sweet cream cheese, encased in a buttery graham cracker crust, makes this cheesecake a culinary work of art. Its vibrant color makes it an eye-catching addition to any spread, ensuring it stands out from other traditional dessert options. Getting the perfect texture and color involves careful attention to detail, but the results are undeniably worth the effort. Follow our detailed steps to ensure your pink velvet raspberry cheesecake is a resounding success.
A dessert for any occasion
Whether you’re celebrating a birthday, an anniversary, Valentine’s Day, or simply gathering with friends and family, this pink velvet raspberry cheesecake fits every event perfectly. Its elegant presentation and rich flavor profile make it suitable for formal dinners, yet its comforting taste ensures it’s equally at home at casual get-togethers. Imagine the delight on your guests’ faces as you present this stunning, homemade dessert. It’s more than just a treat; it’s an experience, a conversation starter, and a sweet gesture all rolled into one. This versatile dessert is also perfect for sharing on social media platforms like Pinterest, inspiring others with your beautiful creation.
What makes it special?
What sets this raspberry cheesecake apart is its unique combination of aesthetic appeal and incredible flavor. The “pink velvet” aspect comes from a hint of food coloring blended with the natural redness of raspberries, creating a beautiful, consistent hue throughout the creamy filling. The tartness of fresh or frozen raspberries cuts through the sweetness of the cream cheese, offering a balanced and complex taste that keeps you coming back for more. Furthermore, the smooth, velvety texture is achieved through precise mixing and baking techniques, ensuring a melt-in-your-mouth experience with every single slice. It’s a truly special occasion dessert that will be remembered long after the last bite.
Why Make This Sweet Cheesecake?
Baking a homemade pink velvet raspberry cheesecake offers numerous rewards beyond just a delicious treat. It allows for complete control over ingredients, ensuring freshness and quality that store-bought options simply cannot match. Crafting this dessert from scratch provides a satisfying sense of accomplishment, transforming simple ingredients into a beautiful and delectable creation. The aroma filling your kitchen as it bakes is an added bonus, creating a cozy and inviting atmosphere. Moreover, presenting a homemade cheesecake demonstrates a thoughtful effort that enhances any celebration or meal. It’s an opportunity to create something truly personal and memorable for your loved ones.
Easy and impressive dessert
Despite its luxurious appearance, this raspberry cheesecake is surprisingly straightforward to make, even for novice bakers. The steps are clearly defined, breaking down the process into manageable parts, from preparing the crust to chilling the final product. While it requires some patience for cooling and chilling, the active preparation time is relatively minimal. The “impressive” factor comes from its vibrant color and rich, creamy texture, making it look much more complex than it actually is. You don’t need advanced pastry skills to achieve a professional-looking result; just careful attention to the instructions will yield a stunning dessert that will surely elicit compliments. For another easy and impressive dessert, consider trying these Vanilla Bean Creme Brulee Cheesecake Cupcakes.
Gather Pink Velvet Cheesecake Ingredients
The success of your pink velvet raspberry cheesecake begins with assembling the right ingredients. Quality components are paramount for achieving that perfect balance of flavor and texture. Ensure all dairy products are fresh, and choose good quality graham crackers for a robust crust. Pay close attention to the specific measurements; baking is a science, and precision helps guarantee optimal results. Having everything measured and ready before you start mixing will streamline the entire process and prevent any last-minute scrambling. This organized approach is a sweet secret to successful baking every time.
Crust ingredients list
The foundation of any great cheesecake is a flavorful and sturdy crust. For our pink velvet raspberry cheesecake, you will need:
- Graham cracker crumbs: About 1 ½ cups, made from finely crushed graham crackers. You can crush them in a food processor or by placing them in a Ziploc bag and using a rolling pin.
- Granulated sugar: 1/4 cup, to add a touch of sweetness to the crust.
- Melted unsalted butter: 1/2 cup (one stick), which binds the crumbs together and gives the crust its rich flavor.
This simple combination creates a perfect base that will hold up beautifully against the creamy filling.
Filling ingredients list
The heart of your cheesecake is its luscious, vibrant filling. Gather these items for the creamy, raspberry-infused delight:
- Cream cheese: Three (8-ounce) blocks, full-fat, softened. This is crucial for a smooth, lump-free filling.
- Granulated sugar: 1 1/2 cups, to sweeten the cheesecake.
- Large eggs: 3, at room temperature, which act as a binder and contribute to the creamy texture.
- Sour cream: 1/2 cup, full-fat, at room temperature. Adds a subtle tang and richness, preventing the cheesecake from being overly sweet.
- Vanilla extract: 1 teaspoon, pure extract for depth of flavor.
- Fresh or frozen raspberries: 1 cup, pureed and strained to remove seeds. If using frozen, thaw them first.
- Red or pink food coloring: A few drops, optional, to enhance the pink velvet hue.
These ingredients, when combined correctly, will yield a truly magnificent filling. For other desserts, you might find similar ingredients used for delightful results.
Room temperature matters
One of the most critical factors for a smooth, lump-free cheesecake filling is ensuring that your cream cheese, eggs, and sour cream are all at room temperature. Cold ingredients do not mix well together; cold cream cheese will resist blending smoothly, leading to lumps in your batter. Cold eggs can also cause the mixture to curdle or separate. Allow these ingredients to sit on your counter for at least 1-2 hours before you begin mixing. This simple step makes a tremendous difference in achieving that signature creamy, velvety texture that defines a perfect homemade cheesecake. Skipping this step can lead to a less desirable consistency, making your efforts less rewarding.
Making Your Perfect Cheesecake Crust
A well-made crust is the unsung hero of any cheesecake, providing structural integrity and a complementary flavor that enhances the rich filling. Taking the time to prepare it correctly ensures your pink velvet raspberry cheesecake stands firm and presents beautifully. The key lies in achieving the right consistency for the crumbs and ensuring they are uniformly pressed into the pan. This process is straightforward but requires a bit of attention to detail to prevent a crumbly or too-thick base. A good crust not only tastes delicious but also helps in clean slicing later on.
Crumb and butter mix
Begin by combining your finely crushed graham cracker crumbs with the granulated sugar in a medium bowl. Mix these dry ingredients thoroughly to ensure the sugar is evenly distributed. Next, pour in the melted unsalted butter. Using a fork or your hands, mix until all the crumbs are moistened and resemble wet sand. It’s important that every crumb is coated with butter; this is what allows the crust to hold its shape once pressed and baked. If your crumbs aren’t fully saturated, the crust might be too fragile. This mixture should be cohesive enough to clump together when squeezed lightly in your hand.
Pressing into the pan
Transfer the buttered crumb mixture into a 9-inch springform pan. Springform pans are ideal for cheesecakes as their removable sides allow for easy extraction without damaging the delicate dessert. Using the bottom of a flat glass or a measuring cup, firmly and evenly press the crumbs onto the bottom of the pan. You can also extend a small lip of crumbs up the sides of the pan, about an inch high, if desired. Ensure the crust is compact and uniform in thickness across the entire base. Bake the crust in a preheated oven at 350°F (175°C) for 8-10 minutes. This pre-baking step helps to set the crust, preventing it from becoming soggy once the filling is added. Allow it to cool slightly before adding the filling.
Crafting the Vibrant Cheesecake Filling
The filling is where the magic truly happens for your pink velvet raspberry cheesecake, transforming simple ingredients into a creamy, flavorful, and visually stunning dessert. Achieving a silky-smooth texture and that signature vibrant pink hue requires careful mixing and attention to the order of ingredients. Avoid overmixing, as this can incorporate too much air, leading to cracks during baking. The goal is a homogenous, airy-but-dense mixture that will bake into a wonderfully rich consistency. This step is the most rewarding part of the preparation, as you watch the colors and textures come alive.
Smooth cream cheese base
In a large mixing bowl, beat the softened cream cheese on medium speed until it is completely smooth and creamy, with no lumps remaining. This initial step is vital; any lumps here will remain in your final cheesecake. Gradually add the granulated sugar, beating until just combined and smooth. Be careful not to overmix at this stage. Once smooth, beat in the sour cream and vanilla extract until fully incorporated. The sour cream adds a beautiful richness and a slight tang that perfectly complements the sweetness, enhancing the overall flavor profile of your creamy dessert. Ensure the mixture is well scraped from the sides of the bowl to maintain consistency.
Adding raspberry and color
Now, it’s time to infuse your cheesecake with the delightful raspberry flavor and its characteristic pink velvet color. Take your pureed and strained raspberries and gently fold them into the cream cheese mixture. The straining step is important to remove any seeds, ensuring a smooth texture. Add a few drops of red or pink food coloring at this point, mixing until you achieve your desired shade of pink. Start with a small amount and add more gradually until you are happy with the color saturation. Finally, one at a time, gently beat in the room temperature eggs on low speed, just until they are incorporated. Do not overmix the eggs; over-beating can introduce too much air, which can cause the cheesecake to puff up too much during baking and crack upon cooling. This careful approach ensures a dense, creamy, and visually appealing filling for your homemade dessert.
Baking Your Pink Velvet Masterpiece
Baking a cheesecake is often seen as a daunting task, but with the right approach, you can achieve a perfectly cooked, crack-free masterpiece. The key to success lies in understanding oven temperature settings and knowing how to properly gauge when your cheesecake is done. Cheesecake prefers a gentle, consistent heat, which helps it cook evenly without drying out or cracking. We’ll also discuss the benefits of a water bath, a technique that provides a moist baking environment, further preventing cracks and ensuring a silky texture. Patience is a virtue when baking cheesecake, so resist the urge to peek frequently.
Oven temperature setting
Preheat your oven to 325°F (160°C). A slightly lower temperature for a longer period is generally preferred for cheesecakes, as it promotes even cooking and reduces the risk of cracking. If using a water bath (highly recommended for a crack-free finish and creamy texture), wrap the outside of your springform pan tightly with heavy-duty aluminum foil to prevent water from seeping in. Place the foil-wrapped pan in a larger roasting pan. Pour the cheesecake filling into the cooled, pre-baked crust. Carefully place the roasting pan into the oven and then pour hot water into the roasting pan, ensuring it comes about halfway up the sides of the springform pan. This water bath creates a humid environment, which is crucial for a smooth, tender cheesecake. Baking typically takes 60-75 minutes.
How to check for done
Determining when your pink velvet raspberry cheesecake is perfectly baked is crucial. After the initial baking time, gently jiggle the springform pan. The edges of the cheesecake should appear set and slightly puffed, while the very center (about a 2-inch diameter) should still have a slight wobble, similar to gelatin. It shouldn’t be liquidy, but not completely firm either. This slight jiggle indicates that the cheesecake is cooked through but will continue to set as it cools. Over-baking will result in a dry, crumbly texture and is the primary cause of cracks. Once it reaches this stage, turn off the oven but leave the cheesecake inside with the oven door propped open for another hour. This gradual cooling process is another secret to preventing cracks and ensuring a perfectly smooth top. For a different dinner idea, you might enjoy learning how to make Easy Butter Chicken.
Secrets to Cooling Your Cheesecake
Cooling is perhaps the most overlooked yet critical stage in cheesecake preparation. It’s during this phase that the cheesecake truly sets, firming up to its iconic creamy texture. Rushing the cooling process can lead to structural issues like cracks and a less-than-ideal consistency. The goal is to allow the cheesecake to transition from a hot, delicate state to a firm, stable one very gradually. This gentle approach helps maintain the integrity of the cake, preserving its smooth top and dense interior. Think of it as the final, patient step to perfection for your homemade dessert.
Gradual cooling process
Once you’ve turned off the oven and propped the door open as described above, allow the cheesecake to remain in the cooling oven for at least one hour. This gradual decrease in temperature prevents a sudden thermal shock that can cause the cheesecake to shrink too quickly and crack. After an hour, carefully remove the cheesecake from the oven and lift it out of the water bath (if used). Place it on a wire rack to cool completely at room temperature. This step typically takes another 1-2 hours. Do not attempt to refrigerate the cheesecake until it has reached room temperature, as this can also contribute to cracking and condensation issues. Be patient; this slow transition ensures a beautiful, crack-free surface and a wonderfully smooth texture throughout your pink velvet raspberry cheesecake.
Refrigerate for Best Cheesecake Results
After the meticulous baking and gradual cooling, the final, crucial step to perfection for your pink velvet raspberry cheesecake is proper refrigeration. This chilling period is not just for making the cheesecake cold; it’s essential for allowing the filling to fully set, firm up, and for the flavors to meld and deepen. A properly chilled cheesecake will have a much more superior texture, making it easier to slice cleanly and enjoy. Attempting to slice or serve a cheesecake before it is thoroughly chilled will result in a messy presentation and a less satisfying mouthfeel, undermining all your hard work.
Chilling time is key
Once your cheesecake has completely cooled to room temperature on a wire rack, cover it loosely with plastic wrap and transfer it to the refrigerator. The ideal chilling time for a cheesecake is at least 6-8 hours, but for the absolute best results, chilling it overnight (12-24 hours) is highly recommended. During this extended chilling period, the cream cheese mixture solidifies further, creating that dense, rich, and firm consistency characteristic of a perfect cheesecake. The flavors also have time to fully develop, resulting in a more complex and harmonious taste. Patience during this chilling phase will be greatly rewarded with a truly spectacular and easy-to-slice pink velvet raspberry cheesecake that everyone will rave about. It’s a simple yet powerful step in ensuring your homemade dessert reaches its full potential.
7 Sweet Secrets Revealed: Cheesecake Tips
Achieving cheesecake perfection often comes down to a few clever tricks and careful considerations. These sweet secrets are designed to help you overcome common baking challenges, enhance the aesthetic appeal of your pink velvet raspberry cheesecake, and ensure every slice is a delight. From presentation tips to preventing common issues like cracks, incorporating these insights will elevate your baking skills and guarantee a consistently impressive result. Embrace these simple yet effective strategies to make your cheesecake-making experience even more rewarding and foolproof. You can find more helpful baking tips on our Instagram page.
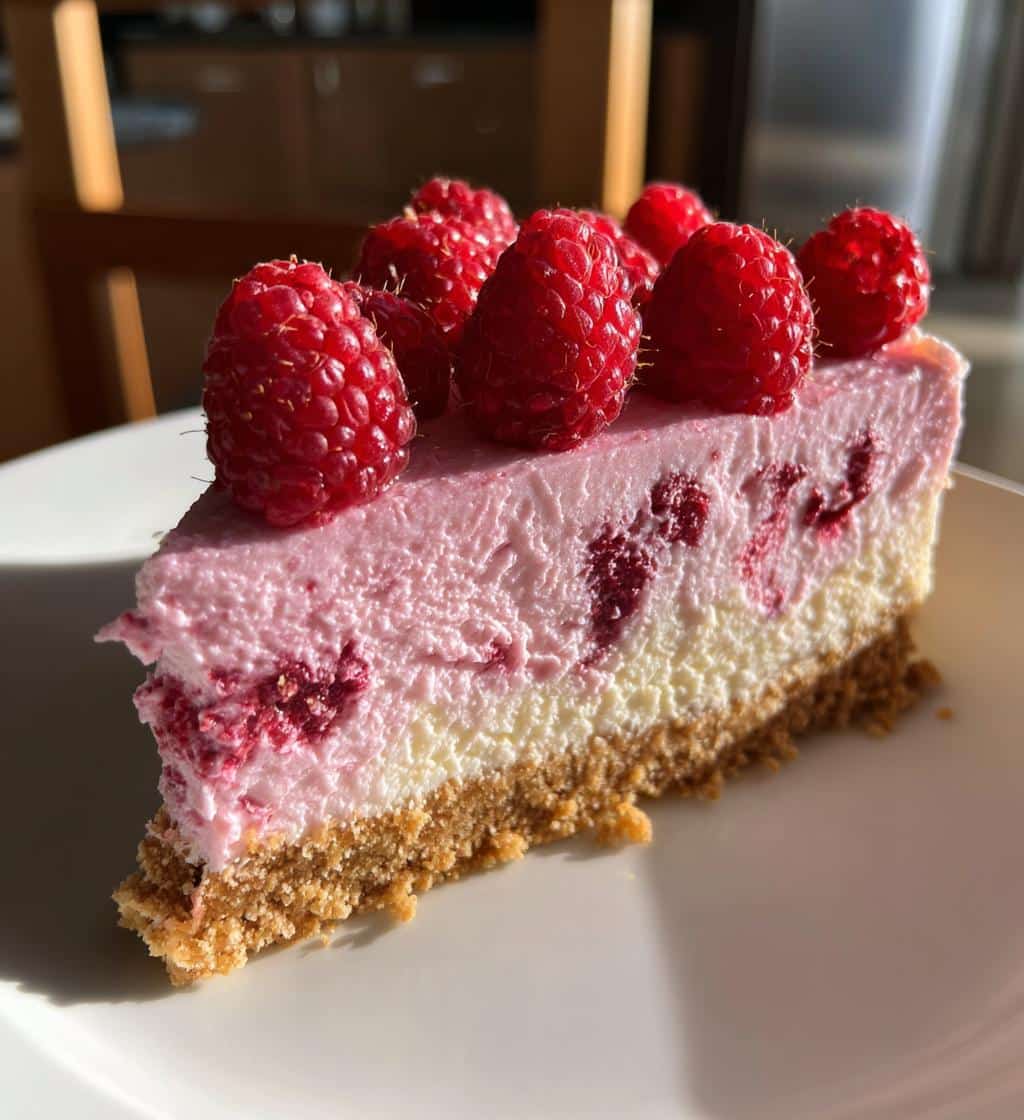
Garnish with fresh fruit
While your pink velvet raspberry cheesecake is stunning on its own, a thoughtful garnish can elevate its visual appeal and add an extra layer of freshness. Arrange fresh raspberries, perhaps a few blueberries, and a sprig of fresh mint or basil leaves on top just before serving. The vibrant colors of fresh fruit contrast beautifully with the pink cheesecake, making it even more inviting. You could also dust it lightly with powdered sugar or drizzle with a raspberry sauce for an extra touch of elegance. This simple step adds a gourmet flourish to your homemade dessert, signaling a truly special occasion treat.
Adjust food coloring
The “pink velvet” aspect of this raspberry cheesecake is all about achieving that perfect, appealing hue. Food coloring is optional, but it helps ensure a consistently vibrant pink, especially if your raspberries are lighter in color. Start with just a few drops of red or pink gel food coloring and mix well. Observe the color and add more, one drop at a time, until you reach your desired intensity. Remember, the color will deepen slightly as it bakes and cools. It’s always better to start with less and add more, as you cannot remove coloring once it’s added. This control allows you to customize your cheesecake’s appearance to match any theme or personal preference.
Prevent cracks easily
Cheesecake cracks are a common frustration for bakers, but they are largely preventable. The main culprits are sudden temperature changes and over-baking. Here are key preventative measures:
- Room Temperature Ingredients: Ensure all dairy and eggs are at room temperature for smooth mixing.
- Don’t Overmix: Over-beating the batter, especially after adding eggs, incorporates too much air, causing the cheesecake to rise too quickly and then fall, leading to cracks.
- Water Bath: As mentioned, a water bath provides a moist, even baking environment.
- Gradual Cooling: Leaving the cheesecake in the turned-off oven with the door ajar prevents thermal shock.
- Avoid Opening Oven: Resist the temptation to open the oven door frequently during baking.
- Don’t Over-Bake: Remove the cheesecake when the center still has a slight jiggle.
By following these baking tips diligently, you significantly increase your chances of achieving a beautiful, crack-free pink velvet raspberry cheesecake. For another delicious dish, check out this Chicken Bacon Ranch Tater Tot Casserole.
Serving Your Delicious Raspberry Cheesecake
The moment of truth has arrived! After all your careful preparation, baking, cooling, and chilling, it’s time to serve your magnificent pink velvet raspberry cheesecake. Proper serving techniques ensure that each slice is as beautiful as it is delicious. A perfectly sliced piece allows your guests to appreciate the smooth texture, the vibrant color, and the meticulous effort you put into this homemade dessert. The presentation is just as important as the taste, especially for a visually striking dish like this.
Slice and enjoy
To achieve clean, professional-looking slices, use a long, thin, sharp knife. For best results, dip the knife in hot water and wipe it clean with a towel before each cut. This prevents the cheesecake from sticking to the blade and dragging, ensuring a smooth, crisp edge for every slice. Run the knife through the hot water again after each cut. Carefully lift each slice onto a serving plate. You can serve the cheesecake chilled directly from the refrigerator, or let it sit at room temperature for about 15-20 minutes to slightly soften the filling, enhancing its creamy texture. Pair with fresh berries, a dollop of whipped cream, or a drizzle of raspberry coulis for an extra touch. Then, sit back and enjoy the accolades for your stunning pink velvet raspberry cheesecake. If you’re looking for other impressive meals, consider exploring our main course recipes.
Pink Velvet Raspberry Cheesecake Nutrition
Understanding the nutritional aspects of your pink velvet raspberry cheesecake can be helpful, especially if you’re mindful of dietary intake or planning meals for a special occasion. While this cheesecake is a rich and decadent treat, it’s also a homemade dessert, which means you have control over the quality of ingredients. Keep in mind that nutritional values can vary based on specific brands of ingredients used and any modifications made to the recipe. This section provides a general overview, encouraging thoughtful enjoyment of this sweet creation.
Per serving details
A typical slice of pink velvet raspberry cheesecake, when cut into 12 servings, can range approximately:
- Calories: 350-450 kcal (depending on ingredient choices and sugar content)
- Total Fat: 25-35g
- Saturated Fat: 15-20g
- Cholesterol: 90-120mg
- Sodium: 200-300mg
- Total Carbohydrates: 30-40g
- Dietary Fiber: 1-2g (from graham crackers and raspberries)
- Total Sugars: 25-35g
- Protein: 5-7g
These figures are estimates and should be used as a general guide. Enjoying this creamy dessert in moderation is key to balancing indulgence with a healthy lifestyle. For a lighter but equally delicious dessert, check out the Peanut Butter Brownie Swirl Cookies.
Common Cheesecake Questions Answered
Baking a pink velvet raspberry cheesecake can bring up a few common questions, especially for those new to cheesecake making or looking for ways to adapt the recipe. Addressing these frequently asked questions helps clarify potential uncertainties and provides practical solutions, ensuring a smoother baking experience. Understanding these aspects allows for greater flexibility and confidence in your dessert preparation, helping you tackle this special occasion treat with ease. We aim to provide all the baking tips you need for success.
Can I use frozen raspberries?
Yes, you absolutely can use frozen raspberries for this pink velvet raspberry cheesecake! In fact, they are often more readily available and can be just as flavorful as fresh ones, especially when pureed. When using frozen raspberries, simply thaw them completely before pureeing and straining them to remove any seeds. The process remains the same. The key is to ensure they are thawed to prevent excess water from being introduced into your cheesecake filling, which could alter the texture. Frozen raspberries are a convenient and equally delicious alternative, making this homemade dessert accessible year-round.
How long does it keep?
A properly stored pink velvet raspberry cheesecake will last quite well in the refrigerator. Once completely chilled, cover the cheesecake tightly with plastic wrap or store it in an airtight container to prevent it from absorbing refrigerator odors and drying out. When stored correctly, your cheesecake will remain fresh and delicious for 3 to 5 days in the refrigerator. If you wish to keep it longer, you can freeze slices of cheesecake wrapped individually in plastic wrap and then in foil. Frozen cheesecake can last for up to 1-2 months. Thaw frozen slices in the refrigerator overnight before serving. This ensures you can enjoy your creamy dessert for an extended period.