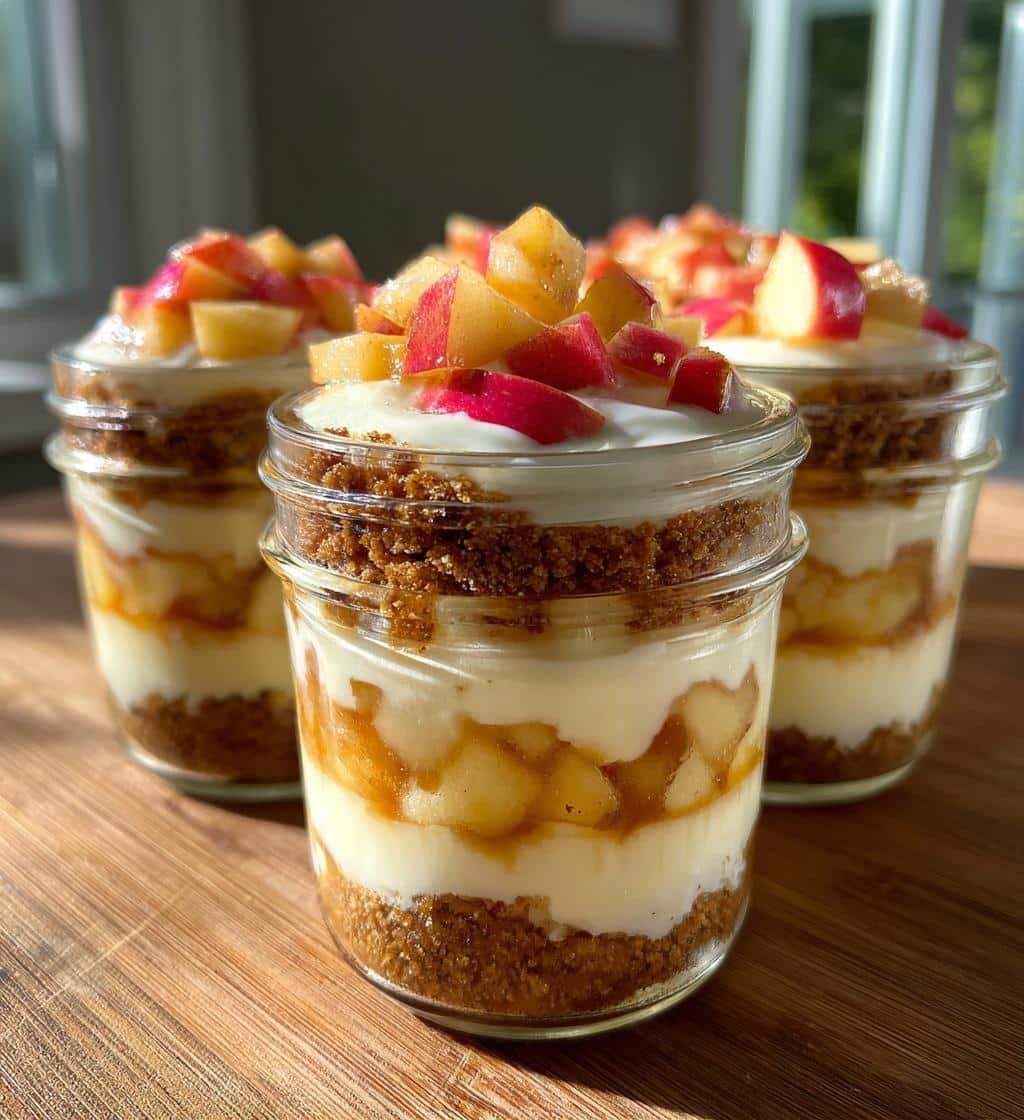
No Bake Apple Cheesecake Jars are a delightful and effortless dessert, perfect for any occasion. These individual treats combine a sweet graham cracker crust, a luscious creamy cheesecake layer, and spiced apple topping. They are simple to prepare, require no baking, and make an excellent make-ahead option for gatherings or a sweet everyday indulgence.
Key Takeaways
- Enjoy a delicious, easy-to-make no-bake apple cheesecake dessert.
- These individual jars are perfect for stress-free entertaining and simple preparation.
- Layered with graham cracker crust, creamy cheesecake, and apple filling for delightful flavor.
- Ideal as a make-ahead treat, saving time and effort for any event.
- Customize crusts and fillings for fun variations.
Craving a sweet, simple treat? These jars are your answer. They offer delightful flavors. No oven heat is needed. Just pure, creamy apple joy. Perfect for a quick fix.
No Bake Apple Cheesecake Jars: Easy Dessert
Dive into the world of effortless desserts with our No Bake Apple Cheesecake Jars, an easy dessert solution that promises maximum flavor with minimal fuss. These individual cheesecake jars are a dream come true for anyone who loves the rich taste of cheesecake paired with the warm, comforting spice of apples, all without ever turning on the oven. They are not just delicious; they are incredibly convenient, making them a fantastic choice for a casual treat or a more formal gathering. If you appreciate the simplicity of well-crafted desserts, you might also enjoy the elegance of Vanilla Bean Creme Brulee Cheesecake Cupcakes, showcasing another delicious cheesecake variation.
What makes them special?
What sets these no-bake apple cheesecake jars apart is their incredible simplicity coupled with their sophisticated flavor profile. Each jar layers a buttery graham cracker crust, a rich and creamy cheesecake filling, and a tender, spiced apple topping. The “no-bake” aspect means less time in the kitchen and more time enjoying. They are also portion-controlled, making them ideal for serving guests or enjoying as a personal treat without overindulging. The combination of textures—crunchy crust, smooth cream, and soft fruit—creates a harmonious bite every time, proving that an easy dessert can still be wonderfully complex in taste.
Perfect for any occasion.
Whether you’re hosting a backyard barbecue, a holiday dinner, or simply looking for a sweet ending to a weeknight meal, these cheesecake jars fit seamlessly into any event. Their individual presentation makes them hygienic and appealing for potlucks or parties, eliminating the need for slicing and serving a whole cheesecake. They are robust enough to travel well and elegant enough to impress. From cozy family evenings to celebratory gatherings, these no-bake apple cheesecake jars are a versatile and consistently crowd-pleasing option.
Why Make These Delightful Jars?
Choosing to make No Bake Apple Cheesecake Jars goes beyond just creating a delicious dessert; it’s about embracing convenience, versatility, and pure culinary enjoyment. These delightful jars offer a stress-free approach to baking, perfect for busy schedules or those who prefer to keep their ovens off, especially during warmer months. The joy of a homemade treat, without the extensive prep or cleanup, makes these jars a go-to recipe for many. It’s similar to how simple, flavorful dishes like Easy Honey Garlic Chicken can make weeknight meals a breeze.
Simple, quick preparation time.
One of the most compelling reasons to prepare these jars is the remarkably simple, quick preparation time. You won’t spend hours mixing, baking, and cooling. Most of the work involves assembling layers, which can be done in under 30 minutes, sometimes even faster depending on your speed. This makes them an ideal choice for last-minute dessert needs or when you want something homemade but lack the luxury of time. The focus is on combining quality ingredients efficiently to achieve a fantastic result, proving that a delightful dessert doesn’t always require an elaborate cooking process.
No oven needed for bliss.
The “no oven needed” aspect is a significant advantage, particularly in the summer heat or when your oven is occupied with other dishes. This feature simplifies the process dramatically, eliminating concerns about oven preheating, baking times, and potential burning. It’s pure bliss knowing you can create a luscious, creamy cheesecake without any baking. This method also makes it a great recipe for beginner cooks or those with limited kitchen appliances, ensuring everyone can enjoy a fantastic dessert with ease.
Great make-ahead treat.
These no-bake apple cheesecake jars excel as a make-ahead treat. Preparing them a day in advance allows the flavors to meld beautifully and the cheesecake layer to set perfectly, resulting in an even more delicious and stable dessert. This characteristic is invaluable for entertaining, as it frees up your time on the day of your event, allowing you to focus on other preparations or simply relax. Just pull them from the fridge when ready to serve! For another fantastic dessert that can be prepared in advance, consider making Snickerdoodle Cobbler.
Ingredients for Your Apple Jars
Creating delicious No Bake Apple Cheesecake Jars begins with selecting the right ingredients. Each component plays a crucial role in building the delightful flavors and textures of this easy dessert. From the sweet and crumbly graham cracker crust to the rich and creamy cheesecake layer, and finally, the tender, spiced apple topping, quality ingredients ensure the best possible outcome. Understanding the purpose of each item on your list will help you achieve perfection in every jar.
All you need list.
To embark on this delightful culinary journey, gather your essentials. For the graham cracker crust, you’ll need graham crackers and melted butter. The creamy cheesecake layer requires cream cheese, heavy cream, powdered sugar, and vanilla extract. For the star of the show, the apple topping, you’ll need fresh apples (such as Honeycrisp or Granny Smith), brown sugar, cinnamon, nutmeg, a pinch of salt, and a splash of lemon juice to prevent browning and brighten the flavors. Having all your ingredients prepped and measured beforehand will make the assembly process incredibly smooth and enjoyable.
Key components for layers.
Let’s break down the key components that form the five delicious layers in your jars. The base is the graham cracker crust, offering a delightful crunch and a buttery, sweet foundation. Graham crackers, historically a healthy snack, provide a unique texture when crushed and mixed with butter. You can learn more about their origin on Wikipedia’s Graham Cracker page. Next is the luscious creamy cheesecake layer, made with softened cream cheese and whipped heavy cream for an airy, yet rich consistency. This layer provides the signature tang and velvety texture. Finally, the spiced apple filling brings warmth and a fruity sweetness, perfectly complementing the rich cheesecake. These three core components, when thoughtfully layered, create a symphony of taste and texture that makes each bite truly special.
Making the Creamy Cheesecake Layer
The creamy cheesecake layer is the heart of your No Bake Apple Cheesecake Jars, providing that signature rich and tangy flavor that cheesecake lovers adore. Achieving the perfect texture for this layer is crucial for the overall success of the dessert. It needs to be smooth, airy, and firm enough to hold its shape once chilled. Following these steps carefully will ensure your cheesecake layer is wonderfully luscious and contributes significantly to the irresistible charm of these easy dessert jars.
Soften cream cheese first.
Before you begin, it is absolutely paramount to soften your cream cheese. Cold cream cheese will result in a lumpy mixture, no matter how long you beat it. Take your cream cheese out of the refrigerator at least 30-60 minutes before you plan to use it, allowing it to come to room temperature. This simple step ensures that the cream cheese will blend smoothly with the other ingredients, creating a homogeneous and silky texture. Room temperature cream cheese is the secret to a perfectly smooth and creamy cheesecake layer, preventing any undesirable curdling or textural inconsistencies.
Beat until light, fluffy.
Once your cream cheese is perfectly softened, place it in a large mixing bowl. Using an electric mixer (handheld or stand mixer), beat the cream cheese on medium speed until it becomes light and fluffy, usually about 2-3 minutes. Scrape down the sides of the bowl frequently to ensure everything is evenly incorporated. After achieving this initial fluffiness, you’ll gradually add powdered sugar and vanilla extract, continuing to beat until the mixture is smooth and well combined. In a separate bowl, whip your cold heavy cream until stiff peaks form, then gently fold it into the cream cheese mixture. This folding technique is essential for maintaining the airy texture, resulting in a delightfully creamy and cloud-like cheesecake filling that sets beautifully.
Crafting the Graham Cracker Crust
The graham cracker crust forms the foundational layer of your No Bake Apple Cheesecake Jars, offering a delightful crunch and a buttery sweetness that perfectly balances the creamy cheesecake and spiced apple filling. A well-made crust provides textural contrast and flavor depth, elevating the entire dessert. It’s a simple component to prepare, but paying attention to the details will ensure a firm, flavorful base for your delicious apple dessert.
Crush graham crackers fine.
The key to a cohesive and pleasant graham cracker crust is to crush your graham crackers finely. There are several effective methods for achieving this. You can place the crackers in a large Ziploc bag and crush them using a rolling pin, ensuring no large chunks remain. Alternatively, a food processor makes quick work of this task, yielding consistently fine crumbs. Aim for a sand-like consistency. This fine texture allows the crumbs to bind together properly when mixed with butter, preventing a crumbly mess and ensuring each spoonful of your cheesecake jar includes a satisfying, even crust.
Mix with melted butter.
Once your graham crackers are finely crushed, transfer them to a bowl. Melt your butter (unsalted is generally preferred for desserts) and pour it over the graham cracker crumbs. Use a fork or your hands to thoroughly mix the butter into the crumbs until every crumb is moistened. The mixture should resemble wet sand and, when pressed between your fingers, should hold together. This is the perfect consistency for creating a firm and flavorful graham cracker crust that will set beautifully at the bottom of your jars, providing that wonderful textural counterpoint to the soft layers above.
Assembling Your 5 Layers of Bliss
Assembling these No Bake Apple Cheesecake Jars is where the magic truly comes alive, as you visually build the deliciousness that each guest will enjoy. The art of layering not only creates an appealing presentation but also ensures that every spoonful delivers a harmonious blend of flavors and textures. This process is straightforward and enjoyable, making it a perfect activity to do with family or friends. These jars are a testament to the fact that great desserts can be both beautiful and easy to create.
Follow simple layering steps.
The beauty of these cheesecake jars lies in their simple, intuitive layering. Start with your graham cracker crust at the very bottom of each jar. Use about 1-2 tablespoons per jar, pressing it down gently but firmly to create an even base. Next, pipe or spoon a generous layer of the creamy cheesecake mixture over the crust. A piping bag with a round tip works wonders for a neat presentation, but a spoon will do just fine. Then, add a layer of the spiced apple filling, spreading it carefully to cover the cheesecake. Repeat these layers—crust, cheesecake, apple—until you reach the top of the jar, typically creating five distinct layers in total. Ensure each layer is relatively even for a balanced flavor profile in every bite.
Build your delicious jars.
When building your delicious jars, focus on neatness for an appealing final product. For the best results, use clear jars (8-ounce mason jars are ideal) so the beautiful layers are visible. Don’t overfill the jars; leave a little space at the top for an optional garnish later. After completing the layering, gently tap each jar on the counter a few times to settle the contents and eliminate any air pockets. This also helps to ensure the layers are compact. You can even use the back of a spoon to lightly press down each layer as you go, especially the cheesecake, to create a smooth, even surface. Once assembled, these five layers of bliss are ready for chilling, transforming into a firm, flavorful, and incredibly inviting dessert.
Chilling and Serving Your Jars
The final, crucial steps in perfecting your No Bake Apple Cheesecake Jars are chilling and serving. While the preparation is simple, allowing adequate chilling time is non-negotiable for achieving the desired texture and allowing the flavors to fully develop. Proper serving techniques can also enhance the enjoyment of this delightful apple dessert, making it an even more memorable experience for those who indulge.
Importance of chilling time.
Chilling time is absolutely vital for no-bake cheesecakes. This period allows the creamy cheesecake layer to firm up and set properly, transforming it from a soft mixture into a stable, sliceable (or scoopable, in this case) consistency. Without sufficient chilling, your layers might be too soft and messy. We recommend chilling the jars for at least 4-6 hours, but ideally overnight, in the refrigerator. This extended chill also gives all the flavors—the buttery crust, the tangy cream cheese, and the spiced apples—time to meld together, deepening the overall taste profile and ensuring a truly satisfying dessert experience. Don’t rush this step; patience is key to perfection!
How to best serve.
Once your no-bake apple cheesecake jars are perfectly chilled and set, they are ready to be served. Take them out of the refrigerator about 15-20 minutes before serving to allow them to warm up slightly, which can enhance the flavors and soften the texture just a touch. For an extra touch of elegance and flavor, consider garnishing each jar. A dollop of whipped cream, a sprinkle of cinnamon, a tiny slice of fresh apple, or a mint sprig can elevate the presentation. Serve them with small spoons, allowing guests to enjoy each delicious layer. These individual portions are convenient and visually appealing, making them a fantastic addition to any dessert spread.
Tips for Perfect No Bake Jars
Achieving truly perfect No Bake Apple Cheesecake Jars is easily within reach with a few expert tips. While the recipe is designed to be straightforward, incorporating these insights will elevate your dessert from good to absolutely incredible. These pointers focus on ensuring smooth textures, stable layers, and customizable sweetness, guaranteeing a consistently delicious and impressive outcome for your apple dessert.
Use softened cream cheese.
As mentioned earlier, using softened cream cheese is a non-negotiable step for a perfectly smooth cheesecake layer. If your cream cheese is cold, it will remain lumpy, regardless of how long you beat it. Room temperature cream cheese (left out for 30-60 minutes) whips up beautifully, creating a silky, lump-free base that blends seamlessly with other ingredients. This simple preparation tip prevents textural inconsistencies and ensures your creamy cheesecake layer is as luscious as it should be.
Cold heavy cream helps.
For the best results when whipping heavy cream, ensure it is very cold. Cold heavy cream, ideally chilled in the refrigerator until just before use, whips up faster and achieves stiffer peaks more easily. Some professional bakers even chill their mixing bowl and whisk attachment for 10-15 minutes before whipping. Stiffly whipped heavy cream provides the essential lightness and stability to your no-bake cheesecake filling, preventing it from becoming too dense or runny, and helps it set beautifully once chilled.
Adjust sweetness easily.
One of the fantastic aspects of these no-bake jars is how easily you can adjust the sweetness to your personal preference. When preparing both the cheesecake filling and the apple topping, taste as you go. If you prefer a less sweet dessert, reduce the amount of powdered sugar in the cheesecake layer and brown sugar in the apple filling. For those with a sweeter tooth, you can add a touch more. Remember that the sweetness will be balanced by the tang of the cream cheese and the natural tartness of the apples, so adjust incrementally until you achieve your ideal flavor profile. This flexibility ensures your apple dessert is perfectly tailored to your taste buds.
Fun Variations for Cheesecake Jars
The beauty of No Bake Apple Cheesecake Jars extends beyond their simplicity; they are also incredibly adaptable. Once you’ve mastered the basic recipe, you can unleash your creativity and experiment with various fun variations to suit different tastes and seasons. This versatility makes them a dessert that can be enjoyed year-round, always offering a fresh twist on a beloved classic. After all, the concept of cheesecake itself, with its endless possibilities, is truly fascinating. You can explore the rich history and global adaptations of cheesecake on Wikipedia’s Cheesecake page.
Cookie crust alternatives.
While the classic graham cracker crust is always a winner, exploring cookie crust alternatives can add an exciting new dimension to your cheesecake jars. Consider using crushed shortbread cookies for a buttery, delicate base, or crushed Oreos (chocolate or golden) for a richer, more decadent flavor profile. Digestive biscuits are another popular choice, offering a slightly less sweet and more traditional crust. You could even try ginger snaps for a spicy kick that pairs wonderfully with apple or pumpkin fillings. Experiment with different types of crushed cookies mixed with melted butter to find your favorite new base. This simple swap can completely transform the character of your easy dessert.
Different fruit fillings.
Beyond apples, the possibilities for different fruit fillings are virtually endless. Embrace seasonal produce to keep your no-bake jars fresh and exciting. In summer, think of vibrant berries like strawberries, blueberries, raspberries, or a mixed berry compote. Peaches or cherries also make fantastic choices when in season. For a tropical twist, mango or pineapple fillings can be delightful. In the fall, beyond apples, consider a spiced pear or pumpkin filling. You can either use store-bought fruit pie fillings for ultimate convenience or prepare a simple homemade compote by simmering fresh fruit with a little sugar and spices. This allows you to customize the flavor profile to perfectly match your mood or the occasion, ensuring these cheesecake jars are always a hit.
Storing Your Apple Cheesecake Jars
Proper storage is essential to maintain the freshness, flavor, and texture of your No Bake Apple Cheesecake Jars. Because they contain dairy and fresh fruit, understanding how to keep them properly refrigerated is key to enjoying them at their best for an extended period. These guidelines ensure that your delicious apple dessert remains safe and delightful for whenever you crave a sweet treat or need to serve them to guests.
Keep them refrigerated.
Due to the presence of cream cheese and heavy cream in the cheesecake layer, it is imperative to keep your No Bake Apple Cheesecake Jars refrigerated at all times when not serving. Immediately after assembly, cover each jar tightly with its lid or plastic wrap to prevent them from absorbing odors from other foods in the fridge and to keep them fresh. Place them on a stable shelf in your refrigerator. This consistent cold temperature is crucial for setting the cheesecake and preventing bacterial growth, ensuring both the safety and quality of your make-ahead treat.
How long do they last?
When properly stored in the refrigerator, these apple cheesecake jars typically last for up to 3-4 days. While they might still be safe to eat beyond this period, the quality of the fresh fruit topping might begin to diminish, and the graham cracker crust could start to soften. For optimal taste and texture, it’s best to enjoy them within the first 2-3 days. If you’ve prepared a larger batch, consider making the apple topping fresh on the day you plan to serve a portion of the jars, or store the topping separately until needed to maximize freshness. This ensures that every bite remains as delicious as the first, making them a reliable make-ahead treat.
Nutrition Facts: Apple Cheesecake Jars
Understanding the nutrition facts for your No Bake Apple Cheesecake Jars can be helpful, especially if you’re mindful of your dietary intake. While these jars are undeniably a delicious easy dessert, they are also an indulgent treat. The breakdown typically considers the various components: the graham cracker crust, the creamy cheesecake layer, and the apple topping. Please note that exact figures will vary based on specific ingredient brands and portion sizes, but a general overview can guide your choices.
Per serving breakdown.
A typical per serving breakdown for an 8-ounce No Bake Apple Cheesecake Jar will include calories, fat, carbohydrates, and sugar. The graham cracker crust contributes carbohydrates and some fat. The creamy cheesecake layer, made with full-fat cream cheese and heavy cream, will be the primary contributor of fat and calories, along with sugar from the powdered sugar. The apple topping adds natural sugars, carbohydrates, and some dietary fiber. While these jars offer a satisfying sweet experience, they are generally intended as a treat rather than a health food, fitting perfectly into an occasional indulgence.
Calories, sugar, fat.
On average, one No Bake Apple Cheesecake Jar can range from 300 to 500 calories, depending heavily on the ingredients used and the exact portion size. The sugar content can also be significant, coming from both the added sugars in the cheesecake filling and apple topping, as well as the natural sugars in the apples. Fat content will largely be derived from the cream cheese, heavy cream, and butter in the crust. If you’re looking to modify these figures, consider using low-fat cream cheese, reducing the amount of sugar, or using a thinner layer of crust. However, these adjustments might alter the creamy texture and rich flavor profile of the original recipe. Enjoy these jars as a delicious, satisfying treat!
Common Questions About These Jars
As you plan to make and enjoy your No Bake Apple Cheesecake Jars, you might have a few common questions. This section addresses typical queries to ensure your experience is as smooth and successful as possible. From preparation timing to alternative serving options, we’ve got you covered, allowing you to confidently create this delightful apple dessert. Feel free to connect with us on Pinterest and Instagram for more tips and recipe inspiration!
Can I make ahead?
Yes, absolutely! These No Bake Apple Cheesecake Jars are an excellent make-ahead treat. In fact, making them ahead of time is highly recommended. Preparing them at least 4-6 hours in advance, or even better, overnight, allows the cheesecake layer to fully set and the flavors to meld beautifully. This means you can assemble them the day before your event, freeing up valuable time on the day of. Just store them covered in the refrigerator, and they’ll be perfectly chilled and ready to impress your guests, or simply await your personal enjoyment whenever a craving for an easy dessert strikes.
What if I don’t have jars?
No worries if you don’t have individual jars! While jars offer a charming presentation and convenient individual portions, you can certainly make this no-bake apple cheesecake in alternative containers. A standard 8×8-inch or 9×13-inch baking dish (depending on the desired thickness of your layers) works perfectly. You would simply press the graham cracker crust into the bottom of the dish, then layer the cheesecake filling and apple topping. Once chilled and set, you can slice and serve individual portions. Another option is to use small dessert glasses, ramekins, or even clear plastic cups for individual servings, providing a similar layered effect without needing specific mason jars. The most important thing is the delicious flavor, not the vessel!