S’mores Hand Pies offer a delightful twist on a classic campfire favorite, bringing all the gooey, chocolatey goodness into a convenient, portable pastry. This easy recipe ensures a sweet treat perfect for gatherings or a simple indulgence. Learn simple steps to create these perfect dessert hand pies at home with golden perfection.
Key Takeaways
- Effortlessly create delicious S’mores hand pies with simple ingredients.
- Enjoy a quick prep time of just 15 minutes, followed by 25 minutes of baking.
- Learn efficient methods for assembly, sealing, and achieving golden perfection.
- Explore storage and make-ahead options to savor these sweet treats longer.
These pies are a joy. They bring campfire flavors indoors. Simple ingredients yield amazing results. Kids and adults love them. A perfect treat anytime.
S’mores Hand Pies: Easy Recipe Overview
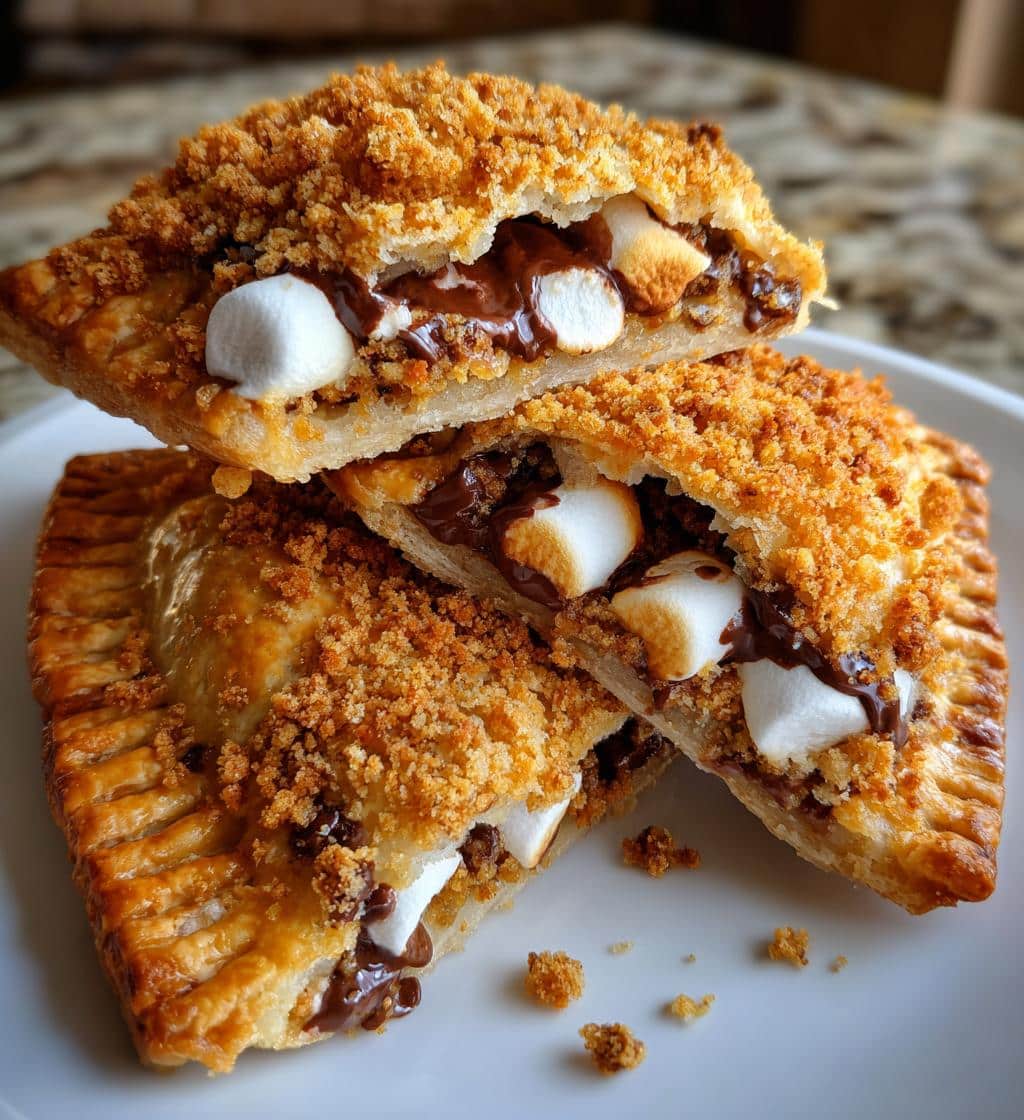
S’mores Hand Pies are the quintessential sweet treat for anyone looking to recreate the magic of a campfire s’more without the need for a bonfire. This easy recipe transforms simple ingredients into delightful, portable desserts, perfect for parties, picnics, or a cozy evening at home. The beauty of these hand pies lies in their straightforward preparation and irresistible taste, combining a flaky crust with a gooey, chocolatey, and marshmallow-filled center, all touched with the nostalgic crunch of graham cracker crumbs. This detailed guide ensures you can achieve golden perfection with minimal fuss, making homemade pies a rewarding experience. For more dessert inspirations, check out our collection of dessert recipes.
Total Time: Forty Minutes
One of the most appealing aspects of making S’mores Hand Pies is the remarkably short total time required. From start to finish, you’ll have these delicious treats ready in approximately forty minutes. This includes a mere fifteen minutes of active preparation, followed by a twenty-five minute baking period. Such efficiency makes these sweet hand pies an ideal choice for a last-minute dessert or when you need a quick yet impressive snack. The streamlined process means less time in the kitchen and more time enjoying your homemade creation.
Servings: Twelve Hand Pies
This recipe is designed to yield a generous dozen S’mores Hand Pies, making it perfect for sharing with family and friends. Each hand pie is individually sized, offering a convenient single serving that’s easy to handle and enjoy. Whether you’re hosting a small gathering or simply want enough to last a few days, twelve hand pies provide ample opportunity to savor this delightful dessert. The consistent yield also helps with portion control and planning, ensuring everyone gets a taste of these perfect s’mores hand pies.
Gather Ingredients for Perfect Hand Pies
Creating truly irresistible S’mores Hand Pies begins with assembling the right ingredients. While the concept is simple, using quality components ensures a superior end product. You’ll find most of these items readily available in any grocery store, making this an accessible homemade treat for bakers of all skill levels. Pay attention to the details of each ingredient, as they all play a crucial role in developing the signature flavors and textures of a classic s’more, encased in a flaky, golden crust.
Pie Crusts and Egg
The foundation of these delightful hand pies is the pie crust. For convenience and consistent results, we recommend using pre-made refrigerated pie crusts. These save significant time and effort, allowing you to focus on the fun of assembly. You’ll typically need two standard pie crusts per batch. For that beautiful golden perfection and a slightly crisp finish, an egg wash is essential. A single large egg, whisked with a splash of water or milk, will create the perfect glaze for the tops of your pies, enhancing their visual appeal and providing a subtle shine.
Chocolate, Marshmallows, Graham Crumbs
No s’more is complete without its iconic trio: chocolate, marshmallows, and graham cracker crumbs. For the chocolate component, semi-sweet chocolate chips or chopped chocolate bars work wonderfully, melting into a rich, gooey center. When selecting marshmallows, mini marshmallows are ideal as they melt evenly and fit perfectly within the hand pies. If you only have large marshmallows, simply snip them into smaller pieces with kitchen shears. Finally, graham cracker crumbs are crucial for that authentic s’mores flavor and texture. You can buy pre-crushed graham cracker crumbs or crush whole graham crackers yourself in a food processor or by hand in a bag.
Simple Steps for Making S’mores Pies
Making S’mores Hand Pies is a straightforward and enjoyable process, designed to be accessible even for novice bakers. This section will guide you through the key stages of preparation, from setting up your workspace to crafting the filling. Each step is broken down to ensure clarity and success, promising a batch of perfect s’mores hand pies that are as fun to make as they are to eat. Follow along closely, and you’ll be on your way to a sweet treat that evokes cherished campfire memories.
Prepping Your Irresistible S’mores Hand Pies
Effective preparation is key to a smooth baking experience. Before you even think about assembly, a few preliminary steps will ensure your kitchen is ready and your ingredients are optimized. Taking the time for these initial preparations will help you achieve the best results, leading to consistently perfect hand pies with that desired golden perfection. It also simplifies the subsequent steps, making the entire process more enjoyable and less prone to last-minute rushes.
Preheat Oven to 375°F
One of the first and most critical steps is to preheat your oven. Set your oven to 375°F (190°C). Allowing the oven to reach the correct temperature before introducing your hand pies is vital for even baking and a beautifully golden, flaky crust. If the oven isn’t hot enough, the crust might not set properly, and the filling could seep out. A properly preheated oven ensures a quick and efficient bake, delivering that perfect texture.
Roll and Cut Pie Circles
Next, carefully unroll your refrigerated pie crusts onto a lightly floured surface. Using a 3-inch round cookie cutter or a glass rim, cut out as many circles as possible from each crust. You should get approximately six circles per crust, totaling twelve. Gather the scraps, gently re-roll them, and cut out additional circles if needed. Aim for uniform circles to ensure even baking and a consistent look for your S’mores Hand Pies. This step is fundamental to the structure of your homemade pies.
Crafting the Delicious S’mores Pie Filling
The heart of these S’mores Hand Pies lies in their rich, gooey filling. This simple yet irresistible mixture perfectly captures the essence of a classic s’more, combining the sweet indulgence of chocolate and marshmallows with the subtle crunch and flavor of graham crackers. Preparing the filling is quick and easy, requiring just a few moments to bring these key components together before they transform into a molten delight during baking. This filling is what truly makes these hand pies a perfect dessert.
Mix Chocolate and Marshmallows
In a medium bowl, gently combine your chosen chocolate chips or chopped chocolate with the mini marshmallows. It’s important to mix them evenly so that each hand pie gets a balanced distribution of these melt-in-your-mouth ingredients. The combination of chocolate and marshmallow will become wonderfully gooey and rich as the pies bake, creating the signature texture that defines a s’more. Consider trying our Peanut Butter Brownie Swirl Cookies for another decadent dessert idea.
Add Graham Cracker Crumbs
Once the chocolate and marshmallows are mixed, fold in the graham cracker crumbs. The crumbs serve a dual purpose: they absorb some of the moisture from the melting chocolate and marshmallows, preventing the filling from becoming too runny, and they provide that distinctive s’mores flavor and a delightful textural contrast. Ensure the crumbs are evenly distributed throughout the mixture. This simple addition elevates the filling, making each bite reminiscent of a campfire classic.
Assembling and Sealing Your Hand Pies
This stage is where your individual pie circles transform into delicious S’mores Hand Pies. Careful assembly and proper sealing are crucial to prevent the gooey filling from escaping during baking. With a little precision, you’ll create beautifully formed pies that hold their shape and deliver a burst of flavor in every bite. This is a very satisfying part of the process, bringing you closer to enjoying your sweet treat. It’s also an opportunity to infuse a little love into your homemade pies.
Spoon Filling on Half Circle
Take one of your pie crust circles and spoon a small amount of the S’mores filling onto one half of the circle. Be careful not to overfill, leaving a small border around the edge of the semi-circle to allow for proper sealing. About a tablespoon of filling per hand pie is usually sufficient. This strategic placement ensures that when you fold the crust over, the filling is perfectly centered, allowing for a neat, sealed edge.
Fold Over and Seal Edges
Gently fold the other half of the pie crust circle over the filling, creating a crescent shape. Align the edges carefully. To seal, press firmly around the edges with your fingers, then use the tines of a fork to crimp and seal them securely. This crimping not only locks in the delicious filling but also creates an attractive, rustic edge for your homemade pies. A well-sealed edge is vital to keep the chocolate and marshmallow from oozing out during baking, ensuring a clean and perfect dessert.
Brush Tops with Egg Wash
Once all your hand pies are assembled and sealed, arrange them on a baking sheet lined with parchment paper. Using a pastry brush, lightly coat the top of each hand pie with the whisked egg wash. This egg wash is the secret to achieving that beautiful golden perfection, providing a glossy finish and contributing to a slightly crispier crust. You can also sprinkle a few extra graham cracker crumbs on top for added texture and visual appeal, making these sweet hand pies even more inviting. For another golden fried treat, consider our Funnel Cake Bites recipe.
Baking S’mores Hand Pies to Golden Perfection
Baking is the magical final step where your prepared S’mores Hand Pies transform into gooey, golden delights. Achieving “golden perfection” refers to a beautifully browned crust that is crisp and flaky, contrasting wonderfully with the molten interior. Careful monitoring of the baking process ensures the marshmallows and chocolate melt just right without burning the crust. This section details the precise timing and visual cues to look for, ensuring every batch of your homemade pies is a triumph.
Bake for Twenty-Five Minutes
Place your baking sheet with the S’mores Hand Pies into the preheated 375°F (190°C) oven. Bake for approximately twenty-five minutes. During this time, the pie crusts will puff up and turn a beautiful golden brown, and the filling inside will become warm, gooey, and perfectly melted. Keep an eye on them towards the end of the baking time, as oven temperatures can vary. The goal is a rich, golden crust, indicating they are cooked through and ready to be enjoyed as a perfect dessert. For more baking inspiration, explore our Carina Recipes on Pinterest.
Cool Before Serving
Once baked to golden perfection, carefully remove the S’mores Hand Pies from the oven. It’s crucial to let them cool on the baking sheet for at least 10-15 minutes before attempting to serve or move them. The filling, especially the melted chocolate and marshmallows, will be extremely hot and can cause burns. Cooling also allows the filling to set slightly, making the pies easier to handle and preventing the gooey center from spilling out. While they are tempting when warm, this cooling period ensures a more enjoyable and safer eating experience. Learn more about the history of this classic S’more treat.
Quick Times: Prep, Cook, Total Hand Pies
Understanding the time commitment for any recipe is essential for meal planning and successful baking. For these S’mores Hand Pies, efficiency is a key advantage, making them a fantastic option when you’re short on time but still want to create something special. This section breaks down the active preparation and cooking times, reinforcing just how quickly you can achieve a batch of these sweet, homemade pies, emphasizing their accessibility and convenience for any occasion.
Fifteen Minute Preparation
One of the most appealing aspects of this S’mores Hand Pies recipe is the minimal active preparation time. You’ll only need about fifteen minutes to gather your ingredients, cut the pie circles, mix the filling, and assemble your hand pies. This swift prep makes it an ideal recipe for busy weeknights or impromptu gatherings, allowing you to quickly create a perfect dessert without spending hours in the kitchen. It truly is an easy recipe designed for modern lifestyles.
Twenty-Five Minute Cooking Time
Following the quick preparation, the S’mores Hand Pies require only twenty-five minutes in the oven to bake to golden perfection. This relatively short cooking time means you won’t have to wait long before indulging in your delicious homemade pies. While they bake, you can tidy up your kitchen or prepare another element of your meal. The combined prep and cook time reinforces the fact that these are genuinely quick and easy treats, delivering maximum flavor with minimal effort.
Nutrition Facts for S’mores Hand Pies
Understanding the nutritional content of what we eat is important for many. While S’mores Hand Pies are undoubtedly a sweet treat, providing general nutritional insights can help in making informed dietary choices. Please note that exact values can vary based on specific brands of ingredients used and portion sizes. The following information provides a typical estimation for these homemade pies, helping you to fit this perfect dessert into your eating plan.
Calories Per Hand Pie
On average, one S’mores Hand Pie can contain approximately 200-250 calories. This estimation considers the pie crust, chocolate, marshmallows, and graham cracker crumbs. Calorie counts can fluctuate based on the size of your pie circles, the amount of filling, and whether you choose full-fat or reduced-fat ingredients. These hand pies are meant to be an indulgence, offering a delightful and satisfying calorie-dense snack or dessert. For a lighter option, you might consider our Beet Salad with Feta.
Key Nutritional Values
Beyond calories, S’mores Hand Pies typically provide varying amounts of carbohydrates, fats, and sugars. They are generally rich in carbohydrates due to the pie crust and sugars from the marshmallows and chocolate. They also contain fats from the crust and chocolate. Protein content is usually low. While specific micronutrients are not a primary feature of this dessert, it does offer a satisfying burst of energy and flavor. Always refer to the nutrition labels of your specific ingredients for the most accurate breakdown, especially if you are tracking dietary intake closely. For general information on pie, you can visit its Wikipedia page.
Storing Your S’mores Hand Pies Safely
Proper storage is essential to maintain the freshness and deliciousness of your S’mores Hand Pies. Whether you’ve made a large batch or have a few leftovers, knowing how to store them correctly ensures they remain a perfect dessert for as long as possible. Following these simple storage guidelines will help preserve their texture and flavor, allowing you to enjoy your homemade pies over several days, maintaining their appeal as a delightful sweet treat.
Use Airtight Container
To keep your S’mores Hand Pies fresh, store them in an airtight container at room temperature for up to 2-3 days. If you prefer, or if your home is particularly warm, you can also store them in the refrigerator for up to 5 days. However, refrigeration may slightly alter the texture of the crust, making it less crisp. When ready to eat, you can warm them slightly in the microwave for 10-15 seconds or in a low oven for a few minutes to bring back that gooey, fresh-baked experience.
Make Ahead: Freeze S’mores Hand Pies Easily
For those who love to plan ahead or prepare batches of treats, S’mores Hand Pies are wonderfully freezer-friendly. This make-ahead option allows you to enjoy freshly baked hand pies whenever a craving strikes, or to easily entertain guests without last-minute fuss. Freezing them correctly ensures that their quality and flavor are preserved, making them a convenient and perfect dessert to have on hand for any occasion. This is a great tip for busy bakers wanting a quick prep option.
Prepare and Freeze Ahead
You can freeze S’mores Hand Pies either unbaked or baked. For unbaked pies: prepare them up to the egg wash step, then place them on a parchment-lined baking sheet and freeze until solid (about 2 hours). Once solid, transfer them to a freezer-safe airtight bag or container for up to 2-3 months. Bake from frozen, adding an extra 5-10 minutes to the baking time. For baked pies: allow them to cool completely, then freeze individually on a baking sheet before transferring to an airtight container. Reheat frozen baked pies in a 350°F (175°C) oven for 10-15 minutes until warmed through and gooey. Stay updated on our latest easy recipe creations by following us on Instagram.
Creative Twists for S’mores Hand Pies
While the classic S’mores Hand Pie is undeniably delicious, there’s always room for a little creativity and personalization. Adding unique twists can elevate this already perfect dessert, allowing you to tailor the flavors to your preferences or to seasonal ingredients. These simple modifications can transform your easy recipe into something even more special, demonstrating the versatility of homemade pies and ensuring a delightful sweet treat for everyone.
Add Peanut Butter for Flavor
One popular and incredibly delicious twist is to incorporate peanut butter into your S’mores Hand Pies. Before spooning the chocolate and marshmallow mixture onto the pie circles, spread a thin layer of creamy peanut butter on the crust. The rich, nutty flavor of peanut butter complements the sweet chocolate and marshmallows beautifully, creating a “Reese’s” style s’more experience. This simple addition introduces a new layer of complexity and creaminess, making these hand pies even more irresistible for peanut butter lovers and adding a fun spin to your quick prep dessert.