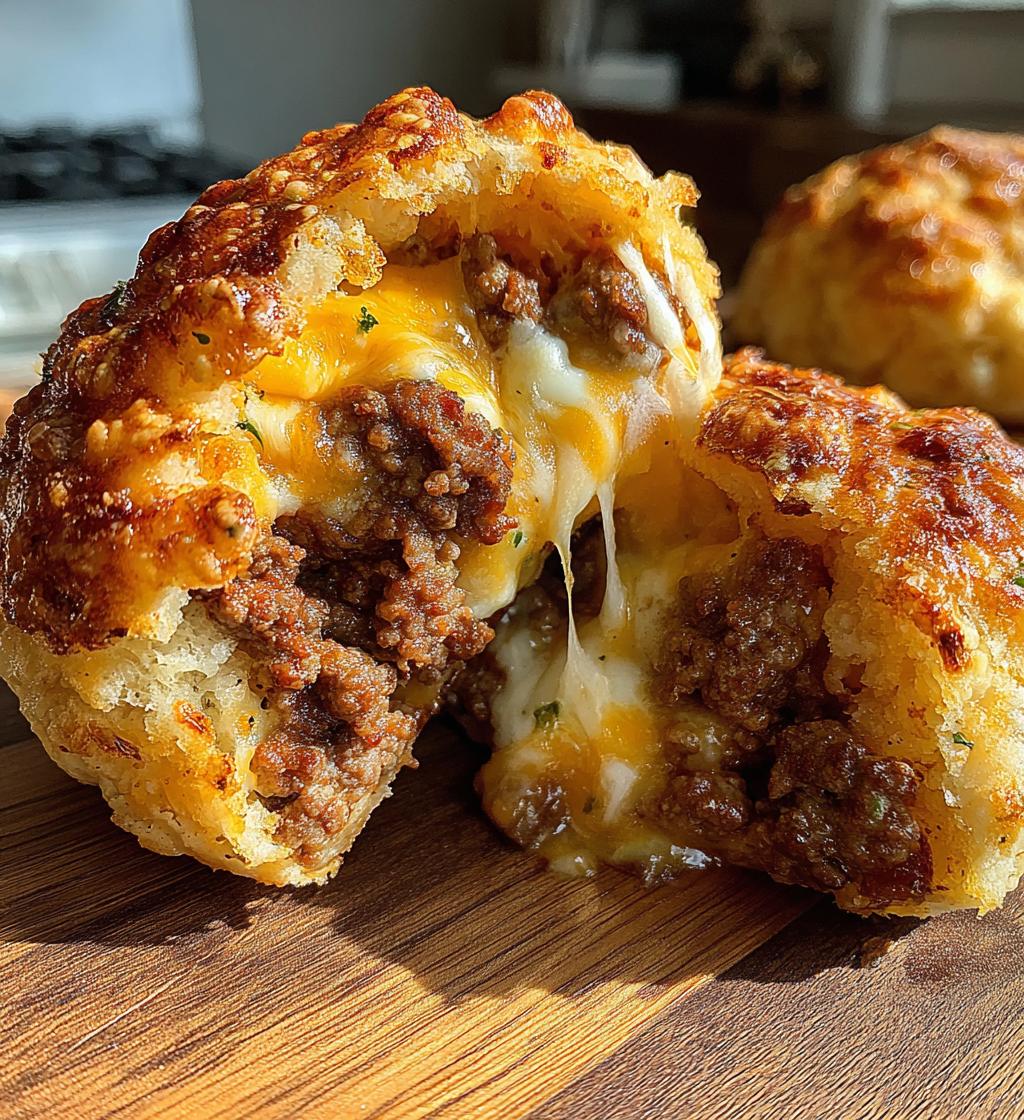
Cheeseburger Bombs are a fantastic way to enjoy all the classic flavors of your favorite burger in a fun, bite-sized package. These savory delights, featuring seasoned ground beef and melted cheese encased in soft biscuit dough, make for an incredibly satisfying meal or appetizer. They are simple to prepare and loved by everyone.
Key Takeaways
- Create delicious, bite-sized cheeseburger bombs using simple ingredients like ground beef and ready-made biscuit dough.
- Learn how to perfectly fill and seal each bomb for a leak-free, golden-brown finish.
- Discover serving suggestions, creative variations, and optimal storage tips for maximum enjoyment.
- Enjoy a quick prep and cook time, making these bombs an ideal choice for busy weeknights or casual gatherings.
Cooking at home brings joy. Simple recipes truly deliver. Enjoy creating delicious meals. These bombs are a perfect example. They combine flavor and fun effortlessly.
Meet Your New Favorite Garlic Parmesan Bombs
While this article primarily focuses on the savory delights of Cheeseburger Bombs, the versatility of this “bomb” concept truly shines when you consider creations like Garlic Parmesan Bombs. Imagine warm, fluffy dough infused with rich garlic, melted Parmesan, and a hint of herbs, baked to a golden perfection. These simple, yet incredibly flavorful morsels are perfect as a side dish to any Italian meal or a standalone appetizer that disappears quickly at parties. They share the same user-friendly approach as our cheeseburger variety, proving that delicious, homemade treats don’t have to be complicated.
What makes them “Wow in 2 Bites”?
The “Wow in 2 Bites” factor comes from a combination of perfectly balanced flavors and an irresistible texture. For Garlic Parmesan Bombs, it’s the burst of savory garlic, the salty tang of Parmesan cheese, and the soft, pillowy dough that’s often brushed with melted butter and fresh parsley just before serving. Each bite delivers a comforting warmth and a delightful chew, making it hard to stop at just one. This small package delivers big taste, making them an instant crowd-pleaser. Whether sweet or savory, the beauty of “bombs” lies in their convenient, compact form, packing a punch of flavor in every serving. You can explore other comforting dinner ideas, such as this Creamy Chicken Alfredo Lasagna Rolls recipe, for more family favorites.
Simple Ingredients for Amazing Cheeseburger Bombs
Creating mouth-watering Cheeseburger Bombs doesn’t require a pantry full of exotic items. In fact, one of their greatest appeals is the simplicity of the ingredient list, which likely includes many staples you already have on hand. This straightforward approach ensures that even novice cooks can achieve fantastic results with minimal fuss. Gathering your ingredients before you start cooking streamlines the process and makes the whole experience much more enjoyable. These simple ingredients combine to create a symphony of classic flavors that everyone will adore.
All you need: Beef and biscuits
The foundation of our cheeseburger bombs starts with two key components: flavorful ground beef and convenient, store-bought biscuit dough. For the beef, opt for a lean-to-medium fat content (80/20 or 85/15) to ensure a juicy filling without excessive grease. You’ll want about a pound to a pound and a half for a standard batch. The biscuit dough, typically found in the refrigerated section of your grocery store, provides the perfect chewy and slightly crispy exterior. Grands! Southern Homestyle Biscuits are a popular choice due to their size and flakiness, but any similar large biscuit dough will work wonderfully. This simple pairing truly makes this a quick recipe for any occasion. For another great main course, consider trying this main course recipe from Carina Recipes.
Cheeses and seasonings list
To infuse these bombs with that unmistakable cheeseburger flavor, a blend of cheeses and seasonings is essential. A combination of shredded cheddar cheese and American cheese slices (torn into pieces) works exceptionally well, offering both sharp flavor and melty goodness. You can also experiment with pepper jack for a little kick or mozzarella for extra stretch. For seasonings, think classic burger flavors:
- Garlic powder: A must for aromatic depth.
- Onion powder: Enhances the savory base.
- Salt and black pepper: To taste, bringing out all the flavors.
- Ketchup and mustard: A small amount mixed into the beef adds that signature tang.
- Worcestershire sauce: A secret weapon for umami richness.
Don’t be afraid to adjust these to your preference or add a pinch of smoked paprika for extra depth. This simple combination elevates the beef to true cheeseburger status. You can learn more about the history and variations of Cheddar cheese on Wikipedia.
Step-by-Step Guide to Cheeseburger Bombs
Creating your own batch of delicious Cheeseburger Bombs is a straightforward and rewarding culinary adventure. This section outlines the essential steps from preparing your flavorful filling to sealing and baking each perfect bomb. Following these instructions carefully will ensure your bombs are not only incredibly tasty but also beautifully golden and perfectly cooked through. Get ready to impress your family and friends with these savory, bite-sized delights that capture all the essence of a classic cheeseburger in a fun, handheld format.
Making the Flavorful Beef and Cheese Filling
The heart of any good cheeseburger bomb lies in its rich and savory filling. Achieving that classic burger taste within a bite-sized package requires careful attention to seasoning and ingredient combination. This step is crucial for developing the robust flavors that will make your bombs truly irresistible. Start with quality ingredients, and don’t be shy with the seasonings to ensure every bite is packed with deliciousness.
Combining beef with cheeses
Begin by browning your ground beef in a large skillet over medium heat. Make sure to break it up into small crumbles as it cooks. Once the beef is fully cooked and no pink remains, drain any excess grease thoroughly. This step is important to prevent your bombs from becoming greasy. Return the beef to the skillet and reduce the heat to low. Now, it’s time to introduce the cheese. Add your shredded cheddar and torn American cheese slices to the warm beef. Stir continuously until the cheese is completely melted and evenly incorporated, creating a gooey, flavorful mixture. This creates a beautifully blended filling that’s ready for its next flavor enhancements. For a similar hearty meal, check out our Cheesy Chicken and Rice Casserole.
Adding the garlic and onion flavors
With the beef and cheese base established, it’s time to layer in those essential aromatic flavors that define a great cheeseburger. To the beef and cheese mixture, add your garlic powder, onion powder, a dash of Worcestershire sauce, and a tablespoon each of ketchup and mustard. Season generously with salt and freshly ground black pepper to taste. Mix everything thoroughly, ensuring all the seasonings are evenly distributed throughout the filling. The heat from the beef will help to meld these flavors together beautifully. Give it a taste test and adjust seasonings as needed – this is your chance to make it perfectly suited to your palate. This flavorful beef mixture is now ready to be encased in the biscuit dough, promising a delightful surprise in every bite.
Wrapping Each Bomb: Fill and Seal
This stage is where your cheeseburger bombs truly begin to take shape. The key to a successful, mess-free bomb is in the careful flattening of the dough and the meticulous sealing of each individual parcel. Taking your time during this step will ensure that none of that delicious filling escapes during baking, leaving you with perfectly contained, golden-brown delights. It’s a fun and interactive part of the process, especially if you have little helpers in the kitchen!
Flattening the biscuit dough
Before you begin filling, gently separate each biscuit from the can. On a lightly floured surface or a piece of parchment paper, use your hands or a rolling pin to flatten each biscuit into a round about 4-5 inches in diameter. The goal is to make the dough thin enough to wrap easily but not so thin that it tears or becomes too delicate to hold the filling. Aim for an even thickness across the entire circle. This expanded surface area will provide ample space for the generous scoop of beef and cheese filling that is about to go in. A properly flattened biscuit is the first step towards a perfectly formed bomb.
Spoon in the beef mixture
Once your biscuit rounds are ready, it’s time for the delicious filling. Place a spoonful (about 1 to 1.5 tablespoons) of the prepared beef and cheese mixture right in the center of each flattened biscuit. Be careful not to overfill, as this can make sealing difficult and lead to leakage during baking. The amount will depend on the size of your biscuits and how much filling you want in each bomb. Ensure the mixture is mounded in the center, leaving a clear border of dough around the edges. This border is crucial for achieving a tight, secure seal, keeping all the savory goodness locked inside until the moment your cheeseburger bomb is bitten into.
Pinching edges to seal tight
Now for the critical sealing process. Carefully bring the edges of the biscuit dough up and over the beef mixture, gathering them at the top. Pinch and press the edges firmly together to create a tight seal. Make sure there are no gaps or openings where the filling could escape. Roll the sealed dough between your palms a few times to smooth out the seam and form a neat, round ball. Place each finished bomb seam-side down on your prepared baking sheet. Repeat this process until all your biscuit dough and filling have been used. A well-sealed bomb ensures a beautiful, uniformly baked product that holds all its cheesy, beefy goodness inside. This careful sealing technique is a common practice in many filled pastries, similar to making hot pockets or dumplings.
Baking Until Golden: Your Perfect Bombs
The moment of truth arrives when your carefully crafted cheeseburger bombs enter the oven. Baking them to a beautiful golden brown is the final step to achieving that irresistible crispy exterior and wonderfully melted interior. Proper oven temperature and a watchful eye are key to ensuring each bomb is cooked through and perfectly delicious. Get ready for your kitchen to fill with the amazing aroma of savory beef and warm, cheesy goodness.
Oven temperature and baking sheet
Preheat your oven to the temperature specified on your biscuit dough packaging, usually around 350-375°F (175-190°C). While the oven heats, line a large baking sheet with parchment paper or a silicone baking mat. This will prevent the bombs from sticking and make cleanup a breeze. Arrange your sealed cheeseburger bombs on the prepared baking sheet, ensuring they are spaced far enough apart to allow for even baking and browning. Typically, 1-2 inches between each bomb is sufficient. An overcrowded baking sheet can lead to uneven cooking, so it’s better to use two sheets if necessary. This preparation sets the stage for uniformly baked, golden treats.
Brushing with butter and parsley
For an extra layer of flavor and a beautiful golden sheen, consider brushing the tops of your cheeseburger bombs before and/or after baking. Before they go into the oven, a light brush with melted butter can contribute to a richer crust and a more appetizing appearance. Once the bombs are out of the oven and still warm, brush them again with melted butter, then sprinkle generously with fresh chopped parsley. The warmth of the bombs will help the butter and parsley adhere, adding a fresh, aromatic finish that complements the savory filling perfectly. This simple step elevates the presentation and adds a touch of gourmet flair to your homemade cheeseburger bombs. Find more delicious ideas on Carina Recipes Pinterest.
Quick Prep and Cook Times Overview
One of the many appealing aspects of making Cheeseburger Bombs is their relatively quick turnaround time, making them a perfect option for busy weeknights or impromptu gatherings. Understanding the estimated prep and cook times allows you to plan your meal efficiently, ensuring you can enjoy these delicious treats without a lengthy wait. This section provides a clear breakdown, so you know exactly what to expect from start to finish. It’s a truly quick recipe!
How long to prepare?
The preparation time for Cheeseburger Bombs is surprisingly short. You can typically expect to spend about 15-20 minutes actively preparing the ingredients and assembling the bombs. This includes browning the beef, mixing in the cheese and seasonings, flattening the biscuits, and carefully wrapping each bomb. If you’re efficient in the kitchen, you might even shave a few minutes off this estimate. This quick prep makes them an ideal choice for an easy weeknight dinner when time is of the essence but you still crave something homemade and satisfying.
How long to bake?
Once assembled, the baking time is also quite reasonable. Cheeseburger Bombs usually require about 12-18 minutes in a preheated oven. The exact time will depend on your oven, the size of your bombs, and the specific brand of biscuit dough you use. You’ll know they’re ready when the biscuit dough is beautifully golden brown on the outside and cooked through. Always keep a close eye on them during the last few minutes to prevent over-baking. A quick bake time ensures you can get these delicious appetizers or a simple dinner on the table swiftly.
Nutrition Details for Your Tasty Bombs
Understanding the nutritional content of your homemade Cheeseburger Bombs can be helpful for meal planning and dietary awareness. While exact figures will vary based on the specific brands of ingredients used and portion sizes, this section provides an estimated breakdown to give you a general idea. Remember that homemade dishes allow for some control over ingredients, potentially making them a healthier alternative to fast-food options.
Per serving: Calories and protein
When considering one cheeseburger bomb as a single serving (assuming 8-10 bombs from one can of biscuits and one pound of beef), you can estimate the following: Each bomb typically contains approximately 250-350 calories. This caloric value comes primarily from the ground beef, biscuit dough, and cheese. Protein content is quite robust, with each bomb offering roughly 15-20 grams of protein. This makes them a satisfying and energy-providing snack or a component of a larger meal, perfect for building muscle and keeping you full. Always refer to the specific nutrition labels of your chosen ingredients for precise values.
Fat and carb breakdown
In terms of macronutrients, cheeseburger bombs will have a notable fat and carbohydrate profile. Each serving is estimated to contain around 15-25 grams of fat, largely contributed by the ground beef (especially if not extra lean) and the cheese. The biscuit dough provides the bulk of the carbohydrates, with each bomb containing approximately 15-25 grams of carbohydrates, including some dietary fiber. Keep in mind that these are estimates. To make them lighter, you could opt for leaner ground beef, reduced-fat cheese, or whole wheat biscuit dough options if available. These delicious appetizers are designed to be a hearty and satisfying treat, so enjoy in moderation or adjust ingredients to your dietary needs.
Serving Suggestions for Delicious Cheeseburger Bombs
Cheeseburger bombs are incredibly versatile and can be enjoyed in various ways, whether as a fun appetizer, a hearty snack, or even a casual dinner. The way you serve them can greatly enhance the overall experience, turning a simple homemade cheeseburger recipe into a memorable culinary moment. Consider pairing them with classic sides or experimenting with different dips to complement their savory profile. These are truly a family favorite!
Best served warm
Without a doubt, Cheeseburger Bombs are at their absolute best when served warm, straight out of the oven. The biscuit dough is soft and slightly crispy, the beef filling is juicy, and the cheese is perfectly melted and gooey. Allowing them to cool slightly for a few minutes after baking will prevent burns but ensure maximum enjoyment. The warmth enhances all the savory flavors and creates a comforting experience. If you’re serving them for a party, consider keeping them in a warmed slow cooker on a “warm” setting or reheating them briefly before guests arrive to maintain their optimal temperature and texture. Nothing beats the fresh taste of a warm, homemade treat.
Dips for extra flavor
While delicious on their own, Cheeseburger Bombs truly shine when paired with a selection of complementary dips. Think of them like gourmet burger sliders, ready for a flavorful accompaniment. Classic choices include:
- Ketchup and Mustard: The ultimate burger condiments, offering that familiar tangy and savory kick.
- Ranch Dressing: A creamy, herby dip that provides a cool contrast to the warm bombs.
- BBQ Sauce: Adds a sweet and smoky element that pairs wonderfully with beef.
- “Secret Sauce” or Aioli: A blend of mayo, ketchup, relish, and a touch of hot sauce for a gourmet burger experience.
- Sriracha Mayo: For those who enjoy a little heat, a spicy kick will elevate the flavor.
Offering a variety of dips allows everyone to customize their experience and find their favorite flavor combination. This really takes a simple dinner to the next level!
Creative Variations for Your Garlic Bombs
While this recipe champions the classic cheeseburger bomb, the beauty of the “bomb” concept is its endless adaptability. The foundation of a soft, baked dough enveloping a savory filling opens up a world of creative possibilities. Don’t limit yourself to just beef and cheddar; let your culinary imagination run wild and customize these delicious creations to suit your taste preferences or whatever ingredients you have on hand. It’s a fantastic way to utilize leftovers or experiment with new flavor combinations.
Try different meats or cheeses
The core beef and cheese filling can easily be swapped or augmented. For different meats:
- Ground Turkey or Chicken: A leaner alternative that still provides a great base. Season appropriately.
- Pulled Pork or Chicken: Leftover BBQ pulled pork or chicken makes for amazing bombs, especially with a smoky cheese.
- Sausage: Italian sausage (sweet or spicy) creates a flavorful, hearty bomb.
- Breakfast Sausage: Combine with scrambled eggs and cheese for a breakfast bomb!
As for cheeses, the sky’s the limit:
- Pepper Jack: For a spicy kick.
- Provolone or Mozzarella: For a more Italian-inspired bomb.
- Swiss or Gouda: Adds a nutty or smoky depth.
- Feta: Consider with ground lamb or spinach for a Mediterranean twist.
These substitutions can completely change the flavor profile, making each batch a new delicious adventure. Find more inspiration by checking out our Carina Recipes Instagram.
Add veggies like jalapeños
Incorporating vegetables not only adds nutrition but also introduces exciting textures and flavors. Finely diced vegetables can be mixed directly into the beef filling or layered in before sealing:
- Jalapeños: Fresh or pickled, finely diced jalapeños add a fantastic spicy punch.
- Bell Peppers: Red, green, or yellow bell peppers, sautéed until soft, add sweetness and crunch.
- Onions: Caramelized onions provide a sweet and savory depth.
- Mushrooms: Sautéed mushrooms offer an earthy umami flavor.
- Spinach: Wilted and squeezed dry, spinach can add a nutritional boost and mild flavor.
- Pickles: Finely diced dill pickles mimic that classic burger topping inside the bomb.
Remember to chop vegetables finely so they integrate well and cook through evenly. These additions transform your cheesy beef bombs, offering a fresh take on the classic. For another dish where veggies shine, consider our Crispy Parmesan Chicken with a Rich Garlic Sauce which pairs wonderfully with various vegetable sides.
Storing Your Leftover Cheeseburger Bombs Right
It’s always a good idea to make extra cheeseburger bombs because they’re such a hit! Properly storing any leftovers ensures they remain fresh and delicious for future enjoyment. Taking a few simple steps to store them correctly will help maintain their texture and flavor, making those quick reheated snacks just as satisfying as the first batch. This section guides you on how to keep your homemade cheeseburger recipe enjoyable for days.
Keep them fresh for days
To keep your leftover cheeseburger bombs fresh, allow them to cool completely to room temperature after baking. Once cooled, transfer them to an airtight container. You can layer them, but it’s best to place parchment paper between layers to prevent sticking. Store the container in the refrigerator for up to 3-4 days. When you’re ready to enjoy them again, simply reheat in the microwave for 30-60 seconds per bomb, or in a toaster oven at 350°F (175°C) for 5-10 minutes until heated through and slightly crispy. Avoid leaving them out at room temperature for extended periods to prevent spoilage. Proper refrigeration is key to preserving their quality and ensuring they taste great every time.
Freezing and Reheating Your Homemade Bombs
Cheeseburger bombs are not only delicious fresh but also freeze exceptionally well, making them an excellent option for meal prepping or having quick snacks ready at a moment’s notice. Freezing them correctly, whether baked or unbaked, can save you time and effort down the line. This section provides the best methods for freezing your homemade cheeseburger recipe and bringing them back to their delicious glory when you’re ready to enjoy them.
How to freeze unbaked bombs
Freezing cheeseburger bombs unbaked is a fantastic way to prepare them ahead of time for future meals. After you’ve assembled and sealed each bomb, place them in a single layer on a parchment-lined baking sheet. Flash freeze them for about 1-2 hours, or until they are solid. This step prevents them from sticking together when stored in a larger bag. Once frozen solid, transfer the unbaked bombs to a freezer-safe airtight bag or container. They can be stored in the freezer for up to 2-3 months. When ready to bake, place the frozen bombs on a baking sheet and bake directly from frozen, adding an additional 5-10 minutes to the original baking time, or until golden brown and cooked through. This method provides ultimate convenience for a quick party snack anytime.
Best ways to reheat leftovers
For reheating already baked and refrigerated cheeseburger bombs, several methods work well to restore their deliciousness:
- Oven/Toaster Oven: This is often the best method for maintaining a crispy exterior. Preheat your oven or toaster oven to 350°F (175°C). Place the bombs on a baking sheet and heat for 10-15 minutes, or until warmed through and the crust is slightly crisp.
- Air Fryer: For an even crispier result, an air fryer is excellent. Reheat at 325°F (160°C) for 5-8 minutes, checking halfway, until hot and crispy.
- Microwave: While the quickest option, it can sometimes result in a softer crust. Microwave individual bombs for 30-60 seconds, or until heated through. This is best for a super quick snack.
No matter the method, ensuring they are heated thoroughly is key to enjoying these savory, cheesy bombs all over again. These methods are also great for other handheld baked goods, such as this Chicken Bacon Ranch Tater Tot Casserole if you decide to freeze portions.