Easy Chocolate Turtle Cake is a truly decadent dessert, perfect for any special occasion or a delightful family treat. This recipe guides you through creating moist chocolate cake layers, a luscious caramel filling with crunchy pecans, and a smooth fudge frosting. Prepare for rave reviews with this impressive yet achievable homemade cake.
Key Takeaways
- Follow simple steps for making a delicious chocolate turtle cake.
- Utilize baking tips for perfectly baked and cooled cake layers.
- Master recipes for a rich caramel filling and smooth fudge frosting.
- Gain guidance on cake assembly, decoration, and proper storage.
- Explore ingredient substitutions and flavor enhancement ideas.
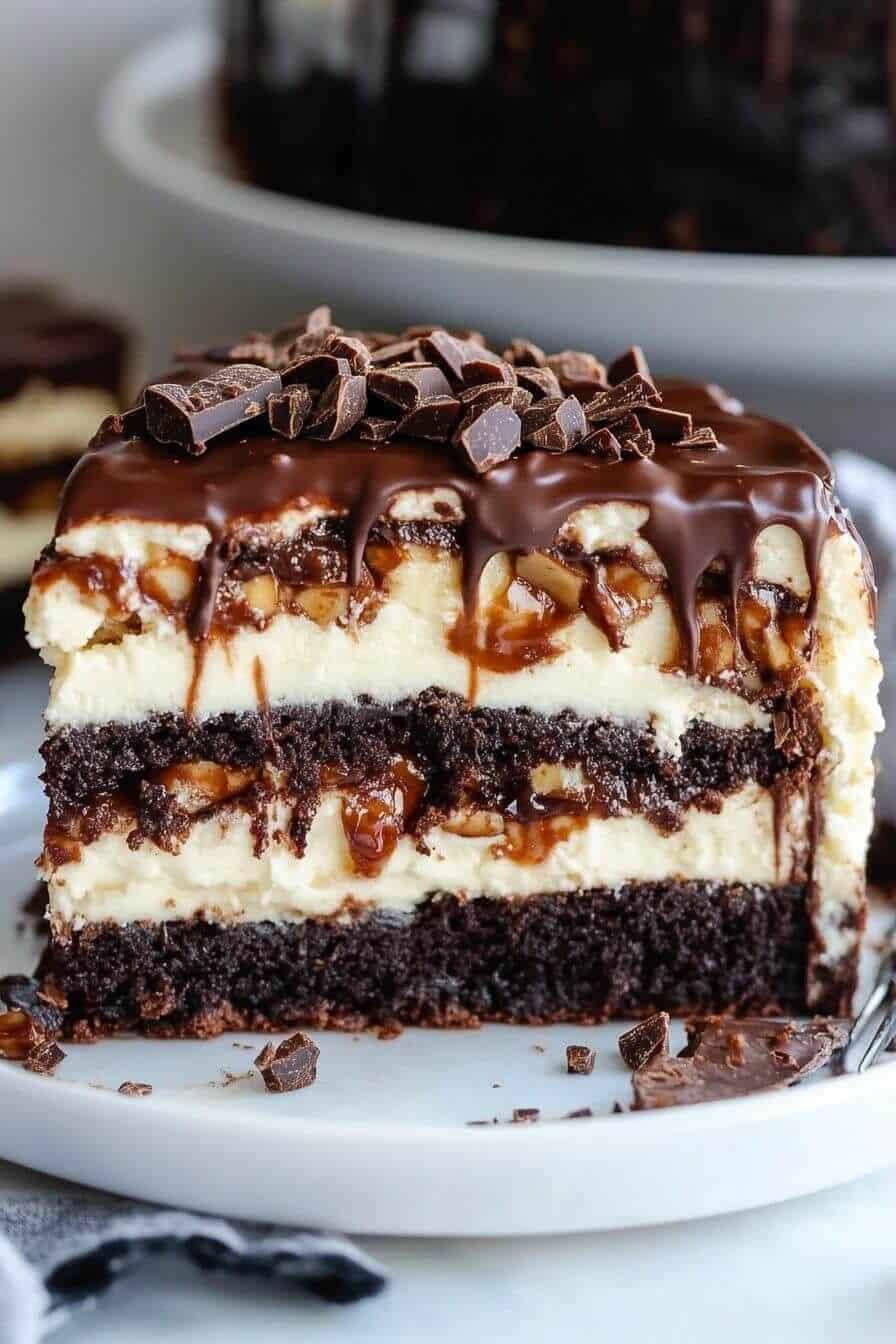
This cake offers pure indulgence. Layers of chocolate delight await you. Sweet caramel and pecans provide crunch. Fudge frosting completes every slice. It’s a crowd-pleasing dessert.
Start Your Easy Chocolate Turtle Cake
Beginning your journey to a spectacular easy chocolate turtle cake sets the stage for a truly delightful baking experience. Success lies in meticulous preparation, ensuring every step is seamless and enjoyable. This initial phase focuses on readying your baking environment and collecting all necessary components, which makes the entire process far less stressful and much more fun. Think of this as your baking mise en place, where everything is organized and at your fingertips, allowing you to focus purely on the creative act of baking this incredible dessert recipe.
Prepping Pans and Heating Oven
Proper pan preparation is crucial for cake layers that release easily and have a beautiful, even texture. For this chocolate turtle cake, you’ll typically need two or three 8 or 9-inch round cake pans. Start by greasing them generously with butter or a non-stick baking spray. After greasing, dust the pans with flour or, for an extra chocolatey boost, with cocoa powder. This cocoa dusting not only prevents sticking but also enhances the rich chocolate color of your cake layers, a little trick that makes a big difference. Gently tap out any excess flour or cocoa. Concurrently, preheat your oven to the specified temperature in the recipe. A consistently preheated oven is vital for even baking and proper cake rise, preventing dense spots or sunken centers. Don’t rush this step; give your oven ample time to reach and stabilize at the correct temperature.
Gathering All Your Ingredients
Before you even think about mixing, take a moment to gather all your ingredients. This practice, often called “mise en place,” ensures you have everything on hand and measured correctly. For your chocolate turtle cake, this will include staples like all-purpose flour, granulated sugar, cocoa powder (preferably Dutch-processed for a richer color and flavor), baking soda, baking powder, salt, eggs, milk, vegetable oil, vanilla extract, and hot coffee or water. For the fillings and frosting, you’ll need cream cheese, dulce de leche or caramel sauce, turtle candies, pecans, and fudge frosting ingredients. Having everything ready minimizes forgotten ingredients and helps maintain a smooth workflow. It also allows ingredients to come to room temperature if required, which is often key for emulsification and texture in baking. For another fantastic dessert, consider trying this quick Italian cream cake.
Mixing the Delicious Chocolate Cake Batter
Crafting the perfect chocolate cake batter is a crucial step for achieving moist, flavorful layers for your easy chocolate turtle cake. The secret lies in a balanced approach, ensuring all ingredients are well-incorporated without overmixing, which can lead to a tough cake. This section details the systematic combination of dry and wet components, followed by the careful integration of the signature turtle elements.
Whisk Dry and Wet Together
Begin by combining all your dry ingredients in a large bowl. This typically includes flour, sugar, cocoa powder, baking soda, baking powder, and salt. Whisk them thoroughly to ensure they are fully aerated and evenly distributed. This prevents lumps and helps the leavening agents work effectively throughout the batter. In a separate bowl, whisk together the wet ingredients: eggs, milk, vegetable oil, and vanilla extract. Gradually add the wet mixture to the dry ingredients, mixing on low speed with an electric mixer or by hand with a whisk until just combined. The key is to mix until no dry streaks remain, but avoid overmixing. Overmixing develops gluten too much, resulting in a dense, chewy cake rather than a light, tender one. Finally, slowly pour in hot coffee or hot water, mixing until the batter is smooth. The hot liquid helps to bloom the cocoa powder, intensifying the chocolate flavor and creating a thin batter consistency that bakes into an incredibly moist cake.
Adding Chips and Pecans
Once your base chocolate cake batter is ready, it’s time to introduce the delightful additions that make this a true chocolate turtle cake. Gently fold in a generous amount of chocolate chips, mini chocolate chips, or even chopped dark chocolate. These will melt beautifully into the cake during baking, creating pockets of gooey chocolate goodness. Next, add a portion of your chopped pecans. The pecans provide a wonderful textural contrast and their nutty flavor complements the chocolate and caramel perfectly. When adding these elements, use a spatula and fold them in carefully to ensure they are evenly distributed throughout the batter without deflating it. This careful approach maintains the batter’s airy structure, contributing to a light and fluffy cake. For more main course ideas, browse our main course category, perhaps after enjoying this sweet treat.
Baking Perfect Chocolate Cake Layers
Baking the cake layers is where your easy chocolate turtle cake truly begins to take shape. Achieving perfect, even layers is essential for a beautiful and structurally sound finished dessert. This stage requires attention to detail, from how you fill your pans to how you determine when the cakes are perfectly baked and ready for cooling. Precision here ensures a professional-looking and tasting result.
Dividing Batter Evenly
Evenly dividing the cake batter among your prepared pans is more important than many home bakers realize. Unevenly filled pans will result in layers that bake at different rates and have varying thicknesses, which can make stacking and frosting a challenge. The best way to ensure even distribution is to use a kitchen scale. Place each prepared pan on the scale, tare it to zero, and then spoon in the batter until each pan holds the exact same weight of batter. If you don’t have a scale, simply eyeball it, but try to be as consistent as possible. Once the batter is in the pans, gently tap each pan on the counter a few times to release any large air bubbles and help the batter settle evenly. This minor step contributes significantly to a flat, level cake layer, which is ideal for stacking.
Checking for Doneness
Knowing exactly when your chocolate cake layers are done baking is key to preventing dry, overbaked cakes or crumbly, underbaked ones. Baking times are usually approximate, so visual cues and simple tests are your best friends. Start checking your cakes a few minutes before the minimum recommended baking time. A perfectly baked cake layer will spring back lightly when gently pressed in the center. The edges might pull away slightly from the sides of the pan. The most reliable method, however, is the toothpick test: insert a clean wooden toothpick into the center of the cake. If it comes out clean or with a few moist crumbs attached, the cake is done. If it comes out with wet batter, continue baking for a few more minutes and retest. Avoid opening the oven door too frequently during the early stages of baking, as this can cause cakes to sink. For more general information on how cake is made, you can visit Wikipedia.
Chill Cake for Easy Handling
After your chocolate cake layers emerge from the oven, a crucial cooling and chilling process is required to prepare them for assembly. This step is often overlooked, but it is absolutely essential for creating a stable, easy chocolate turtle cake that doesn’t crumble or melt your carefully prepared fillings and frostings. Properly cooled and chilled cake layers are significantly easier to handle, slice, and stack, leading to a much more professional and satisfying final product. Patience during this phase truly pays off.
Cooling Layers Properly
Once your cake layers are out of the oven, do not attempt to remove them from their pans immediately. Allow them to cool in their pans on a wire rack for about 10-15 minutes. This initial cooling period allows the cake to set further and firm up, making it less likely to break when inverted. After this time, carefully invert each cake layer onto the wire rack. Gently remove the pan and peel off any parchment paper if you used it. Allow the cake layers to cool completely at room temperature, which can take anywhere from 1 to 2 hours, depending on their thickness and the ambient temperature. Ensure they are entirely cool to the touch before proceeding to the next step; even slight warmth can cause buttercreams and fillings to melt.
Refrigerate Before Slicing
Once the cake layers are completely cool to room temperature, wrap each layer individually in plastic wrap. For best results, place the wrapped layers in the refrigerator for at least 30 minutes, or even an hour. Chilling the cake layers makes them much firmer and easier to handle, especially if you plan to level or slice them into thinner layers. Cold cake is less prone to tearing and crumbing during cutting, allowing for cleaner, more precise cuts. This step also prepares the cake for the rich caramel filling and smooth fudge frosting that will be applied later, ensuring that your snickerdoodle cobbler, or in this case, your turtle cake, remains structurally sound. A firm foundation is key to a beautiful, towering cake.
Crafting Your Sweet Caramel Filling
The sweet caramel filling is the heart of your easy chocolate turtle cake, providing that distinctive gooey, nutty, and indulgent flavor profile that makes this dessert so irresistible. Crafting this filling perfectly is about balancing richness and sweetness, ensuring a smooth texture that complements the chocolate cake layers. This section focuses on achieving a truly decadent caramel center.
Mixing Cream Cheese and Dulce
Start by ensuring your cream cheese is softened to room temperature. This is a critical step, as cold cream cheese will create lumps in your filling, no matter how much you mix it. In a medium bowl, beat the softened cream cheese with an electric mixer until it’s light and fluffy. This aeration helps create a smooth, creamy base. Next, slowly add the dulce de leche, or a high-quality store-bought caramel sauce, to the cream cheese. If you’re using dulce de leche, which is a rich, caramelized milk confection, you’ll find it adds a deep, complex caramel flavor that’s unparalleled. Continue to beat the mixture on medium speed until it’s completely smooth and well combined. Scrape down the sides of the bowl frequently to ensure all ingredients are thoroughly incorporated. A touch of vanilla extract can also be added here to enhance the overall flavor profile of the sweet caramel filling, creating a truly harmonious blend that’s both creamy and delightfully sweet.
Folding in Turtle Candies
Once your cream cheese and dulce de leche mixture is smooth and creamy, it’s time to add the signature “turtle” elements. This typically involves chopped turtle candies or a combination of chopped pecans and small caramel pieces. Chop the turtle candies (or your chosen alternatives) into small, manageable pieces. You want them to be large enough to provide a textural contrast but small enough to be easily spreadable within the filling and comfortable to eat. Gently fold these chopped candies and pecans into the caramel cream cheese mixture using a spatula. The goal is to distribute them evenly without overmixing, which could break down the candies or make the filling too dense. This ensures every bite of your easy chocolate turtle cake will have that delightful crunch and burst of caramel, making the filling not just a creamy layer but a textural adventure. Refrigerate the filling for about 15-20 minutes to firm it up slightly before layering, making it easier to work with.
Layering This Easy Chocolate Turtle Cake
The layering process is where all your hard work comes together, transforming individual components into a magnificent easy chocolate turtle cake. This stage requires a steady hand and a keen eye to create a dessert that is not only delicious but also visually stunning. Proper layering ensures an even distribution of cake, filling, and frosting, making every slice a perfectly balanced delight. It’s the moment of architectural assembly for your delicious dessert.
Slicing Each Cake Layer
To achieve a professional-looking cake, especially if your layers have domed tops, leveling them is a crucial step. Use a long, serrated knife or a cake leveling tool to carefully slice off the domed top of each cooled and chilled cake layer, creating a flat surface. This ensures your cake layers stack evenly and prevents your finished cake from leaning. If you desire a taller cake with more filling layers, you can then slice each leveled cake layer horizontally into two thinner layers. This technique requires a very steady hand and a sharp knife. Rotate the cake as you slice, keeping the knife level. If you’re nervous about slicing thin layers, stick to the original two or three layers. Remember, consistency in thickness makes for a much neater final presentation, essential for any elegant desserts.
Building Cake with Filling
Now for the fun part: building your easy chocolate turtle cake! Place your first leveled cake layer on a cake stand or serving plate. If you plan to move the cake later, consider placing a small dollop of frosting or filling underneath the first layer to secure it to the plate. Spread a generous, even layer of your prepared sweet caramel filling over the first cake layer, extending almost to the edge but leaving a small border for the frosting later. Top with the second cake layer, pressing down gently to ensure it’s level. Repeat the process with remaining cake layers and filling. If using multiple thin layers, apply a thinner layer of filling to each. Once all layers are stacked and filled, you’ll have a tall, impressive cake ready for its final adornment. For inspiration on beautiful cake creations, check out Carina Recipes on Instagram for visually appealing desserts.
Frosting Your Decadent Chocolate Dessert
The frosting is the final delicious coat that brings your easy chocolate turtle cake together, sealing in moisture and adding another layer of rich flavor. Applying fudge frosting smoothly and evenly is key to achieving a polished, decadent finish that makes your dessert as appealing to the eyes as it is to the palate. This step transforms your layered creation into a true masterpiece, ready for its final decorative touches and eventual enjoyment. A well-frosted cake is a delight to behold.
Applying Fudge Frosting Smoothly
Before applying the main layer of frosting, it’s highly recommended to apply a thin “crumb coat.” This involves spreading a very thin layer of fudge frosting all over the cake, both on the top and sides, to trap any loose crumbs. Once applied, refrigerate the cake for 15-20 minutes, allowing this crumb coat to firm up. This crucial step prevents crumbs from mixing into your final frosting layer, ensuring a clean, smooth finish. After the crumb coat is firm, apply the remaining fudge frosting generously. Use an offset spatula or a bench scraper to spread the frosting evenly around the sides and top of the cake. For extra smooth sides, gently heat your offset spatula under hot water, dry it, and then use it to smooth the frosting. Work quickly and confidently to achieve a clean, professional look on your decadent chocolate dessert.
Setting Frosting in Fridge
Once your easy chocolate turtle cake is fully frosted, it’s beneficial to give the fudge frosting some time to set. Carefully transfer the frosted cake to the refrigerator for at least 30 minutes, or even longer, especially if your kitchen is warm. Chilling the cake allows the frosting to firm up, making it much more stable. This stability is incredibly helpful for several reasons: it prevents the frosting from smudging or melting, makes the cake easier to transport, and prepares it for any additional decorations you might want to add, such as drizzled caramel or extra pecans. A firm frosting provides an excellent base for intricate designs or just a simple, elegant presentation. For more baking inspiration and presentation ideas, consider checking out Carina Recipes on Pinterest.
Decorate Your Easy Chocolate Turtle Cake
Decorating your easy chocolate turtle cake is the final artistic flourish that elevates it from a delicious treat to a showstopping centerpiece. This stage allows you to personalize your dessert and make it truly your own, enhancing both its visual appeal and its overall flavor profile. With just a few simple techniques, you can add elegant touches that highlight the “turtle” theme and impress anyone who sees (and tastes!) it. Get ready to transform your cake.
Drizzling Caramel Topping
Once your fudge frosting has set beautifully in the refrigerator, it’s time to add the signature caramel drizzle. This step not only adds another layer of flavor but also creates an attractive, visually appealing design. You can use store-bought caramel sauce or leftover homemade caramel from your filling. If the caramel is too thick, gently warm it slightly until it reaches a pourable consistency. Transfer the caramel to a squeeze bottle or a piping bag with a small round tip. Alternatively, you can use a spoon. With a steady hand, drizzle the caramel over the top of the cake, allowing some of it to cascade artfully down the sides. You can create a simple crisscross pattern, a spiral, or an abstract design. The contrast between the dark chocolate frosting and the golden caramel is absolutely stunning and irresistible, making this a true party dessert.
Adding Pecans and Candies
To complete the turtle aesthetic and add more textural interest, liberally sprinkle chopped pecans over the caramel drizzle on top of the cake. You can also press some pecans around the base or sides of the cake. If you have extra turtle candies, chop them into smaller pieces and scatter them artfully on top as well. For a more structured look, you can arrange whole pecan halves around the border of the cake. These additions not only reinforce the cake’s theme but also provide a delightful crunch that contrasts wonderfully with the soft cake and creamy frosting. Be creative with your placement; a symmetrical design can be elegant, or a more rustic, scattered approach can be charming. These final touches make your chocolate dessert truly special and ready for presentation.
Serving Your Amazing Chocolate Cake Slices
After all your efforts in baking, layering, and decorating, the moment finally arrives to serve your amazing chocolate turtle cake. Presenting beautiful, clean slices is the final touch that demonstrates your skill and consideration. This section guides you on how to achieve perfect portions, ensuring each guest receives a pristine slice of your baked masterpiece, ready to be savored and enjoyed. Get ready for applause!
Warm Knife for Clean Cuts
Achieving perfectly clean slices of your easy chocolate turtle cake, especially with its rich filling and frosting, can be tricky without the right technique. The secret weapon for clean cuts is a warm, sharp knife. Before each slice, run a long, thin-bladed knife under hot water for about 20-30 seconds, then wipe it completely dry with a clean kitchen towel. The warmth of the blade helps it glide effortlessly through the frosting, cake layers, and dense caramel filling without dragging or tearing. After each cut, repeat the warming and wiping process to ensure every subsequent slice is just as clean and neat. This small but significant step prevents messy edges and preserves the beautiful layers you worked so hard to create, making each portion picture-perfect.
Enjoy Your Baked Masterpiece
With beautifully cut slices on plates, it’s time to sit back and enjoy your baked masterpiece. This easy chocolate turtle cake is designed to be a delightful experience for the senses—from the rich aroma of chocolate, the visual appeal of its layers and decorations, to the incredible combination of moist chocolate cake, gooey caramel, crunchy pecans, and smooth fudge frosting in every bite. Serve it as a grand finale to a special dinner, a highlight at a party, or simply as a well-deserved treat for yourself and your loved ones. The blend of flavors and textures makes this a memorable sweet treat that everyone will adore. Don’t forget to savor the moment and take pride in your delicious creation; it’s a testament to your baking prowess and a true crowd-pleaser.
Tips for Making This Delicious Cake
Even with a straightforward recipe, a few insider tips can elevate your easy chocolate turtle cake from simply good to absolutely extraordinary. These baking secrets address common challenges and enhance the flavors and textures, ensuring your homemade cake is nothing short of perfection. Incorporating these small adjustments can make a significant difference in the final outcome, turning a successful bake into a truly unforgettable dessert experience.
Using Cocoa for Pans
When preparing your cake pans, instead of dusting them with flour after greasing, consider using cocoa powder for your chocolate cakes. This simple substitution serves a dual purpose. Firstly, it prevents any unsightly white flour residue from appearing on the dark chocolate cake layers, maintaining a consistently rich brown color. Secondly, and perhaps more importantly, it subtly enhances the chocolate flavor of the cake itself. As the cocoa powder bakes onto the edges of the cake, it creates a slightly deeper chocolate crust, contributing to the overall decadent profile of your chocolate turtle cake. It’s a small change with a big impact on both appearance and taste.
Coffee Deepens Chocolate Flavor
One of the best-kept secrets for intensifying chocolate flavor in baking is the addition of hot coffee. While it might sound unusual, the coffee doesn’t make your cake taste like coffee; instead, it acts as a flavor enhancer, bringing out the deeper, richer notes of the cocoa powder. When the recipe calls for hot water in the batter, substitute it with an equal amount of hot brewed coffee (or instant coffee dissolved in hot water). The acidity in coffee reacts with the cocoa, creating a more pronounced and complex chocolate taste without overwhelming it. This trick is especially effective in recipes like this easy chocolate cake, where a robust chocolate presence is desired, making every bite more decadent and satisfying.
Toasting Nuts for Best Taste
While raw pecans are perfectly fine for your easy chocolate turtle cake, toasting them beforehand can significantly amplify their flavor and crunch. Toasting nuts brings out their natural oils, resulting in a deeper, nuttier taste and a more brittle texture. To toast pecans, spread them in a single layer on a baking sheet and bake in a preheated oven at 350°F (175°C) for about 5-10 minutes, stirring occasionally, until they are fragrant and lightly browned. Alternatively, you can toast them in a dry skillet over medium heat for a few minutes, shaking frequently. Let them cool completely before chopping and adding them to your cake batter or caramel filling. This simple step adds another layer of sophistication and depth to your sweet treat.
Substitutions for Your Turtle Cake Ingredients
While the classic easy chocolate turtle cake recipe is a proven winner, sometimes dietary preferences, availability of ingredients, or simply a desire for variety calls for substitutions. Don’t be afraid to customize! This section explores popular and effective ingredient swaps that allow you to adapt the recipe while maintaining its delicious essence. Whether you’re looking for convenience or a slightly different flavor profile, these alternatives ensure your homemade cake remains a fantastic sweet treat that caters to your needs. Creativity in the kitchen is always encouraged.
Swapping Cake and Pudding Mixes
For a quicker and often moister chocolate cake, you can easily use a good quality boxed chocolate cake mix instead of making the cake from scratch. Look for a “devil’s food” or “dark chocolate” mix for the best flavor. To enhance the box mix and make it taste more homemade, consider adding a packet of instant chocolate pudding mix to the dry ingredients, along with an extra egg and replacing the water with milk or even coffee. This “doctoring” of a box mix results in an incredibly moist, rich, and dense cake that rivals many from-scratch recipes. It’s a fantastic shortcut for creating a delicious easy chocolate cake without compromising on texture or flavor, especially when time is of the essence. This allows you to focus more on the decadent caramel filling and fudge frosting.
Nut and Caramel Alternatives
If pecans aren’t your favorite, or if you have a nut allergy, there are plenty of delicious nut and caramel alternatives for your easy chocolate turtle cake. For nuts, walnuts or even toasted almonds can be substituted for pecans, offering a slightly different but equally delightful crunch and flavor profile. If nuts are out entirely, consider pretzel pieces for a salty-sweet crunch, or even small chocolate-covered toffee bits for added texture and caramel-like flavor. For the caramel filling, while dulce de leche offers a unique depth, a good quality store-bought caramel sauce works wonderfully. You can also make your own simple caramel sauce from scratch. If you want to change the “turtle” candy aspect, try chopping up rolos, snickers, or even Heath bars. These substitutions allow you to tailor the cake to personal tastes or dietary needs, ensuring everyone can enjoy a slice of this amazing dessert. For another creative baking idea, try our peanut butter brownie swirl cookies.
Store This Easy Chocolate Turtle Cake
Knowing how to properly store your easy chocolate turtle cake is just as important as baking it, ensuring its freshness, flavor, and texture are preserved for as long as possible. Whether you’re planning to enjoy it over several days, save some for a future craving, or prepare it ahead of time for a special event, effective storage methods are key. This section provides practical advice to keep your baked masterpiece delicious and moist from the first slice to the last. Maximize its longevity and enjoyment.
Storing Cake in Fridge
Because your easy chocolate turtle cake contains a cream cheese-based caramel filling and possibly butter-based fudge frosting, it’s best stored in the refrigerator. After the cake has been assembled and frosted, cover it loosely with plastic wrap or place it in an airtight cake carrier. This prevents the cake from drying out and absorbing odors from other foods in the fridge. Stored properly, the cake will remain fresh and delicious for 3-5 days. Allow individual slices to come closer to room temperature for about 15-20 minutes before serving, as this enhances the flavors and softens the cake and frosting to their optimal texture. The cold helps the layers and frosting remain firm and intact, making it an excellent make-ahead dessert option.
Freezing Cake for Later
If you’ve made a large cake or simply want to save some for a later date, your easy chocolate turtle cake freezes beautifully. For best results, freeze individual slices or an entire cake that has been completely chilled and frosted. For an entire cake, place it uncovered in the freezer for about an hour until the frosting is firm. Then, wrap it tightly in several layers of plastic wrap, followed by a layer of aluminum foil. This double-layer protection prevents freezer burn. For individual slices, wrap each slice similarly. Frozen cake can be stored for up to 2-3 months. To thaw, unwrap the cake or slices and let them come to room temperature on the counter or in the refrigerator. This method is perfect for extending the enjoyment of your special treat.
Making Ahead for Convenience
The easy chocolate turtle cake is an excellent make-ahead dessert, offering great convenience for busy hosts or bakers. You can bake the cake layers a day or two in advance. Once completely cooled, wrap them tightly in plastic wrap and store them at room temperature or in the refrigerator. They can even be frozen for up to a month. The caramel filling can also be made a day in advance and stored in an airtight container in the refrigerator. The fudge frosting can often be prepared ahead and stored, though it might need a quick re-whip before use. Assembling the cake closer to the serving time ensures peak freshness, but having components ready drastically reduces stress on the day of your event. This flexibility makes baking this decadent dessert a joyous rather than a daunting task.