Dulce de Leche Cheesecake Bars offer a delightful twist on a classic dessert. These heavenly squares combine a buttery graham cracker crust with a smooth, creamy cheesecake filling infused with luscious dulce de leche. Perfect for sharing or enjoying solo, this easy recipe brings a touch of indulgence to any occasion. Get ready to bake a truly special treat.
Key Takeaways
- Prepare a simple graham cracker base for these bars.
- Achieve a smooth, creamy filling by using room temperature ingredients.
- Dulce de leche adds a rich, caramel flavor to the creamy cheesecake.
- Proper cooling and chilling are crucial for perfect bar texture.
These bars are truly delightful. Creamy, rich, and perfectly sweet. A crowd-pleaser for sure. Simple steps lead to amazing results. Enjoy baking them today!
Dulce de Leche Cheesecake Bars: A Dreamy Treat
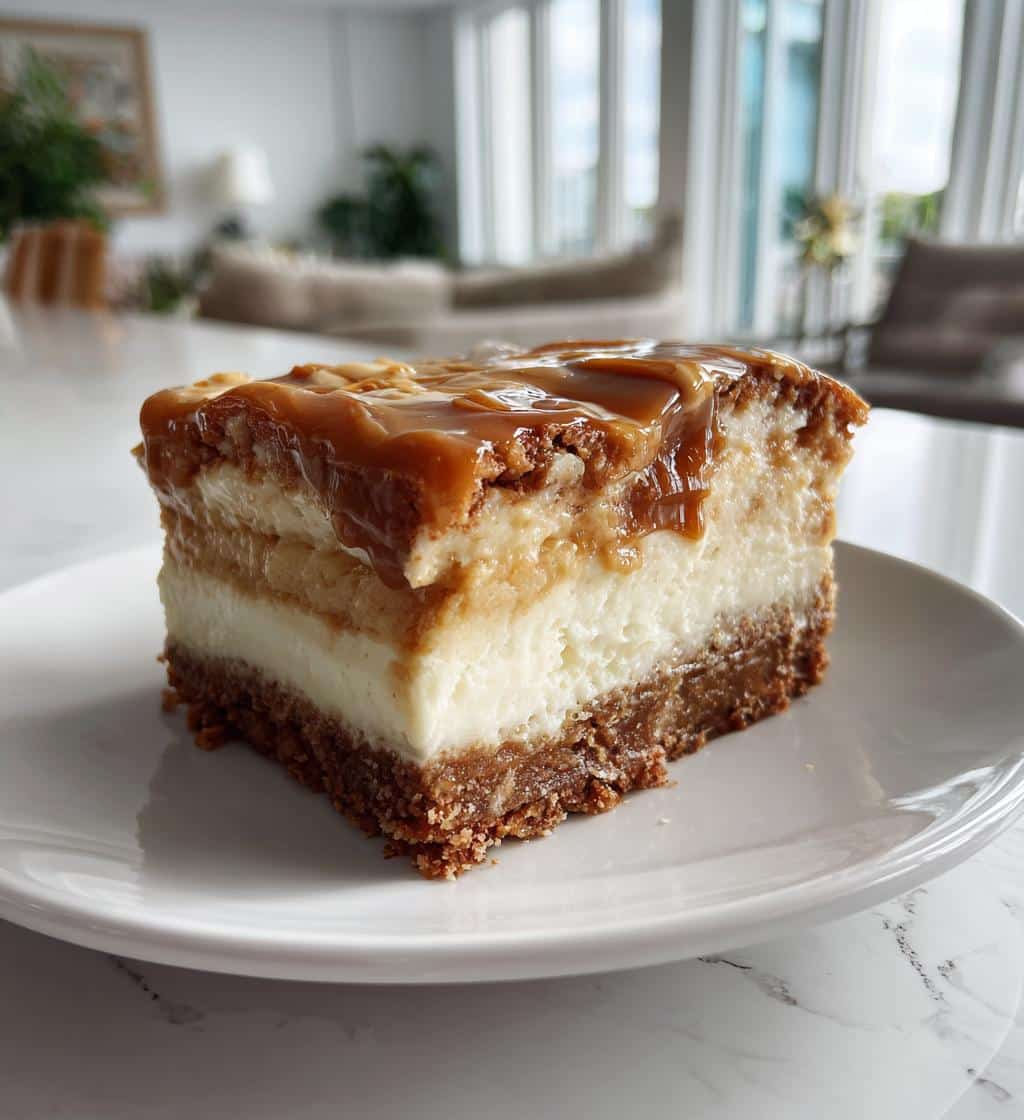
Dulce de Leche Cheesecake Bars stand out as a truly dreamy treat, captivating taste buds with their unique blend of textures and flavors. Unlike traditional cheesecakes, these bars offer individual portions, making them ideal for gatherings or a convenient single serving. The star ingredient, dulce de leche, a rich, caramelized milk confection, infuses the creamy cheesecake with its distinctive sweetness and depth, setting these bars apart from any other dessert. Every bite delivers a harmonious balance of sweet caramel and tangy cream cheese, all atop a perfectly crisp crust.
What Makes These Bars Special?
What truly makes these bars special is the innovative combination of familiar cheesecake comfort with an exotic, decadent twist. The rich, golden swirl of dulce de leche through the smooth, creamy cheesecake filling creates a visual appeal as captivating as its taste. This isn’t just a simple dessert; it’s an experience. The easy-to-handle bar format also means less fuss than a whole cheesecake, making them a fantastic option for parties, potlucks, or a special weekend treat. They offer a sophisticated flavor profile in an approachable, enjoyable form.
Why You’ll Love This Recipe
You’ll absolutely love this recipe because it simplifies the art of cheesecake making without compromising on flavor or presentation. It’s an easy recipe that yields impressive results, perfect for both novice bakers and seasoned pros. The steps are straightforward, and the ingredients are readily available. Plus, who can resist the allure of a creamy, caramel-infused dessert? Whether you’re craving something sweet after dinner or looking for a delightful confection to share, these Dulce de Leche Cheesecake Bars are guaranteed to become a favorite in your baking repertoire. If you enjoy rich, creamy desserts, you might also enjoy our Vanilla Bean Creme Brulee Cheesecake Cupcakes.
Gather Your Tools for Tasty Bars
Before you begin the delightful journey of baking your Dulce de Leche Cheesecake Bars, it’s always wise to gather all your necessary tools and equipment. Having everything at hand ensures a smooth and enjoyable baking process, preventing any last-minute searches that could disrupt your flow. You’ll need standard baking essentials, but paying close attention to your baking pan choice is particularly important for the best results, ensuring even baking and easy removal.
What Baking Pan to Use
For these cheesecake bars, an 8×8 or 9×9 inch square baking pan is ideal. A lighter-colored, metal pan is often preferred for even baking, as darker pans can sometimes cause the crust and edges to brown too quickly. To make cutting and removal effortless, lining your pan with parchment paper is highly recommended. Extend the parchment paper over two opposite sides of the pan to create “slings,” which will allow you to lift the entire chilled cheesecake out of the pan easily. This simple trick makes slicing neat squares a breeze and protects the delicate crust from sticking, making the serving process much smoother.
Simple Ingredients for Amazing Bars
The beauty of these Dulce de Leche Cheesecake Bars lies in their relatively simple list of ingredients, most of which are pantry staples. High-quality ingredients are always key for superior flavor and texture, so choose fresh dairy and good-quality graham crackers. Each component plays a vital role in creating the perfect balance of sweet, tangy, and creamy that defines this delightful dessert. This section outlines everything you’ll need, with a special note on preparing your cream cheese to ensure optimal creaminess.
All Items You Will Need
To make these delicious bars, gather the following:
- For the Crust:
- 1 ½ cups graham cracker crumbs (about 10-12 full sheets)
- ¼ cup granulated sugar
- ½ cup unsalted butter, melted
- For the Cheesecake Filling:
- 2 (8-ounce) packages full-fat cream cheese, softened
- ½ cup granulated sugar
- 2 large eggs
- 1 teaspoon vanilla extract
- ½ cup dulce de leche (store-bought or homemade)
- Pinch of salt
- Optional Topping:
- Whipped cream or extra dulce de leche for drizzling
Soften Cream Cheese First
One of the most crucial steps for achieving a silky-smooth cheesecake filling is to ensure your cream cheese is properly softened to room temperature. This means taking it out of the refrigerator at least 1-2 hours before you plan to start baking. Cold cream cheese will result in a lumpy batter, no matter how much you mix it, and overmixing to compensate can incorporate too much air, leading to cracks in your finished cheesecake. Room temperature cream cheese blends effortlessly with sugar and other ingredients, creating that desirable creamy texture we all crave in a perfect cheesecake bar. This attention to detail is essential for a professional-looking and tasting result.
Crafting the Graham Cracker Crust Base
The foundation of any great cheesecake bar is a perfectly crafted crust. For our Dulce de Leche Cheesecake Bars, a buttery graham cracker crust provides that essential textural contrast to the creamy filling. It’s simple to make but requires a bit of attention to ensure it’s firm and holds together beautifully after baking. Getting this base right is key to preventing a soggy or crumbly bottom. A well-made crust provides a sturdy and delicious platform for the rich, decadent cheesecake layer that follows.
Mixing Crumb and Melted Butter
Start by crushing your graham crackers into fine crumbs. You can do this using a food processor for a consistent texture, or by placing them in a sturdy Ziploc bag and crushing them with a rolling pin. Once you have your fine crumbs, transfer them to a medium bowl. Add the granulated sugar, mixing it thoroughly with the graham cracker crumbs until evenly distributed. Then, pour in the melted unsalted butter. Mix until all the crumbs are evenly moistened and resemble wet sand. It’s important that all crumbs are coated, as the butter acts as the binder that holds the crust together when baked.
Pressing Crust into Your Pan
Once your crumb mixture is ready, transfer it to your prepared 8×8 or 9×9 inch baking pan (lined with parchment paper, remember!). Using the bottom of a flat glass or a measuring cup, firmly and evenly press the mixture into the bottom of the pan. Pay special attention to the corners and edges to ensure a uniform thickness throughout. A dense, well-compacted crust is less likely to crumble when you cut the bars later. Once pressed, bake this crust in your preheated oven for about 8-10 minutes. This pre-baking step helps to set the crust, making it crispier and preventing it from becoming soggy when the wet cheesecake filling is added. Allow it to cool slightly while you prepare the filling.
Making the Creamy Cheesecake Filling
The heart of these delightful bars is the smooth, rich cheesecake filling, expertly infused with dulce de leche. Achieving that signature creamy texture is all about gentle mixing and ensuring your ingredients are at the right temperature. This section will guide you through combining everything to create a luscious batter that bakes into perfection. Remember, patience and proper technique are your best friends here to avoid any lumps or over-aeration, which can detract from the final product’s quality.
Blending Cream Cheese and Sugar
In a large mixing bowl, using an electric mixer on low speed, beat your softened cream cheese until it is completely smooth and free of any lumps. This step is critical; if the cream cheese isn’t lump-free now, it won’t be later. Gradually add the granulated sugar, continuing to beat on low speed just until combined and smooth. Be careful not to overmix at this stage. The goal is to incorporate the sugar thoroughly without whipping too much air into the mixture, which can lead to cracks during baking. Scrape down the sides of the bowl often to ensure everything is evenly mixed and the batter maintains a consistent texture.
Adding Dulce de Leche and Eggs
Once the cream cheese and sugar are beautifully smooth, gently mix in the vanilla extract and a pinch of salt. Next, add the star ingredient: the dulce de leche. Swirl it into the cream cheese mixture until just marbled, or incorporate it more fully if you prefer a consistent caramel flavor throughout. Finally, add the eggs, one at a time, mixing on very low speed just until each egg is incorporated. It’s crucial not to overmix once the eggs are added, as this can introduce too much air, leading to a puffy cheesecake that may crack as it cools. Gentle mixing ensures a dense, creamy, and crack-free final product. This careful process is similar to creating a perfect Quick Italian Cream Cake batter.
Baking Your Dulce de Leche Cheesecake Bars
Baking cheesecake bars requires a gentle touch and precise temperature control to ensure a perfectly set, creamy texture without overcooking. Unlike a full-sized cheesecake which often benefits from a water bath, bars are a bit more forgiving but still require attention. Following these guidelines will help you achieve beautifully baked bars with a rich, uniform consistency. The right baking environment is key to developing their exquisite texture and flavor, preventing common baking issues like cracks or dryness.
Set Oven Temperature
Preheat your oven to 325°F (160°C). This moderate temperature is key for cheesecake. A too-hot oven can cause the cheesecake to bake too quickly around the edges, leading to cracks, a dry texture, and uneven cooking. The lower temperature allows the cheesecake to bake slowly and evenly, resulting in that desirable smooth, creamy consistency throughout. Make sure your oven is fully preheated before placing the cheesecake bars inside to ensure consistent heat from the start. This steady heat is crucial for a tender, perfectly set interior.
How Long to Bake Them
Carefully pour the prepared cheesecake filling over the pre-baked graham cracker crust in your pan. Gently spread it out evenly with a spatula. Place the pan in the preheated oven and bake for approximately 25-30 minutes. The cheesecake bars are done when the edges appear set and slightly golden, but the center still has a slight wobble when you gently shake the pan. They will continue to set as they cool. Avoid over-baking, as this can result in a dry and rubbery texture. Once baked, turn off the oven and prop the door open slightly, allowing the bars to cool gradually inside the oven for about 15-20 minutes. This slow cooling helps prevent cracking. This method also works wonderfully for other baked goods like Peanut Butter Brownie Swirl Cookies.
Cooling and Chilling Bars to Perfection
The cooling and chilling phases are just as vital as the baking process for cheesecake bars. Rushing these steps can compromise the texture, leading to a less-than-perfect dessert. Proper cooling prevents cracks and helps the cheesecake set correctly, while chilling ensures the bars are firm enough to cut neatly and enhances their rich flavor. This patience is a small price to pay for the ultimate creamy, sliceable treat, making these steps non-negotiable for success.
Let Bars Cool Completely
After their gradual cool-down in the oven, remove the pan from the oven and place it on a wire rack to cool completely at room temperature. This step usually takes at least 1-2 hours, depending on your kitchen’s temperature. It’s important that the bars are completely cool to the touch before moving them to the refrigerator. Transferring warm cheesecake directly to the fridge can cause condensation to form on the surface, making it watery or affecting its texture. Patience here will be greatly rewarded with a smooth, pristine surface that is ready for its final chill.
Refrigerate for Firm Texture
Once cooled to room temperature, cover the pan loosely with plastic wrap and transfer the Dulce de Leche Cheesecake Bars to the refrigerator. They need to chill for a minimum of 4 hours, but ideally overnight, to allow them to fully set and firm up. This chilling period is crucial for developing the characteristic dense and creamy texture of cheesecake and makes them much easier to cut into neat, clean squares. Resist the temptation to cut them too soon! The wait is worth it for beautifully structured bars. For more fantastic baking ideas, remember to check out our Pinterest page.
Serving Your Dulce de Leche Cheesecake Bars
Once your Dulce de Leche Cheesecake Bars are perfectly chilled and firm, the moment of truth arrives: serving! Proper cutting techniques and thoughtful toppings can elevate the presentation and enjoyment of this already delicious dessert. These bars are impressive on their own, but a little extra touch can make them truly unforgettable, transforming them from a simple sweet treat into a memorable culinary delight for any occasion.
How to Cut Bars Neatly
For neat, clean cuts, remove the chilled cheesecake from the pan using the parchment paper slings. Place the entire slab on a cutting board. The key to clean slices is a sharp knife and a warm blade. Run a long, thin-bladed knife under hot water, wipe it dry, and then make your cut. Repeat this process for each slice: warm, wipe, cut. This prevents the cheesecake from sticking to the knife and creating messy edges. You can cut the cheesecake into 16 or 20 squares, depending on your desired portion size. Between cuts, you can also gently wipe the knife with a damp cloth to remove any sticky residue.
Add a Whipped Cream Topping
While superb on their own, a dollop of freshly whipped cream can take these Dulce de Leche Cheesecake Bars to the next level. The light, airy cream provides a wonderful textural contrast to the dense, creamy cheesecake. You can also drizzle a little extra warmed dulce de leche over the top just before serving for an additional burst of caramel flavor and an attractive finish. A sprinkle of sea salt flakes can also beautifully complement the sweetness of the dulce de leche, offering a sophisticated salty-sweet balance. For more dessert inspirations and plating ideas, visit us on Instagram.
Tips for Making Perfect Cheesecake Bars
While the recipe for Dulce de Leche Cheesecake Bars is straightforward, a few expert tips can ensure your bars turn out absolutely perfect every time. These small adjustments can make a significant difference in both the texture and appearance of your finished dessert, helping you avoid common pitfalls and achieve bakery-quality results. Mastering these simple techniques will set you up for success and make your baking experience even more rewarding.
Avoid Overmixing the Batter
One of the most critical tips for any cheesecake is to avoid overmixing the batter, especially after the eggs have been added. Excessive mixing incorporates too much air, which can cause the cheesecake to puff up dramatically in the oven and then fall and crack as it cools. Mix on low speed, and only until ingredients are just combined. A few lumps from the cream cheese or slightly visible streaks of dulce de leche are better than an overmixed, airy batter. The goal is a dense, smooth, and creamy texture, not a fluffy one that can become rubbery.
Use Room Temperature Ingredients
As mentioned earlier, using room temperature ingredients, particularly the cream cheese and eggs, is paramount. Cold ingredients don’t emulsify well, leading to a lumpy batter and a less uniform texture in the final product. Room temperature cream cheese beats smoothly with sugar, and room temperature eggs integrate more evenly into the batter. Plan ahead by taking these items out of the refrigerator 1-2 hours before you start baking. This simple step will prevent lumps and ensure your Dulce de Leche Cheesecake Bars are wonderfully smooth and creamy, a hallmark of excellent cheesecake.
Storing Leftover Cheesecake Bars Safely
Proper storage is essential to maintain the freshness, flavor, and texture of your Dulce de Leche Cheesecake Bars. Given their dairy content, careful handling and refrigeration are necessary to enjoy them for several days without compromising quality or safety. Follow these guidelines to keep your delicious leftovers at their best, ensuring every piece tastes as good as the first, and preventing any waste of your hard work.
Keep Bars in the Refrigerator
Once cooled and sliced, any leftover Dulce de Leche Cheesecake Bars should be stored in an airtight container in the refrigerator. This protects them from absorbing odors from other foods and prevents them from drying out. Properly stored, these bars will maintain their deliciousness for up to 3-5 days. For longer storage, you can freeze individual bars. Wrap each bar tightly in plastic wrap, then place them in a freezer-safe bag or container. They can be frozen for up to 1-2 months. Thaw frozen bars in the refrigerator overnight before serving for the best texture. Always ensure they are returned to refrigeration promptly after serving, especially if they’ve been out at room temperature for an extended period.
Nutrition Facts for Each Bar
Understanding the nutritional content of your homemade treats can be helpful for dietary planning. While exact figures for homemade Dulce de Leche Cheesecake Bars can vary greatly depending on specific brands of ingredients, portion sizes, and preparation methods, we can provide a general idea of what to expect. These figures are estimates only and should be considered as a guide rather than precise values. Making a recipe at home allows for some control over ingredients, like choosing lower-fat cream cheese or reducing sugar, though this may alter the taste and texture.
Calories and Sugars per Serving
A typical serving of Dulce de Leche Cheesecake Bars, based on a recipe yielding 16 servings from an 8×8 pan, would likely contain approximately 250-350 calories. The sugar content would be relatively high, given the granulated sugar in both the crust and filling, plus the added dulce de leche. Expect around 25-35 grams of sugar per bar. These are sweet treats, after all, and meant for occasional indulgence. Remember that homemade versions often have clearer ingredient lists than store-bought options, giving you more insight into what you’re consuming.
Breakdown of Fat and Protein
Due to the full-fat cream cheese and butter in the crust, these bars will be higher in fat, typically ranging from 15-25 grams per serving, with a significant portion being saturated fat. Protein content will come primarily from the cream cheese and eggs, providing around 4-7 grams per bar. While a delicious treat, these bars are calorie-dense and rich. Enjoy them in moderation as part of a balanced diet. For those looking for lighter options, Carina Recipes also offers a variety of savory main course dishes that can balance out the indulgence.
Enjoy These Dreamy Dulce de Leche Bites
You’ve successfully created a batch of truly exquisite Dulce de Leche Cheesecake Bars! These dreamy bites are more than just a dessert; they’re a celebration of creamy textures, rich caramel flavors, and the simple joy of homemade baking. From the crunchy graham cracker crust to the smooth, dulce de leche-swirled filling, every element comes together to form a treat that is both comforting and sophisticated. We hope you and your loved ones cherish every moment of making and enjoying these special bars.
Share This Delicious Dessert
These Dulce de Leche Cheesecake Bars are perfect for sharing! Whether it’s a family gathering, a festive party, or a simple get-together with friends, they are sure to be a show-stopping hit. Pack them in a decorative box for a thoughtful gift, or arrange them beautifully on a platter for your next event. Don’t forget to take photos and share your baking success with us online! Spreading the joy of these delicious dessert bites is part of the fun. Happy baking, and happy sharing!