Key Takeaways
- Gather all ingredients before starting to ensure a smooth process.
- Always ensure your cake base is completely cooled before crumbling.
- Forming tight, uniform cake balls is crucial for successful dipping.
- Carefully manage chocolate temperature for a smooth, even coating.
- Properly store your finished cake pops to maintain freshness and taste.
Making cake pops is truly fun. They are surprisingly simple to create. Each bite is a sweet delight. Perfect for sharing with friends. Enjoy your homemade dessert creation!
Gathering Ingredients for Cake Pops
Cake Mix and Wet Essentials
To begin your journey into making delicious red velvet cake pops, gathering all your ingredients beforehand is key. You’ll typically start with a standard box of red velvet cake mix, which provides a wonderfully consistent base for your pops. Beyond the mix, you’ll need the usual wet essentials: eggs, vegetable oil, and water, as specified on your cake mix box. We recommend adding a splash of vanilla extract (about 1 teaspoon) to enhance the flavor profile, giving your cake a richer, more nuanced taste that complements the classic red velvet notes. These foundational ingredients are critical for ensuring your cake base is moist and flavorful, setting the stage for perfect homemade cake pops.
Frosting and Coating Chocolate
The magic of a cake pop truly comes alive when you combine the cake crumbs with frosting. For red velvet cake pops, cream cheese frosting is the traditional and arguably best choice, offering a tangy counterpoint to the sweet cake. You can use a store-bought tub for convenience or whip up your own homemade batch for an extra touch of flavor. The final, dazzling component is the chocolate coating. High-quality melting chocolate wafers or candy melts (in white, dark, or colored varieties) are ideal as they melt smoothly and set quickly. Avoid standard chocolate chips, which can be too thick and often don’t set as well. Having these ingredients ready will streamline your baking process, making it an enjoyable experience from start to finish. For more dessert ideas, check out our collection of dessert recipes.
Bake the Red Velvet Cake Base
Oven Prep and Mixing Batter
The foundation of any great red velvet cake pop is, naturally, the cake itself. Start by preheating your oven to the temperature indicated on your red velvet cake mix box, usually around 350°F (175°C). Prepare a 9×13 inch baking pan by lightly greasing and flouring it, or lining it with parchment paper for easy removal. In a large mixing bowl, combine the cake mix with the wet ingredients—eggs, oil, and water—following the package directions. If you’re adding vanilla extract, now is the time to stir it in. Mix until just combined; it’s important not to overmix the batter, as this can lead to a dense, tough cake, which is not ideal for the soft, crumbly texture needed for cake pops. Gentle mixing ensures a tender crumb, which will be easy to work with when forming your cake balls later.
Baking and Cooling Cake
Pour the prepared red velvet batter evenly into your baking pan. Place it in the preheated oven and bake for the time suggested on the cake mix box, typically 25-30 minutes. To check for doneness, insert a toothpick into the center of the cake; if it comes out clean, the cake is ready. Once baked, remove the cake from the oven and let it cool in the pan on a wire rack for about 10-15 minutes. This initial cooling helps the cake solidify slightly. The most crucial step here, a vital one of the many baking tips for successful cake pops, is to allow the cake to cool completely before moving on to the next step. Attempting to crumble warm cake will result in a gummy texture that’s difficult to mix with frosting. Patience truly pays off here, ensuring a perfect consistency for your homemade cake pops. For another delicious treat that requires careful baking, consider making Quick Italian Cream Cake.
Mixing Cake and Frosting
Crumbling Cooled Cake
Once your beautiful red velvet cake has completely cooled (and we mean completely!), it’s time for the fun part: crumbling. The goal here is to achieve a fine, uniform crumb, similar to coarse sand. You can do this by hand, breaking the cake into small pieces and then rubbing them between your fingers. Alternatively, for a quicker method, you can use a stand mixer with the paddle attachment on low speed, or even a food processor, pulsing briefly until the desired consistency is reached. Be careful not to over-process, as you don’t want to turn the cake into a paste. The finer the crumbs, the smoother and more consistent your cake balls will be, which is essential for uniform homemade cake pops.
Combining Cake and Frosting
Now, it’s time to marry your crumbled red velvet cake with the cream cheese frosting. Start by adding about half of the tub of frosting to your crumbled cake. Using your hands, a spatula, or the paddle attachment of a stand mixer, begin to mix thoroughly. The key is to add the frosting gradually, a spoonful at a time, until the mixture reaches a play-dough-like consistency. It should be moist enough to hold together firmly when squeezed, but not so wet that it’s sticky or greasy. You might not need the entire tub of frosting; the amount can vary based on the moisture content of your cake. This perfect consistency is vital for rolling tight cake balls that won’t fall apart later, a cornerstone for any delightful easy cake pop creation.
Forming and Chilling Cake Balls
Rolling Tight Cake Balls
With your cake and frosting mixture ready, it’s time to form the individual cake balls. The goal is consistency in size, which ensures even dipping and a professional look. Using a small cookie scoop or a tablespoon measure can help you portion out uniform amounts. Take a portion of the mixture and roll it tightly between your palms until you have a smooth, compact ball. The tighter you roll them, the less likely they are to crack or crumble when dipped in chocolate. Aim for balls roughly 1 to 1.5 inches in diameter. Place the rolled cake balls onto a baking sheet lined with parchment paper. This step is where the structure of your homemade cake pops truly takes shape, ensuring a sturdy base for the delicious coating.
Chilling for Best Results
Once all your cake balls are rolled, the next critical step is chilling. Place the baking sheet with the cake balls into the refrigerator for at least 30 minutes, or even an hour. If you’re in a hurry, you can pop them into the freezer for 15-20 minutes. Chilling serves two important purposes: it firms up the cake balls, making them easier to handle and less likely to fall apart during dipping, and it helps them adhere better to the sticks. This firming process prevents the cake balls from dissolving or melting into your warm chocolate coating. Proper chilling is a vital technique for achieving those perfect, sturdy red velvet cake pops that hold their shape beautifully.
Melting Chocolate for Coating
Best Ways to Melt Chocolate
Mastering the art of melt chocolate is crucial for a smooth, professional finish on your red velvet cake pops. The two most common and effective methods are using a double boiler or a microwave. For a double boiler, place your candy melts or chocolate wafers in a heat-safe bowl set over a saucepan of simmering water, ensuring the bottom of the bowl doesn’t touch the water. Stir gently until melted and smooth. For the microwave, place chocolate in a microwave-safe bowl and heat in 30-second intervals, stirring thoroughly after each interval, until fully melted and creamy. Be careful not to overheat the chocolate, as this can cause it to seize and become unusable. The ideal temperature for dipping is usually around 90-92°F (32-33°C), ensuring a smooth, thin coat that sets well. Achieving this perfect consistency is a top baking tip for any aspiring cake pop maker.
Prepping Sticks for Dipping
Before you begin dipping your cake balls, prepare your cake pop sticks. This simple step is a secret to preventing your cake pops from sliding off the sticks. Dip the tip of each cake pop stick (about half an inch) into the melted chocolate. Then, immediately insert the chocolate-dipped end into the center of a chilled cake ball, pushing it about halfway through the ball. The melted chocolate acts like glue, creating a strong bond between the stick and the cake ball as it cools and sets. Once all your sticks are inserted, place the cake balls back into the refrigerator or freezer for a few minutes to allow the chocolate to fully set. This reinforcement is especially important for creating sturdy homemade cake pops that are easy to handle and enjoy, making them ideal party treats.
Dipping Your Perfect Cake Pops
Coating Each Cake Ball
With your cake balls chilled and secured on sticks, and your chocolate perfectly melted, it’s time for the most visually rewarding step: dipping! Hold a cake pop by its stick and carefully immerse the entire cake ball into the melted chocolate coating. Ensure the chocolate covers the ball completely, reaching up to meet the set chocolate on the stick. A deep, swift dip is often better than multiple shallow dips, which can create a lumpy coating. If your chocolate starts to thicken, you can gently reheat it for a few seconds using your chosen melting method. The key is to work efficiently but carefully to achieve a smooth, even layer of chocolate, giving your red velvet cake pops their signature glossy finish.
Removing Excess Chocolate
Once the cake ball is fully coated, gently lift it out of the chocolate. Hold the cake pop directly over the bowl and tap the stick gently against the side of the bowl. This allows any excess chocolate to drip off, preventing puddles and creating a cleaner, more refined look. Rotate the cake pop slowly as you tap to ensure an even distribution and removal of chocolate. Don’t tap too aggressively, or the cake ball might detach. Once the dripping slows to an occasional drop, you’re ready for the next step. This technique is vital for creating polished homemade cake pops. After tapping, you can immediately proceed to decorate or place the cake pop upright in a Styrofoam block or a cake pop stand to set. For a similar intricate dessert, consider our Vanilla Bean Creme Brulee Cheesecake Cupcakes.
Decorating Your Red Velvet Pops
Adding Fun Sprinkles
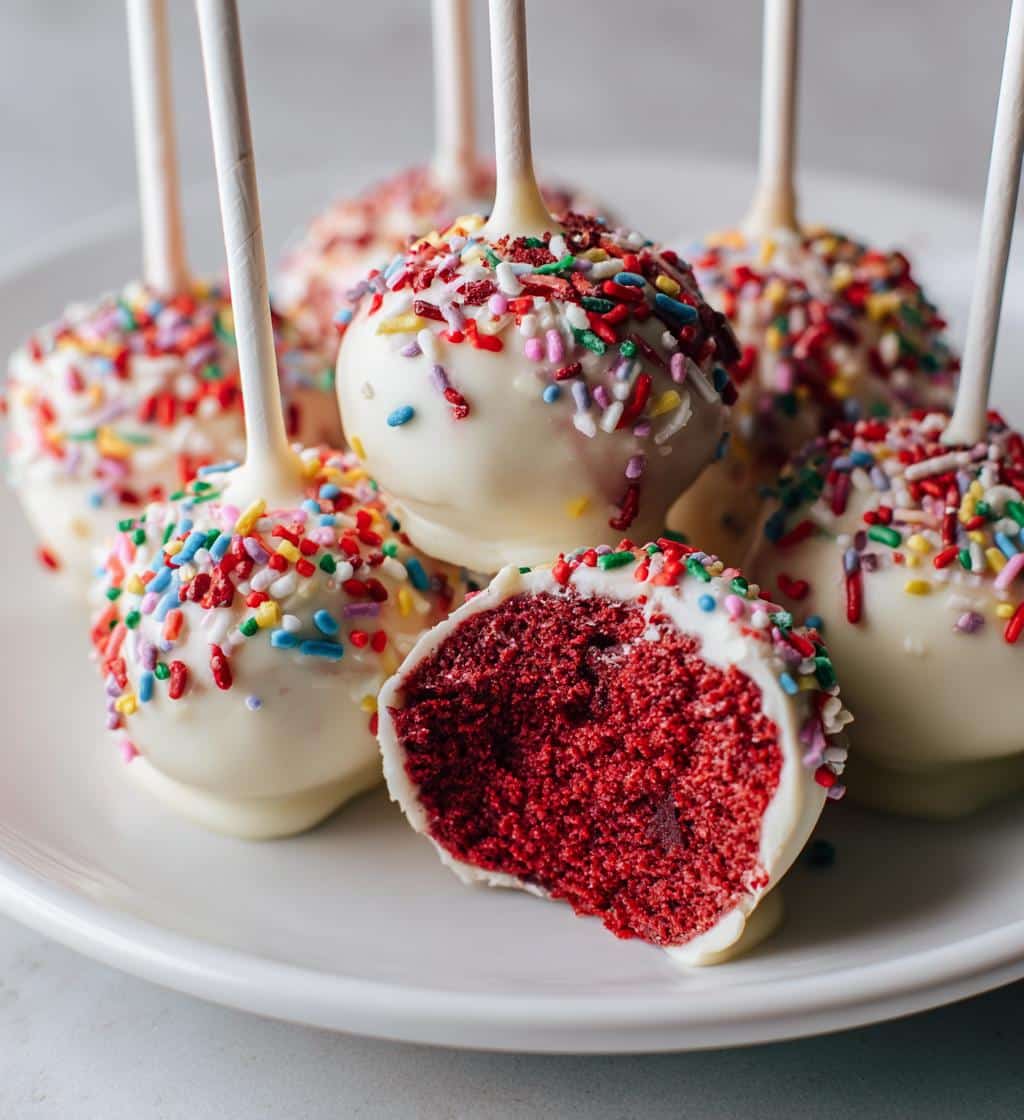
Once your red velvet cake pops are freshly dipped, they’re ready for decoration! This is where you can truly let your creativity shine. While the chocolate coating is still wet, liberally sprinkle your favorite decorative additions onto the pops. Colorful sprinkles, nonpareils, edible glitter, or even finely crushed nuts can instantly elevate the look of your homemade cake pops. If you want a more intricate design, such as drizzles of contrasting chocolate, wait until the primary coating has almost set. Then, using a piping bag with a very small tip or a spoon, drizzle melted white chocolate or another color over the partially set pop. The timing is crucial: sprinkles need to adhere to wet chocolate, while drizzles need a firm base to stand out. Decorating turns simple cake pops into stunning party treats.
Setting Up Your Cake Pops
After dipping and decorating, your red velvet cake pops need a place to set. The best way to do this is to stand them upright. A Styrofoam block, a cake pop stand, or even a tall glass filled with rice or sugar can serve this purpose perfectly. Ensure there’s enough space between each pop so they don’t touch and smudge the wet chocolate. Allow the cake pops to set at room temperature for about 15-20 minutes, or you can place them in the refrigerator for quicker setting (about 10 minutes). Once the chocolate is completely firm to the touch, your beautifully decorated easy cake pop creations are ready to be admired and, of course, enjoyed! You can also find more inspirations for sweet creations on our Pinterest page.
Tips for Great Cake Pops
Always Cool Cake Completely
One of the most frequent mistakes in making cake pops is rushing the cooling process. We cannot stress this enough: your cake base must be completely cool before you start crumbling it. A warm cake will become gummy and difficult to mix with frosting, resulting in a sticky, unmanageable dough rather than a pliable, play-dough-like mixture. A fully cooled cake crumbles beautifully into fine, even crumbs, which are essential for creating smooth, uniform cake balls. Patience at this stage will save you a lot of frustration and ensure your homemade cake pops have the perfect texture from the inside out. This simple baking tip is a cornerstone for success.
Pack Cake Balls Tightly
When you’re rolling your cake and frosting mixture into individual balls, pay close attention to how tightly you pack them. Loose cake balls are prone to crumbling when you insert the stick or, worse, falling off into the melted chocolate during dipping. Apply firm, even pressure as you roll the mixture between your palms to create dense, compact spheres. This ensures they hold their shape, adhere securely to the sticks, and maintain their integrity throughout the dipping process. Tightly packed cake balls are far more resilient and will give your red velvet cake pops a professional, polished finish. This step is key to preventing cake pop falls.
Watch Chocolate Temperature
The temperature of your chocolate coating is arguably the most critical factor for a smooth, flawless finish. Chocolate that is too hot will be too thin, potentially melting your cake balls or creating a transparent coating. Chocolate that is too cool will be too thick, leading to a clumpy, uneven, and often cracked surface. Aim for a temperature around 90-92°F (32-33°C). Use a thermometer if you have one, or test a small amount. If it starts to thicken during dipping, gently reheat it in short bursts. Maintaining the correct chocolate temperature ensures a beautiful, thin, and even coat that sets quickly, making your easy cake pop truly shine. You can learn more about chocolate melting points and techniques on Wikipedia’s chocolate page.
FAQ About Cake Pops
How to Store Cake Pops
Proper storage is essential to keep your red velvet cake pops fresh and delicious. Once the chocolate coating has fully set, you can store them in an airtight container at room temperature for up to 2-3 days. For longer freshness, store them in the refrigerator for up to a week. If refrigerated, allow them to come to room temperature for about 15-20 minutes before serving for the best flavor and texture. For extended storage, cake pops can even be frozen in an airtight container for up to a month. Thaw them in the refrigerator overnight before serving. Knowing how to store your sweet treats ensures they remain perfect for any occasion.
Preventing Falls from Sticks
A common frustration with cake pops is having them fall off the sticks. The primary culprits are usually insufficiently chilled cake balls, loosely rolled cake balls, or not “gluing” the stick with chocolate. Always ensure your cake balls are thoroughly chilled and tightly rolled. Additionally, dipping the stick tip into melted chocolate before inserting it into the cake ball creates a strong bond as the chocolate sets, providing extra stability. If you find your cake balls are still loose, try inserting the stick, then briefly chilling the pops stick-down in a tall glass before dipping the entire ball. For more general information about this confection, you can visit the Cake Pop Wikipedia page.
Changing Cake Flavors
While this recipe focuses on red velvet cake pops, the beauty of cake pops is their versatility! You can easily change the cake flavor to suit your preferences or occasion. Any box cake mix works beautifully—think chocolate, vanilla, lemon, strawberry, or even spice cake. Similarly, you can experiment with different frosting flavors that complement your chosen cake, like vanilla buttercream, chocolate ganache, or even a fruit-flavored frosting. The coating chocolate can also be varied, using white, milk, or dark chocolate, or colored candy melts to match a theme. This adaptability makes homemade cake pops a fantastic canvas for endless creative dessert ideas, allowing you to personalize your party treats.
Why You’ll Love This Recipe
Quick and Easy to Make
This easy cake pop recipe is designed for simplicity without sacrificing flavor or fun. While there are a few steps involved, each one is straightforward, making it an accessible baking project even for beginners. The use of a box cake mix significantly cuts down on prep time, allowing you to focus on the enjoyable parts like mixing, rolling, and decorating. The satisfaction of creating these charming treats from scratch, with minimal fuss, is incredibly rewarding. It’s a wonderful way to produce impressive homemade cake pops that look and taste like they came from a professional bakery, but with the personal touch of your own kitchen. You can often find more quick recipes on our Instagram account.
Great for Parties and Gifts
Red velvet cake pops are undeniably perfect party treats. Their individual serving size makes them easy for guests to grab and enjoy, minimizing mess. They add a festive and elegant touch to any celebration, from birthdays and holidays to baby showers and weddings. Beyond parties, these delightful little spheres also make thoughtful and charming gifts. Package a few beautifully decorated cake pops in a clear bag with a ribbon, and you have a personalized present that’s sure to bring a smile. Their visual appeal and delightful taste ensure they are always a hit, making them a standout among other dessert ideas.
Fun to Create with Friends
Baking cake pops is more than just a recipe; it’s an experience, especially when shared. This activity is fantastic for creating lasting memories with friends, family, or children. The various stages—crumbling cake, mixing frosting, rolling balls, dipping in chocolate, and especially decorating—offer opportunities for everyone to get involved. It’s a hands-on, creative process that encourages laughter and shared enjoyment. Turning simple ingredients into beautifully decorated red velvet cake pops together makes the end product even sweeter and the entire process a joyous event. For other desserts perfect for making with friends, try our Peanut Butter Brownie Swirl Cookies.
Storing Your Red Velvet Pops
To ensure your homemade red velvet cake pops remain fresh and delicious, proper storage is key. Once the chocolate coating has completely set and hardened, you can store them in an airtight container. At room temperature, they will stay fresh for about 2-3 days, especially if kept away from direct sunlight and heat. For longer enjoyment, the refrigerator is your best friend; cake pops can last up to a week when stored chilled. If you refrigerate them, remember to let them sit at room temperature for 15-20 minutes before serving. This allows the cake and frosting to soften slightly, enhancing their texture and flavor. For extended keeping, you can also freeze cake pops in an airtight container for up to a month. Thaw them in the refrigerator overnight before bringing them to room temperature. This careful approach to storing cake pops ensures that every bite is as perfect as the first, making them a consistently delightful sweet treat.
Perfect Cake Pops Nutrition
What’s in Each Pop
While red velvet cake pops are undeniably a delightful sweet treat, it’s helpful to have a general idea of what’s in each pop, especially for those mindful of their intake. Given that cake pops are made from cake, frosting, and a generous coating of chocolate, they are typically calorie-dense. A single homemade cake pop can range from approximately 100 to 200 calories, depending on its size, the richness of the ingredients used (e.g., full-fat vs. reduced-fat frosting), and the thickness of the chocolate coating. They are generally high in sugar and carbohydrates, and contain varying amounts of fat. They offer minimal protein or fiber. As these are celebratory party treats, they are best enjoyed in moderation. Exact nutritional values would require precise measurements of all ingredients and professional analysis, so this serves as a general guideline for what’s in each pop.