Easy Peanut Butter Chocolate Rice Krispie Treats are a beloved no-bake dessert, combining classic crunch with rich peanut butter and smooth chocolate. This recipe offers a quick and satisfying way to curb those sweet cravings. Perfect for any occasion, these treats are always a crowd-pleaser and simple to make for your family.
Key Takeaways
- Create decadent peanut butter chocolate treats with minimal effort and no baking required.
- Use common pantry staples along with mini peanut butter cups for an irresistible flavor.
- Learn how to prepare your pan, make the marshmallow base, and add a simple chocolate topping.
- Get tips for perfect cooling, cutting, and storage to keep your rice krispie squares fresh.
- Explore easy twists to customize your treats, ensuring even distribution and avoiding sticky situations.
Sweet treats bring joy. Simple ingredients make them accessible. No-bake recipes save time. Everyone loves a quick dessert. Perfect for any gathering.
Easy Peanut Butter Chocolate Rice Krispie Treats
A Decadent Snack You’ll Love
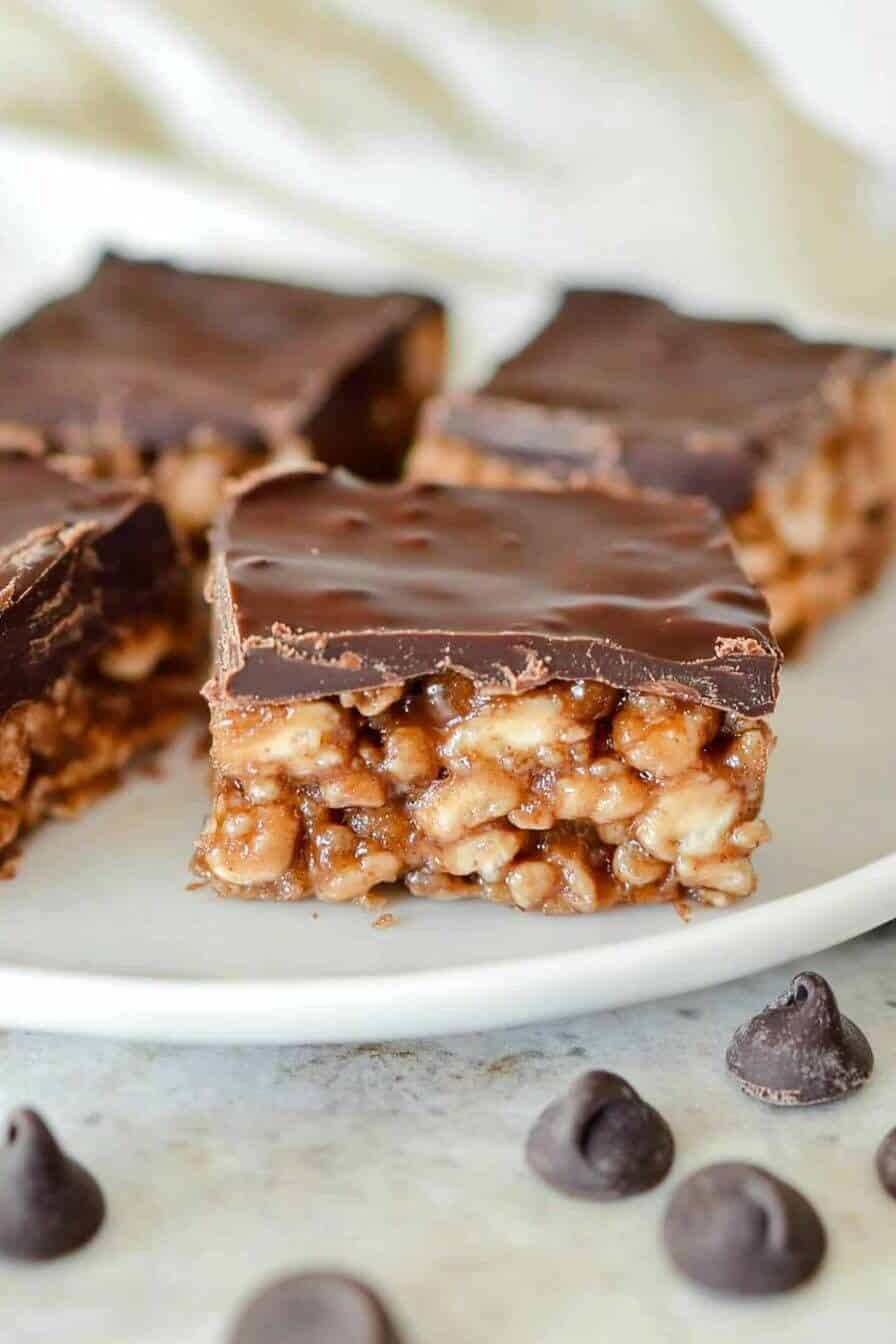
These easy peanut butter chocolate treats are more than just a snack; they are a decadent dessert experience that will satisfy any sweet craving. Combining the timeless crunch of Rice Krispies with the creamy richness of peanut butter and a smooth chocolate topping, this recipe elevates the humble rice krispie square into something truly special. It’s the perfect treat for parties, potlucks, or simply enjoying at home. The blend of salty-sweet flavors makes these homemade rice krispie treats incredibly addictive, and their straightforward preparation means you can whip them up whenever a craving strikes. This family favorite recipe is sure to become a regular in your rotation, offering a delightful twist on a classic no-bake dessert.
Quick Prep for Delicious Treats
One of the best aspects of these easy prep treats is the minimal time required for preparation. Forget about preheating ovens or waiting for batters to rise; these delicious treats come together quickly, making them ideal for busy schedules or spontaneous dessert desires. With just a few simple steps, you’ll have a pan full of irresistible peanut butter chocolate treats cooling on your counter. The active prep time is remarkably short, allowing you to spend less time in the kitchen and more time enjoying your delicious creation. From melting the marshmallow base to spreading the chocolate topping, each step is designed for speed and ease, proving that a decadent dessert doesn’t have to be complicated. If you enjoy quick dessert recipes, check out our Quick Italian Cream Cake for another fast option.
Gather Ingredients for Treats
Pantry Staples You Will Need
To create these delightful no-bake dessert squares, you’ll need a handful of common pantry staples that are likely already in your kitchen. First and foremost, grab your crispy rice cereal. This forms the essential crunchy base of our peanut butter chocolate treats. You’ll also need unsalted butter, which provides richness and helps bind everything together. Mini marshmallows are crucial for the gooey, chewy texture that defines rice krispie squares. A good quality creamy peanut butter is next on the list, adding that signature flavor that makes these treats so irresistible. Finally, don’t forget vanilla extract; a touch of vanilla truly enhances the overall sweetness and aroma, complementing the other ingredients beautifully. Having these items on hand makes starting this simple dessert recipe a breeze, proving that you don’t need fancy ingredients to make something truly spectacular.
Special Decadent Additions
While the basic ingredients create a fantastic treat, a few special additions elevate these from good to absolutely extraordinary. The first key addition is mini peanut butter cups. These tiny, delightful candies melt slightly into the warm cereal mixture, intensifying the peanut butter flavor and adding pockets of creamy chocolate goodness. For the topping, you’ll need semi-sweet chocolate chips, which will be melted down to form a luscious, smooth chocolate layer over your treats. A small amount of additional peanut butter is also incorporated into the chocolate topping, creating a ganache-like consistency that’s easy to spread and sets up perfectly. These decadent dessert elements are what make this recipe stand out, transforming simple marshmallow treats into a truly gourmet experience. Consider other indulgent dessert ideas like our Peanut Butter Brownie Swirl Cookies for more inspiration.
Prepare Your Pan for Treats
Lining with Foil Made Easy
Proper pan preparation is a critical first step to ensure your easy peanut butter chocolate treats are easy to remove and cut once cooled. Lining your pan with aluminum foil is the simplest and most effective method. To do this, tear off a piece of foil that is long enough to cover the bottom of your pan and extend up over the sides by at least an inch or two. This overhang will serve as convenient handles later, allowing you to lift the entire batch of set treats out of the pan effortlessly. Press the foil gently into the corners and along the sides of the pan to create a snug fit. This ensures that the treats maintain their shape and that no sticky bits get trapped in the pan itself. Using foil also makes cleanup a breeze, saving you time and effort.
Greasing to Prevent Sticking
Even with foil, a little greasing goes a long way in preventing any sticking, especially with gooey marshmallow treats. Once your pan is lined with foil, lightly spray the foil with non-stick cooking spray or apply a thin layer of butter or margarine using a paper towel. Make sure to cover the bottom and all sides of the foil that will come into contact with the treat mixture. This creates a non-stick barrier, guaranteeing that your rice krispie squares will release cleanly and easily from the foil once they’ve set. Skipping this step can lead to frustration when trying to remove your decadent dessert from the pan, so take the extra minute to ensure a smooth, hassle-free transfer. Proper greasing contributes significantly to achieving perfect squares when it’s time to cut them.
Making the Marshmallow Base
Melting Butter and Marshmallows
The foundation of these delicious peanut butter chocolate treats lies in their perfectly melted marshmallow base. Begin by melting unsalted butter in a large pot over low heat. It’s crucial to use low heat to prevent the butter from browning too quickly, which can affect the flavor. Once the butter is mostly melted, add the mini marshmallows to the pot. Continue to stir constantly with a spoon or spatula as the marshmallows slowly melt. The goal is a smooth, creamy, and completely melted marshmallow mixture, free of any large lumps. This process takes a few minutes, but patience is key to achieving the ideal gooey consistency that will perfectly coat your crispy rice cereal. This forms the heart of your homemade rice krispie treats.
Stirring in Peanut Butter and Vanilla
Once your marshmallows are fully melted and smooth, remove the pot from the heat. This is a crucial step before adding the remaining ingredients to prevent them from overheating. Immediately stir in your creamy peanut butter. The residual heat from the melted marshmallows will help the peanut butter melt and incorporate seamlessly into the mixture. Stir vigorously until the peanut butter is fully combined, creating a wonderfully rich and fragrant base. Next, add the vanilla extract. Vanilla provides a beautiful aromatic depth that complements the peanut butter and chocolate flavors. Stir well to ensure the vanilla is evenly distributed. This smooth, flavorful base is now ready to welcome the crispy rice cereal, setting the stage for your irresistible peanut butter chocolate treats.
Adding Cereal and Peanut Butter Cups
Coating Rice Krispies Evenly
Now comes the exciting part: adding the crispy rice cereal! Pour the entire box of cereal into the large pot with your warm marshmallow and peanut butter mixture. Using a sturdy spoon or spatula, work quickly but gently to fold the cereal into the gooey base. The key here is to ensure every single flake of cereal is thoroughly coated. Start by scraping from the bottom of the pot, bringing the marshmallow mixture over the cereal, and continue folding until no dry patches of cereal remain. An even coating guarantees that each bite of your homemade rice krispie treats will be wonderfully chewy and crunchy, with that signature gooey texture. This step ensures the perfect structural integrity and flavor distribution for your peanut butter chocolate treats.
Gently Mixing in Mini Cups
Once the cereal is evenly coated, it’s time for the special decadent additions: the mini peanut butter cups. Scatter the mini peanut butter cups over the cereal mixture. Now, gently fold them into the mixture. The goal is to distribute them throughout the treats without crushing them too much. The warmth of the mixture will slightly soften the peanut butter cups, making them incredibly delicious when you bite into them. Avoid overmixing, as this can cause the chocolate and peanut butter from the cups to completely melt and disappear into the base. A gentle hand will ensure you get delightful pockets of whole or partially melted peanut butter cups in every square, adding an extra layer of texture and flavor to these easy peanut butter chocolate treats. For more sweet cravings satisfaction, consider other desserts on CarinaRecipes.
Pressing Treats into the Pan
Spreading Evenly, Not Too Tight
Transfer the warm, sticky cereal mixture into your prepared foil-lined and greased pan. Now, the trick to perfect rice krispie squares is in how you press them into the pan. Use a piece of wax paper or parchment paper to cover your hands, or lightly spray your hands with cooking spray to prevent sticking. Gently but firmly press the mixture evenly into the pan. The goal is to create a flat, consistent layer without compacting the treats too tightly. If you press too hard, your treats will become dense and hard, losing their desirable chewy texture. A light, even pressure is all that’s needed to spread the mixture from edge to edge, ensuring every square has the same delightful consistency. This method helps in achieving perfect squares that are both chewy and easy to bite into.
Creating the Chocolate Topping
Melting Chips with Peanut Butter
No easy peanut butter chocolate treats would be complete without a luscious chocolate topping. In a microwave-safe bowl, combine your semi-sweet chocolate chips with the additional creamy peanut butter. Microwave on high in 30-second intervals, stirring well after each interval, until the mixture is smooth and completely melted. Alternatively, you can use a double boiler method for a more controlled melt. The addition of peanut butter to the chocolate chips creates a slightly softer, more spreadable ganache-like topping that complements the base perfectly. It prevents the chocolate from becoming too hard or brittle once it cools, ensuring a pleasant texture with every bite. This smooth, rich topping is the crowning glory for your homemade rice krispie treats.
Spreading Over Your Easy Treats
Once your chocolate and peanut butter mixture is silky smooth, pour it evenly over the pressed rice krispie treat base in the pan. Use an offset spatula or the back of a spoon to gently spread the chocolate topping from edge to edge, creating a uniform layer. Take care not to press down too hard, as you don’t want to disturb the cereal base underneath. The goal is a beautiful, smooth chocolate surface that completely covers the treats. This step not only adds another layer of decadent flavor but also gives your peanut butter chocolate treats a polished, professional appearance. This quick snack recipe is almost complete, ready to chill and be enjoyed.
Cooling and Cutting Your Treats
Letting Chocolate Firm Up
After you’ve applied the chocolate topping, the most challenging part is waiting for it to set! For best results, place the pan in the refrigerator for at least 30 to 60 minutes. This allows the chocolate topping to firm up completely and the entire treat to cool down and set, making it much easier to cut into perfect squares. If you’re short on time, you can also place it in the freezer for about 15-20 minutes, but be careful not to let it freeze solid, as this can make the treats too hard. Patience during this cooling phase is essential for achieving clean cuts and a stable, enjoyable texture. Properly chilled treats will hold their shape beautifully.
How to Get Perfect Squares
Once the chocolate topping is firm, carefully lift the entire slab of treats out of the pan using the foil overhangs. Place it on a cutting board. Use a large, sharp knife to cut the treats. For clean, perfect squares, wipe your knife with a warm, damp cloth or run it under hot water and dry it between each cut. This helps prevent the chocolate from cracking and the sticky marshmallow from adhering to the blade. Start by trimming the edges if desired for a neater look, then cut the slab into rows, and then cross-cut into individual squares. Aim for consistent sizes for a professional presentation. These rice krispie squares are now ready to be enjoyed! For more baking and dessert ideas, visit CarinaRecipes on Pinterest.
Storing Your Easy Rice Krispie Treats
Keeping Them Fresh and Tasty
To ensure your easy peanut butter chocolate treats remain fresh and retain their delightful texture, proper storage is key. Once cut, store the squares in an airtight container at room temperature. Layer them between sheets of wax paper or parchment paper to prevent them from sticking to each other, especially if the chocolate topping is still slightly soft. They will stay fresh and delicious for up to 3-4 days this way. Avoid refrigerating them for extended periods, as the cold can cause the cereal to become hard and stale, and the chocolate topping might become too rigid. Keeping them at room temperature preserves their chewiness and prevents the chocolate from getting too firm, ensuring every bite is as good as the first.
Freezing for Later Enjoyment
These homemade rice krispie treats are also excellent candidates for freezing, allowing you to enjoy this decadent dessert much later. To freeze, individually wrap each square tightly in plastic wrap, then place them in an airtight freezer-safe container or a heavy-duty freezer bag. They can be frozen for up to 1-2 months. When you’re ready to enjoy them, simply take out the desired number of treats and let them thaw at room temperature for about 15-30 minutes. Freezing is a fantastic way to prepare a large batch of these quick snack recipe treats in advance for future events or to always have a delicious option on hand for those unexpected sweet cravings. You can find more easy prep treats and meal ideas on our Instagram page.
Tips for Perfect Peanut Butter Treats
Avoiding Sticky Situations
Working with sticky marshmallow treats can sometimes be a challenge, but a few simple tips can help you avoid sticky situations. When pressing the mixture into the pan, lightly spray your hands or a piece of wax paper with non-stick cooking spray. This prevents the marshmallow-cereal mixture from clinging to your hands, making it much easier to spread evenly without making a mess. Similarly, when cutting the treats, apply a thin coat of cooking spray to your knife or run it under hot water and wipe it clean between each cut. This keeps the blade from sticking and helps achieve those perfect squares without tearing the treats. These small steps make the entire process smoother and more enjoyable, leading to beautifully presented easy peanut butter chocolate treats every time.
Ensuring Even Ingredient Distribution
For a truly perfect rice krispie square, ensuring even ingredient distribution is paramount. When mixing the cereal into the marshmallow base, take your time to fold thoroughly until every piece of crispy rice cereal is coated. This prevents dry spots and ensures uniform chewiness. When adding the mini peanut butter cups, scatter them over the mixture before gently folding them in. Avoid dumping them all in one spot, which could lead to clusters. Distributing them evenly means every bite will contain a delightful piece of peanut butter cup, enhancing the overall flavor and texture. A well-distributed mixture ensures that each of your homemade rice krispie treats is equally delicious, fulfilling its promise as a decadent dessert. Consider pairing these with a heartier dish from our main course category for a full meal.
Easy Peanut Butter Chocolate Treat Twists
Ideas for Extra Flair
While these easy peanut butter chocolate treats are perfect as is, there are many ways to add extra flair and customize them to your liking. Consider drizzling extra melted chocolate or white chocolate over the finished squares for an artistic touch. A sprinkle of flaky sea salt on top of the chocolate layer can intensify the flavors and add a sophisticated edge. For an extra crunch, lightly toast some shredded coconut and sprinkle it over the chocolate before it sets. You could also mix in a handful of mini chocolate chips directly into the cereal mixture for even more chocolatey goodness throughout the base. These small additions can transform your simple dessert into an even more unique and decadent offering, perfect for any special occasion or just to treat yourself to a new variation of your favorite no-bake dessert. For another fun treat, try our Butterfinger Balls.
Adding Different Toppings or Nuts
Beyond drizzles and sea salt, incorporating different toppings or nuts can open up a world of new flavors for your homemade rice krispie treats. Try sprinkling chopped pretzels over the chocolate topping for a wonderful salty crunch that pairs beautifully with the sweet peanut butter and chocolate. Crushed potato chips can also offer an unexpectedly delicious sweet-and-savory combination. For nut lovers, chopped roasted peanuts, cashews, or even pecans can be folded into the cereal mixture or sprinkled on top of the chocolate. Just be mindful of any allergies when adding nuts. These additions provide both textural contrast and flavor variations, making each batch a new adventure. Experimenting with these ideas keeps this quick snack recipe exciting and ensures you can always whip up something unique for your sweet cravings.
Nutrition Facts for Each Treat
Understanding the Calories
When indulging in these easy peanut butter chocolate treats, it’s helpful to have an understanding of their nutritional content, particularly regarding calories. While these are a decadent dessert, knowing the approximate calorie count for each rice krispie square can assist with mindful enjoyment. The exact calories will vary based on the specific brands of ingredients used (e.g., type of peanut butter, chocolate chips, and marshmallows) and the size of your cuts. Generally, a standard-sized square can range from approximately 150 to 250 calories. This calorie density primarily comes from the sugars in the marshmallows and chocolate, and the fats in the butter and peanut butter. Enjoying these delicious treats in moderation is key, especially as part of a balanced diet. If you are tracking your intake, consider using an online nutrition calculator with your specific ingredient brands and serving size to get a more precise estimate, ensuring you’re fully informed about this satisfying, easy prep treat.