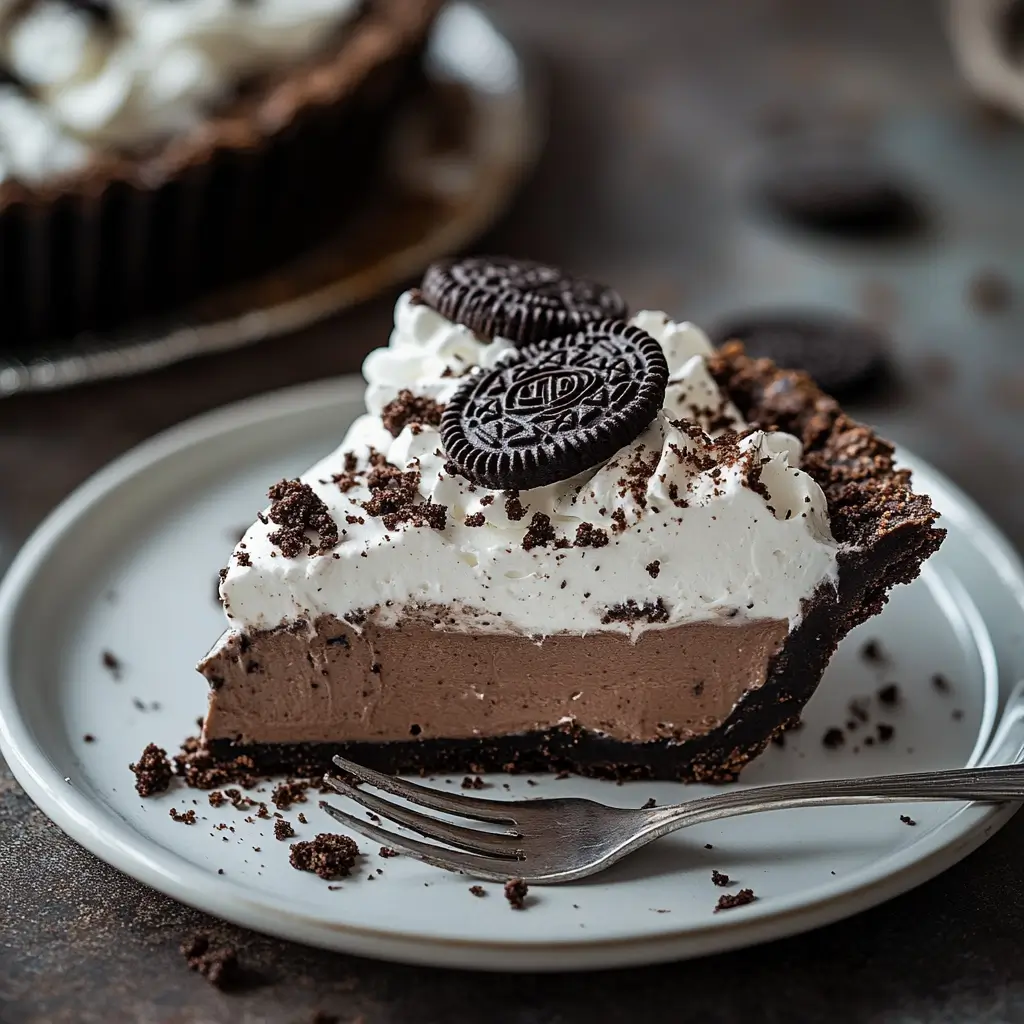
Easy No Bake Oreo Mud Pie is the perfect simple dessert for any occasion. This creamy, chocolatey treat features a crunchy Oreo crust, a rich cream cheese layer, and smooth chocolate pudding, all topped with whipped cream. It’s quick to prepare and a guaranteed crowd-pleaser for your family and guests, requiring no oven.
Key Takeaways
- Prepare a delicious no-bake Oreo mud pie with ease.
- Enjoy layers of crunchy crust, creamy filling, and rich chocolate.
- Learn quick shortcuts and fun variations for personalized treats.
- Perfect for making ahead and serving to delighted guests.
Making this pie is truly simple. No baking means less kitchen time. Layers come together quickly. Everyone loves this sweet indulgence. It’s a perfect dessert option.
Gather Ingredients for Your Pie
Crafting the perfect easy no bake Oreo mud pie begins with gathering all your components. This layered dessert relies on a few simple ingredients that, when combined, create an irresistible treat. You’ll appreciate how straightforward this recipe is, making it a fantastic option for any home baker, regardless of experience. Having everything measured and ready before you start will ensure a smooth preparation process, allowing you to enjoy the creative flow of assembling this delightful dessert.
For the Crunchy Oreo Crust
- About 35 Oreo cookies (whole package)
- 1/2 cup unsalted butter, melted
For the Creamy Filling
- 1 (8 ounce) package cream cheese, softened
- 1 cup powdered sugar
- 1 teaspoon vanilla extract
- 1 (8 ounce) container frozen whipped topping, thawed (e.g., Cool Whip)
For the Chocolate Pudding
- 2 (3.9 ounce) packages instant chocolate pudding mix
- 3 cups cold milk (dairy or non-dairy option)
For the Final Topping
- 1 (8 ounce) container frozen whipped topping, thawed (for topping)
- Extra crushed Oreo cookies or chocolate shavings for garnish
Make the Oreo Crust Easily
The foundation of your easy no bake Oreo mud pie is its signature crunchy crust. This step is incredibly simple and sets the stage for the luscious layers to come. Using Oreos ensures a rich, chocolatey base that perfectly complements the creamy fillings. You don’t need any special equipment beyond a food processor or a Ziploc bag and a rolling pin to achieve the desired crumb consistency. This ease of preparation is a key reason why this no-bake dessert is such a popular choice for quick sweet treats.
Crush Oreos and Melt Butter
Begin by crushing your Oreo cookies. You can place the entire cookies (filling included) into a food processor and pulse until fine crumbs form. If you don’t have a food processor, place the cookies in a large Ziploc bag, seal it, and use a rolling pin to crush them. The finer the crumbs, the more cohesive your crust will be. Once crushed, transfer the Oreo crumbs to a medium bowl. In a separate microwave-safe bowl, melt the unsalted butter until it’s completely liquid. Pour the melted butter over the Oreo crumbs and mix thoroughly with a spoon or your hands until all crumbs are moistened. The mixture should resemble wet sand, ready to be pressed.
Press Crust into Pie Dish
Take your buttered Oreo crumb mixture and transfer it into a 9-inch pie dish. Using the back of a spoon or your clean hands, firmly press the mixture evenly across the bottom and up the sides of the pie dish. Ensure the crust is compact and uniform; this helps it hold its shape once chilled. For an extra firm crust, you might briefly chill it in the refrigerator while you prepare the next layer. This simple technique creates a sturdy base for your delicious desserts, ensuring every slice is perfect.
Whip Up the Cream Cheese Layer
The creamy filling is where this Oreo mud pie truly shines, offering a delightful contrast to the crunchy crust. This layer is light, airy, and incredibly rich, providing a beautiful balance of flavors and textures. The combination of softened cream cheese with powdered sugar and vanilla creates a sweet, tangy base that perfectly complements the chocolate elements. Achieving a smooth consistency is crucial for this layer, ensuring a luxurious mouthfeel in every bite. It’s one of the defining features of this easy no-bake treat.
Beat Cream Cheese Until Smooth
In a large mixing bowl, add the softened cream cheese. It’s important for the cream cheese to be at room temperature; this allows it to beat smoothly without lumps. Using an electric mixer, beat the cream cheese on medium speed until it is light and fluffy, usually about 2-3 minutes. Gradually add the powdered sugar, continuing to beat until fully incorporated and the mixture is smooth and creamy. Stir in the vanilla extract, ensuring it’s well distributed. This forms the rich base of your creamy filling, setting the stage for the next light ingredient.
Fold in Whipped Topping Gently
Once your cream cheese mixture is smooth, it’s time to lighten it up. Gently fold in one container of thawed whipped topping (like Cool Whip) into the cream cheese mixture. Use a spatula and a gentle hand, lifting from the bottom of the bowl and folding over the top. The goal is to incorporate the whipped topping without deflating it, maintaining its airy texture. This step ensures your cream cheese layer remains light and fluffy, not dense, making the overall pie delightfully easy to eat. This particular technique is important for many creamy desserts.
Mix the Chocolate Pudding Layer
No Oreo mud pie would be complete without a decadent chocolate pudding layer. This component brings a deep, chocolatey flavor and a smooth, gelatinous texture that contrasts wonderfully with the cream cheese and Oreo crust. Using instant pudding mix makes this step incredibly quick and convenient, aligning perfectly with the “no-bake” philosophy of the dessert. The simplicity of preparing this layer contributes significantly to the overall ease of the recipe, ensuring a delicious result without any fuss.
Whisk Pudding and Cold Milk
In a separate large mixing bowl, combine the two packages of instant chocolate pudding mix with the cold milk. It’s crucial to use cold milk as it helps the pudding set faster and achieve the right consistency. Whisk continuously for about 2 minutes, or until the mixture begins to thicken. You’ll notice it changing from a watery liquid to a smooth, pudding-like texture quite rapidly. Avoid over-whisking, as this can sometimes lead to a less stable set. This quick step is key to getting a perfectly smooth and rich pudding for your pie.
Let Pudding Set Up Firmly
After whisking, allow the chocolate pudding mixture to sit undisturbed for about 5-10 minutes. During this time, the pudding will continue to firm up, achieving the desired thick consistency necessary for layering. It’s important for the pudding to be firm enough to hold its shape over the cream cheese layer without running. You can tell it’s ready when it no longer appears liquid and has a scoopable texture. This brief setting time is essential for the structural integrity of your impressive layered dessert. For another quick sweet, try these Peanut Butter Brownie Swirl Cookies.
Assemble Your Mud Pie Layers
The assembly process is where your easy no bake Oreo mud pie truly comes to life, as each prepared layer is carefully stacked to create a visually appealing and delicious dessert. This sequence ensures that each flavor and texture can be fully appreciated while also holding its structure. Precision in layering is not just for aesthetics; it also contributes to the pie’s overall stability and mouthfeel. Taking a little extra care here will result in a stunning and satisfying slice.
Cream Cheese Over Chilled Crust
Once your Oreo crust has had a chance to chill and firm up slightly (if you opted for that quick chill), it’s time to add the first creamy layer. Carefully spread the whipped cream cheese mixture evenly over the chilled Oreo crust. Use an offset spatula or the back of a spoon to ensure a smooth, uniform layer. This creamy, tangy layer provides a wonderful counterpoint to the rich chocolate flavors and crunchy base. Make sure to cover the entire crust to the edges for a consistent bite.
Pudding Over Cream Cheese Layer
Next, spoon the now-set chocolate pudding gently over the cream cheese layer. Take care not to disturb the layer beneath. Use your spatula to carefully spread the pudding evenly, extending to the edges of the pie dish. This creates the dark, rich, and smooth chocolate heart of your pie. The contrast between the light cream cheese and the denser pudding is both delightful in texture and appealing to the eye. This layered approach is characteristic of many popular no-bake desserts.
Top Your Pie with Whipped Cream
The final touch for your easy no bake Oreo mud pie is a generous layer of whipped cream, which adds an elegant finish and another dimension of creamy texture. This light and airy topping completes the dessert, making it visually appealing and even more indulgent. It’s also the perfect canvas for additional garnishes, allowing you to personalize your pie and make it extra special for serving. This step truly ties all the rich, sweet, and crunchy elements together.
Smooth Final Whipped Topping
Take your second container of thawed whipped topping and spread it evenly over the set chocolate pudding layer. You can use an offset spatula to create smooth, swooping patterns or simply spread it flat for a clean look. This layer should cover the entire top of the pie, acting as a soft, cloud-like blanket over the rich filling. Ensure the topping is evenly distributed from edge to edge for a beautiful presentation when sliced. This smooth finish prepares the pie for any final decorations.
Add Garnish and Crushed Oreos
To truly elevate your Oreo mud pie, add some garnish. The simplest and most fitting option is a sprinkle of extra crushed Oreo cookies over the whipped cream. You can also add chocolate shavings, mini chocolate chips, or a drizzle of chocolate syrup for extra visual appeal and flavor. This final touch not only makes the pie look more professional but also hints at the deliciousness within. It’s a fantastic way to customize your sweet treat and make it your own.
Chill This Easy No Bake Oreo Mud Pie
Chilling is perhaps the most critical step for any no-bake dessert, especially your easy no-bake Oreo mud pie. This period in the refrigerator allows all the layers to firm up, meld together, and develop their full flavors. Without adequate chilling, the pie might be too soft to slice neatly, and the textures won’t be as distinct or satisfying. Patience at this stage is rewarded with a perfectly set, deliciously refreshing pie that holds its shape beautifully.
Cover and Refrigerate Fully
Once your pie is fully assembled and garnished, gently cover the pie dish with plastic wrap. Ensure the plastic wrap doesn’t touch the whipped topping if you want to preserve its pristine appearance. Place the covered pie in the refrigerator for a minimum of 4-6 hours. For best results, it’s highly recommended to chill it overnight. This extended chilling time allows the cream cheese, pudding, and crust to thoroughly set and firm up, ensuring each layer is stable and distinct when sliced.
Get Layers to Set Firm
The chilling process is vital for the pie’s structural integrity. During this time, the butter in the crust re-solidifies, the gelatin in the pudding sets completely, and the cream cheese mixture firms up. This firming ensures that when you cut into the pie, you get clean, defined layers rather than a messy heap. A well-chilled pie is not only easier to serve but also tastes more refreshing and cohesive. This setting period is what makes this a true creamy, cold dessert, perfect for warmer weather or after a hearty meal like Easy Honey Garlic Chicken.
How to Serve Your Oreo Mud Pie
Serving your impeccably prepared easy no bake Oreo mud pie is the satisfying culmination of your efforts. Presenting it well enhances the dining experience, making each slice a true indulgence for your guests. The key is to ensure the pie is properly chilled and to use the right tools for cutting to maintain its beautiful layered structure. This attention to detail will impress everyone and make your dessert truly memorable.
Slice Neatly for Guests
To achieve clean, neat slices, remove the chilled pie from the refrigerator just before serving. Use a sharp knife that has been run under hot water and wiped dry between each slice. This technique helps the knife glide through the layers without sticking or dragging, resulting in perfectly defined portions. Serve immediately to enjoy the cold, creamy textures. You can offer additional crushed Oreos or chocolate syrup on the side for those who want an extra touch of sweetness. This pie is perfect alongside any meal, even a simple ground turkey and peppers dish.
Make Ahead Your Easy No Bake Mud Pie
One of the many benefits of an easy no bake Oreo mud pie is its excellent make-ahead potential. This feature makes it an ideal dessert for parties, potlucks, or simply having a delicious sweet treat ready for a busy week. Preparing it in advance not only saves time on the day of your event but also allows the flavors to deepen and the layers to fully set, resulting in an even more satisfying dessert. This flexibility adds to its appeal as a go-to recipe.
Store in the Refrigerator
Your finished Oreo mud pie can be stored in the refrigerator, covered with plastic wrap, for up to 3-4 days. Ensure it’s tightly covered to prevent it from absorbing any odors from other foods in the fridge and to keep the whipped topping fresh. The flavors often meld and improve over the first day, so making it the day before serving is often ideal. Keeping it chilled helps maintain the firm texture of the layers, ready for whenever a craving strikes or guests arrive.
Freeze for Longer Storage
For longer storage, this pie freezes beautifully. After the initial chilling, wrap the entire pie (or individual slices) tightly in plastic wrap, then an additional layer of aluminum foil. You can freeze the pie for up to 1-2 months. When you’re ready to serve, transfer the frozen pie to the refrigerator to thaw for several hours or overnight. While the texture might be slightly softer after thawing, it will still be a wonderfully delicious and refreshing dessert, especially on a hot day.
Easy No Bake Oreo Mud Pie Recipe Shortcuts
While the easy no bake Oreo mud pie recipe is already simple, there are fantastic shortcuts you can take to make it even quicker and more convenient. These time-saving tips are perfect for those extremely busy days or when you need a delicious dessert in a flash. Don’t hesitate to adapt the recipe to fit your schedule and preferences, proving that making something extraordinary doesn’t always require extensive effort. These adaptations ensure everyone can enjoy a homemade-tasting treat with minimal fuss.
Use a Store-Bought Crust
To save a significant amount of time, consider using a pre-made, store-bought Oreo crust or a graham cracker crust. These are readily available in most grocery stores and eliminate the need to crush cookies and melt butter. While homemade crusts have a certain charm, a good quality store-bought crust provides a perfectly acceptable and delicious base, allowing you to jump straight into preparing the creamy layers. This shortcut is a lifesaver when you’re short on time but still want to impress.
Change Pudding Flavors
Don’t limit yourself to just chocolate pudding! This recipe is incredibly versatile. Experiment with different instant pudding flavors to create unique variations of your mud pie. Vanilla, white chocolate, butterscotch, or even a combination of flavors can transform the dessert. Imagine a butterscotch mud pie or a white chocolate version! This simple change allows for endless customization, ensuring you can cater to various taste preferences or holiday themes with minimal extra effort.
Fun Variations to Try
The adaptability of the easy no bake Oreo mud pie extends beyond simple shortcuts; it also lends itself beautifully to creative variations. Experimenting with different additions and toppings can transform this classic into a new and exciting sweet treat every time. These variations allow you to tailor the pie to seasonal ingredients, personal preferences, or specific dietary needs, making it a versatile staple in your dessert repertoire. Unleash your inner pastry chef and have fun with these ideas!
Drizzle with Caramel Sauce
For a decadent twist, try drizzling caramel sauce over the chocolate pudding layer before adding the whipped topping, or even over the finished pie. The salty-sweet notes of caramel pair exceptionally well with chocolate and Oreo, adding another layer of complex flavor. You can use a store-bought caramel sauce for convenience or make your own for an extra gourmet touch. A generous drizzle will elevate the pie, making it even more indulgent and appealing to those who love a rich, complex flavor profile.
Add Different Toppings
Beyond crushed Oreos, the possibilities for toppings are virtually endless. Consider adding:
- Mini chocolate chips or chocolate curls for added texture.
- Chopped nuts (like pecans or walnuts) for a nutty crunch.
- Fresh berries (raspberries or sliced strawberries) for a touch of fruitiness and color.
- A sprinkle of flaky sea salt to enhance the chocolate flavor.
- Candy bar pieces (e.g., chopped Reese’s, Snickers) for an ultimate indulgence.
These toppings allow you to customize each slice or the entire pie, making it a truly personalized dessert. For more creative ideas, visit our Instagram!
Enjoy Your Easy No Bake Oreo Mud Pie
Finally, the moment has arrived to savor your creation: the spectacular easy no bake Oreo mud pie. This dessert, born from simple steps and common ingredients, culminates in a truly delicious and satisfying experience. Whether you’ve followed the recipe to the letter or experimented with a few clever variations, the outcome is a testament to the joy of easy, homemade treats. Gather your friends and family, because this pie is designed to be shared and celebrated.
From its satisfyingly crunchy crust to its layers of creamy filling and rich chocolate pudding, capped with a fluffy whipped topping, every bite is a journey of delightful textures and flavors. This pie proves that you don’t need an oven or hours of complicated work to create something truly special. It’s perfect for any occasion – a casual weeknight treat, a festive gathering, or just because you deserve a moment of sweet indulgence. So, go ahead, cut a generous slice, and relish the pure, unadulterated pleasure of your very own no-bake masterpiece. You’ll find yourself coming back to this simple, quick recipe again and again.