Chocolate Cherry Cookies are a fantastic way to brighten any day, offering a perfect blend of rich chocolate and tart cherries. This recipe provides all the steps needed for these delightful treats. Learn how to achieve perfect texture and incredible flavor right from your own kitchen.
Key Takeaways
- Cream butter and sugar properly for light, fluffy cookies.
- Do not overbake to ensure soft, chewy centers.
- Choose high-quality chocolate and dried cherries for superior flavor.
- Accurate measurement is crucial for consistent baking results.
- Cool cookies correctly for the best texture and freshness.
Baking these cookies brings such joy. Simple steps lead to delicious rewards. Everyone will appreciate your effort. Share these treats with loved ones. Enjoy every sweet bite!
Welcome to Chocolate Cherry Cookie Joy
Why you’ll love these cookies
These chocolate cherry cookies are more than just a dessert; they are a delightful experience for your taste buds. Imagine a perfectly baked cookie, soft and chewy on the inside, with a slight crispness around the edges. Each bite offers a harmonious combination of deep, rich chocolate and bright, tart cherries, making it an irresistible treat. They’re relatively easy to prepare, making them an ideal project for both novice bakers and seasoned pros. The aroma alone, as they bake, will fill your home with warmth and happiness, promising a truly memorable dessert recipe. Beyond their incredible taste, these cookies are perfect for sharing, whether at a family gathering, a potluck, or simply as a thoughtful gift for a friend. Their vibrant flavors and appealing appearance make them a standout addition to any cookie platter.
A sweet and tangy treat
The magic of these cookies lies in the exquisite balance between sweet and tangy. The inherent sweetness of the cookie dough, often enhanced by premium chocolate chips, creates a comforting base. This sweetness is beautifully complemented by the intense tanginess of dried cherries. This contrast isn’t just a flavor profile; it’s a culinary journey. The tartness cuts through the richness of the chocolate, ensuring that each bite is vibrant and prevents the cookie from being overly sweet. It’s this delightful interplay that keeps you reaching for another, making them a truly unique and satisfying sweet tangy treat. You might even want to try our Blueberry Muffin Cookies with Streusel for another fruity cookie experience. This combination of sweet and tart is often sought after in baking, as it creates a more complex and engaging flavor that lingers pleasantly on the palate.
Ingredients for Decadent Cookie Success
Achieving truly decadent success with your chocolate cherry cookies starts with selecting the right ingredients. High-quality components not only enhance the flavor but also contribute significantly to the texture and overall enjoyment of your baked goods. Think of each ingredient as a building block; the stronger the blocks, the sturdier and more delicious your cookie will be. Paying attention to these details will set your cookies apart, making them a memorable treat for anyone who tries them.
Wet ingredients you will need
For the foundation of your cookie dough, you’ll need a few key wet ingredients. Unsalted butter, softened to room temperature, is crucial for proper creaming. Large eggs bind everything together, adding moisture and richness. A splash of vanilla extract elevates the flavor profile, bringing warmth and depth to the chocolate and cherry notes. Ensure your eggs are also at room temperature for better emulsification with the butter and sugar, resulting in a smoother, more uniform dough.
Dry ingredients to combine
The dry ingredients form the structure of your cookies. All-purpose flour provides the necessary bulk, while a touch of baking soda helps them rise and achieve that soft, chewy texture. A pinch of salt is vital for balancing the sweetness and enhancing all the other flavors. Always sift your dry ingredients together to eliminate lumps and ensure even distribution throughout the dough. This simple step can prevent pockets of flour or baking soda, leading to a more consistent cookie.
The chocolate and cherry stars
The true stars of these cookies are, of course, the chocolate and cherries. Opt for good quality semi-sweet chocolate chips or chopped dark chocolate for a rich, intense flavor. The better the chocolate, the more luxurious your cookies will taste. For the cherries, dried tart cherries are preferred over sweet ones, as their tanginess provides that perfect counterpoint to the chocolate. Make sure your dried cherries are plump and fresh. If they seem a bit dry, you can rehydrate them slightly in a little warm water or cherry juice for a few minutes before draining thoroughly. This attention to detail with your main flavor components will truly make these cookies shine, creating a delightful experience with every bite.
Mixing Your Chocolate Cherry Cookie Dough
Properly mixing your cookie dough is just as important as the quality of your ingredients. Each step in the mixing process contributes to the final texture and consistency of your chocolate cherry cookies. Rushing through these stages or not paying attention to the details can result in dense, crumbly, or unevenly baked cookies. Take your time, follow the instructions carefully, and you’ll be on your way to a perfect batch of these delightful treats.
How to cream butter and sugars
Creaming butter and sugars is the first critical step. In a large bowl, using an electric mixer, beat the softened unsalted butter with granulated sugar and brown sugar until the mixture is light, fluffy, and pale in color. This process incorporates air into the butter, which creates pockets that expand during baking, resulting in a lighter, more tender cookie. Scrape down the sides of the bowl frequently to ensure everything is evenly combined. This can take several minutes, but it’s a vital step for achieving perfect texture.
Adding wet to dry ingredients
Once your butter and sugars are creamed, beat in the eggs one at a time, ensuring each is fully incorporated before adding the next. Stir in the vanilla extract. In a separate bowl, whisk together your dry ingredients (flour, baking soda, and salt). Gradually add the dry ingredients to the wet ingredients, mixing on low speed until just combined. Be careful not to overmix at this stage; overmixing can develop the gluten in the flour too much, leading to tough cookies. Stop mixing as soon as no streaks of flour remain.
Folding in cherries and chocolate
The final step in mixing is to gently fold in your dried tart cherries and chocolate chips. Use a spatula to incorporate them evenly throughout the dough. You want them distributed well, so every bite gets a taste of both chocolate and cherry. Again, avoid overmixing. A gentle folding motion ensures the cherries and chocolate chips are incorporated without deflating the air you’ve already worked into the dough. This careful approach helps maintain the integrity of the ingredients and the delicate structure of your Peanut Butter Brownie Swirl Cookies or these chocolate cherry ones.
Baking Your Delicious Chocolate Cherry Cookies
Baking cookies is where all your hard work comes to fruition, transforming simple dough into golden, fragrant treats. Precision in baking ensures that your chocolate cherry cookies achieve that ideal balance of crisp edges and a soft, chewy center. From setting the right oven temperature to knowing when they’re perfectly done, each detail contributes to the ultimate enjoyment of these homemade delights.
Oven temperature settings
Preheat your oven to 375°F (190°C). An accurately preheated oven is crucial for consistent baking. If your oven runs hot or cold, consider using an oven thermometer to verify its temperature. Baking at the correct temperature ensures that the cookies spread properly and bake evenly. Place your oven rack in the middle position for optimal heat distribution, which helps prevent scorching the bottoms or under-baking the tops of your cookies. This consistency is a hallmark of good home baking.
Portioning the cookie dough
Using a cookie scoop (about 1.5 to 2 tablespoons) is the best way to portion your dough for uniform size. Evenly sized cookies bake more consistently, ensuring that every cookie on the baking sheet is ready at the same time. Place the dough balls about 2 inches apart on a baking sheet lined with parchment paper or a silicone baking mat. This spacing allows for proper airflow and prevents the cookies from spreading into each other. You can also lightly flatten the tops of the dough balls for a more classic cookie shape, though it’s not strictly necessary.
Signs cookies are ready
Bake for 9-12 minutes, or until the edges are golden brown and the centers are still slightly soft. The cookies will continue to set as they cool on the baking sheet. A key to preventing dry, hard cookies is to remove them from the oven when they still look a little underdone in the very center. They should be just firm enough to hold their shape, but not completely hard. This slight underbaking is what gives them that desirable chewy texture. Trust your instincts and the visual cues; every oven is different, so baking times can vary slightly.
Tip 1: Creaming for Perfect Texture
Achieving a truly perfect texture in your chocolate cherry cookies begins with one fundamental step: proper creaming of butter and sugar. This isn’t just about mixing ingredients; it’s about incorporating air, which is essential for light and tender cookies. Think of it as building the internal structure of your cookie even before it enters the oven. Overlooking this detail can lead to dense, flat cookies, so take your time and do it right.
Softened butter is key
The importance of softened butter cannot be overstated. Butter that is too cold will not cream properly, resulting in a lumpy mixture that struggles to incorporate air. Conversely, butter that is too warm or melted will separate, leading to greasy cookies with an undesirable texture. The ideal consistency for softened butter is when it yields slightly to gentle pressure, similar to the feel of room-temperature cream cheese. If your butter is too cold, you can cut it into smaller pieces and let it sit for 20-30 minutes, or gently warm it in the microwave for a few seconds at a time, being careful not to melt it.
Cream until light and fluffy
Once your butter is perfectly softened, combine it with your sugars (granulated and brown) in a large mixing bowl. Using an electric mixer, beat on medium-high speed for 3-5 minutes, or until the mixture becomes significantly lighter in color and visibly fluffy. During this process, millions of tiny air pockets are created within the butter and sugar mixture. These air pockets expand during baking, contributing to the cookie’s rise and creating a tender crumb. Regularly scrape down the sides of the bowl to ensure all ingredients are thoroughly combined. This step is a cornerstone of great home baking, significantly impacting the final product’s chewiness and overall appeal.
Tip 2: Do Not Overbake Cookies
One of the most common pitfalls in home baking, especially with cookies, is overbaking. It’s a fine line between perfectly baked and dried out, so paying close attention during the final minutes in the oven is crucial. The goal for these chocolate cherry cookies is a soft, chewy interior with slightly crisp edges, a texture that can be easily ruined by just a few extra minutes of heat. Avoiding this mistake ensures your cookies remain moist and enjoyable.
Prevents dry, hard cookies
Overbaking is the primary culprit behind dry, hard cookies. When cookies bake for too long, all the moisture evaporates, leaving them brittle and less flavorful. The sugars caramelize excessively, leading to a burnt taste rather than a pleasant toastiness. This is particularly true for cookies with a high fat content like butter cookies, where prolonged heat can make them greasy and crumbly instead of rich and tender. Removing them at the right moment preserves their internal moisture, which translates to a wonderfully soft and chewy bite. Remember that cookies continue to cook for a short while even after being removed from the oven due to residual heat, so pulling them out slightly underdone is often the key to perfection.
Look for golden edges
The best indicator that your chocolate cherry cookies are ready is their appearance, specifically around the edges. When they are done, the edges should be lightly golden brown and appear set. The centers, however, should still look slightly soft and perhaps even a little puffy. It might feel counterintuitive to take them out when the center still seems underbaked, but this is precisely what yields that desirable chewy texture once they’ve cooled. If you wait until the centers are fully firm in the oven, they will be overbaked by the time they cool completely. Different ovens vary, so it’s wise to start checking your cookies a minute or two before the minimum suggested baking time. This attention to visual cues helps ensure a perfectly baked batch every time. For other dessert ideas, check out our Instagram for more Carina Recipes inspiration.
Tip 3: Select Quality Chocolate Chips
The flavor of your chocolate cherry cookies heavily relies on the quality of your chocolate chips. Just as a chef selects premium ingredients for a gourmet meal, a baker should choose good chocolate for superior results. Subpar chocolate can melt unevenly, taste waxy, or lack the deep, nuanced flavor that truly elevates a cookie. Investing a little more in better chocolate makes a significant difference in the final product, transforming a good cookie into an exceptional one.
Dark chocolate for richness
For a truly rich and complex flavor profile, consider using dark chocolate chips. Varieties like semi-sweet or bittersweet chocolate with a cocoa percentage between 60-75% work beautifully. Dark chocolate offers a deeper, less sugary flavor that provides an excellent contrast to the tartness of the cherries and the sweetness of the cookie dough. Its robust notes add an element of sophistication and a satisfying intensity to each bite. If you’re a fan of rich chocolate, this is definitely the way to go. The higher cocoa content also provides a smoother melt and a more pronounced cocoa aroma, enhancing the overall sensory experience.
Other chocolate varieties
While dark or semi-sweet chocolate is often recommended, don’t hesitate to experiment with other varieties to suit your preference. Milk chocolate chips will yield a sweeter, creamier cookie, which can be lovely if you prefer a milder chocolate flavor. White chocolate chips can also be used for a different aesthetic and a sweeter, vanilla-forward taste, though they might not provide the same contrast to the cherries. You could even use a combination of different chocolate types for a multi-layered chocolate experience. Chopped chocolate bars, rather than chips, can also create beautiful puddles of melted chocolate within the cookie, adding to its visual and textural appeal. Explore what you love for your ultimate Carina Recipes baking satisfaction.
Tip 4: Measure Ingredients for Best Results
In baking, precision is paramount. Unlike cooking, where a pinch of this or a dash of that often works, baking is a science. Accurate measurement of ingredients is critical for achieving consistent and best results, especially for delicate items like chocolate cherry cookies. Even slight discrepancies can alter the dough’s consistency, affecting everything from spread to texture and flavor. Therefore, treat your measuring tools with respect and your ingredients with precision.
Use proper measuring tools
Ensure you are using the correct tools for measurement. Liquid measuring cups, which have a spout and markings at the top, are designed for liquids, allowing you to read the measurement at eye level. Dry measuring cups and spoons, on the other hand, are meant for dry ingredients. Using liquid cups for dry ingredients or vice versa can lead to inaccurate measurements. For flour and other dry ingredients, a kitchen scale is often considered the most accurate method, as it accounts for variations in how ingredients are packed or sifted. A scale removes guesswork and ensures consistency, which is particularly beneficial for complex recipes or when trying to replicate a perfect batch.
Level off dry ingredients
When measuring dry ingredients like flour, sugar, or cocoa powder with dry measuring cups, it’s essential to level them off properly. Spoon the ingredient into the measuring cup until it’s overflowing, then use the straight edge of a knife or a flat spatula to scrape off the excess, ensuring the top is perfectly flat. Avoid packing down flour into the cup, as this can add significantly more flour than intended, leading to dry, dense cookies. Similarly, for ingredients like brown sugar, pack it firmly into the cup so it holds its shape when inverted. This careful approach to measuring guarantees that your dough will have the correct balance of wet and dry components, leading to moist, tender, and perfectly structured chocolate cherry cookies every time.
Tip 5: Proper Cooling for Chewy Cookies
The cooling process is often underestimated but plays a crucial role in developing the final texture of your chocolate cherry cookies. Rushing to transfer them or cooling them improperly can result in cookies that are either too fragile or lose their desirable chewy cookies quality. Patience during this stage is key to locking in moisture and allowing the cookie structure to set perfectly, ensuring that every bite is as delicious as intended. This is part of perfecting your home baking skills.
Cool on baking sheet first
Once your cookies are out of the oven, resist the urge to immediately transfer them. Allow them to cool on the hot baking sheet for 5-10 minutes. During this time, the residual heat from the baking sheet continues to cook the cookies gently, allowing their centers to firm up without becoming overbaked. This gradual cooling on the sheet also helps to set the structure of the cookie, making them less fragile and easier to handle. Attempting to move them too soon can cause them to break apart, especially while they are still warm and delicate.
Transfer to wire rack
After the initial cooling period on the baking sheet, carefully transfer the cookies to a wire rack to cool completely. A wire rack allows air to circulate around all sides of the cookies, preventing condensation from forming on the bottom, which can make them soggy. Cooling on a rack ensures that the cookies achieve a consistent texture throughout – firm enough to handle, yet still soft and chewy in the center. Make sure to space them out on the rack so air can flow freely. This complete cooling is essential before storing them, as warm cookies can create condensation in an airtight container, leading to a loss of crispness and freshness.
Tip 6: Store Cookies to Keep Fresh
Once you’ve gone to the effort of baking a batch of delicious chocolate cherry cookies, proper storage is essential to keep them fresh and maintain their delightful texture. Incorrect storage can lead to stale, hard, or even soggy cookies, quickly diminishing their appeal. Follow these simple tips to ensure your cookie joy lasts as long as possible, preserving that freshly baked taste and chewiness for days to come. A well-stored cookie is always a welcome treat.
Use an airtight container
The most crucial step in keeping your cookies fresh is to store them in an airtight container. Exposure to air is the primary cause of staleness. An airtight container prevents moisture loss, which keeps the cookies soft and chewy, and also protects them from absorbing unwanted odors from the pantry or refrigerator. Glass containers with rubber-sealed lids or high-quality plastic containers work best. Ensure the container is completely dry before adding the cookies to prevent any moisture buildup. For extra freshness, you can place a slice of bread or an apple wedge in the container with the cookies; they will absorb the moisture from the bread/apple, keeping the cookies soft (just remember to replace it daily).
Store at room temperature
For most cookies, including these chocolate cherry delights, storing them at room temperature is ideal. Place the airtight container in a cool, dry place away from direct sunlight. Refrigerating cookies can often dry them out and alter their texture, making them harder. If you need to store them for longer than a few days, freezing is a better option. Layer the cooled cookies between sheets of parchment paper in an airtight freezer-safe container. They can be frozen for up to 2-3 months and thawed at room temperature whenever a craving strikes. This method helps preserve the sweet tangy treat quality of your cookies for an extended period.
Tip 7: Get Creative with Cherry Varieties
While dried tart cherries are the classic choice for these cookies, don’t limit your home baking creativity! The world of dried fruits offers a fantastic array of flavors and textures that can transform your chocolate cherry cookies into something new and exciting. Experimenting with different cherry varieties or other dried fruits allows you to personalize this recipe and cater to various taste preferences, ensuring every batch is a delightful surprise.
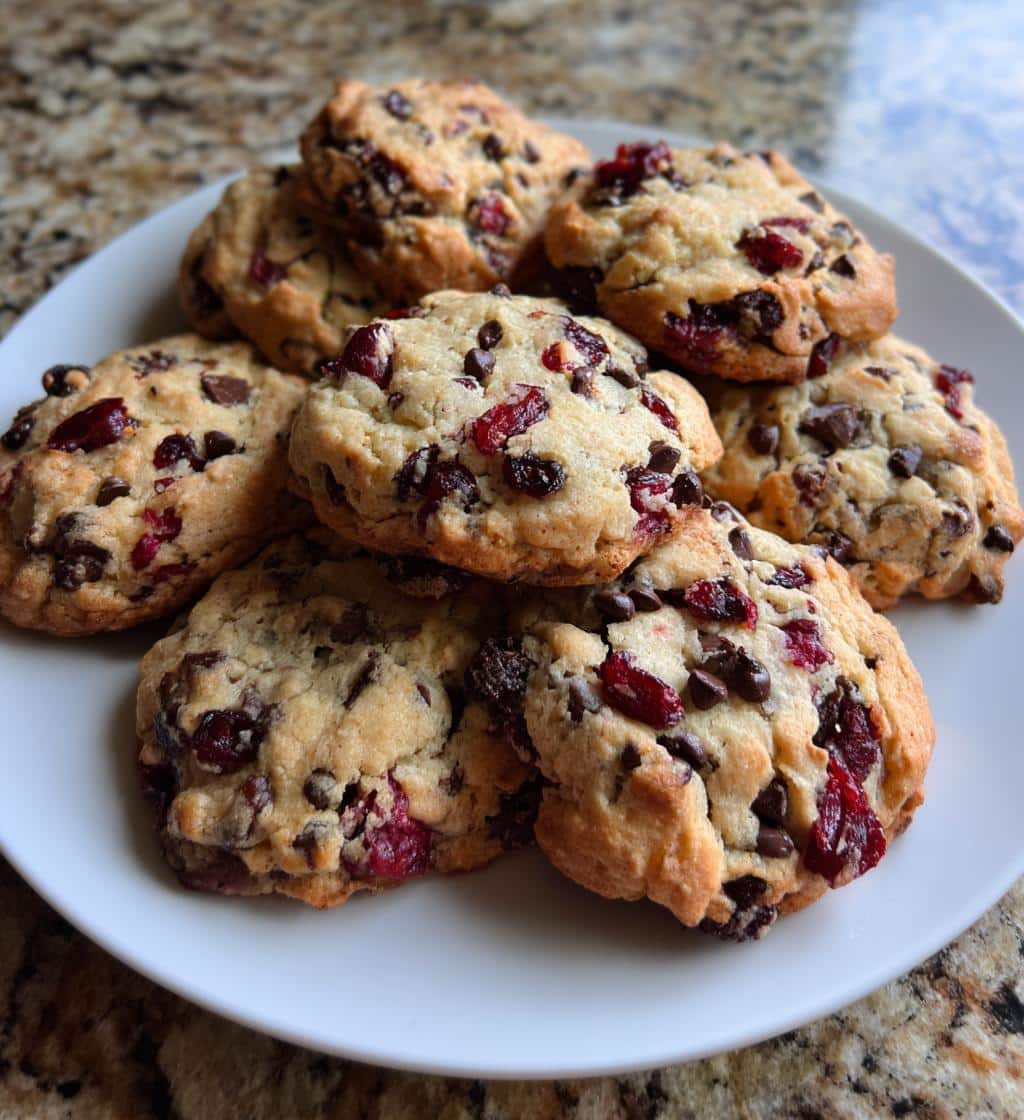
Use dried cranberries instead
If you love the sweet-tart dynamic but don’t have dried cherries on hand, or simply want a different twist, dried cranberries make an excellent substitute. Dried cranberries offer a similar tangy punch that beautifully complements rich chocolate. They also provide a vibrant red color, making your cookies visually appealing. When using cranberries, you might find them slightly more tart than some dried cherries, which can create an even brighter flavor profile. This substitution is a simple way to introduce variety without straying too far from the original concept, maintaining that beloved sweet tangy treat balance.
Try different dried fruits
Beyond cranberries, the possibilities are vast. Consider dried blueberries for a milder, sweeter fruit note, or chopped dried apricots for a more intense, slightly chewy texture and a distinct fruity tang. For a tropical twist, finely chopped dried mango or pineapple could introduce an exotic sweetness. Just ensure the dried fruits are chopped to a size similar to that of the cherries or chocolate chips for even distribution in the dough. Remember to account for the sweetness levels of different fruits; if using very sweet dried fruits, you might slightly reduce the sugar in the cookie dough. This encourages you to make these cookies truly your own, playing with flavors and textures to discover your next favorite dessert recipe. The key is to select dried fruits that provide a good textural contrast and a complementary flavor to the chocolate.
Nutrition Facts for Your Cookies
Understanding the nutrition facts for your chocolate cherry cookies can be helpful, especially if you’re mindful of your dietary intake or tracking calories. While these cookies are certainly a delicious indulgence, being aware of their caloric and macronutrient content allows you to enjoy them responsibly as part of a balanced diet. Homemade treats often offer the benefit of knowing exactly what ingredients go into them, providing more control over their nutritional profile. This section provides a general overview, keeping in mind that exact figures can vary based on ingredients and portion sizes.
Calories per serving
A single chocolate cherry cookie typically contains anywhere from 150 to 250 calories, depending on its size and the specific ingredients used. Factors such as the amount of butter, sugar, and the type of chocolate chips significantly influence the caloric count. Using full-fat butter and generous amounts of sugar and chocolate will lean towards the higher end of this range. If you are looking to manage calorie intake, you might consider making smaller cookies or slightly reducing the amount of chocolate chips, though this can alter the flavor intensity. The benefit of home baking is that you have the flexibility to adjust the recipe to better suit your dietary preferences.
Sugar and fat content
These cookies, like most sweet baked goods, will have a notable sugar and fat content. Each cookie can contain approximately 15-25 grams of sugar, derived from granulated sugar, brown sugar, and the chocolate and dried cherries themselves. Fat content generally ranges from 8-15 grams per cookie, primarily from butter and chocolate. While these numbers might seem high, remember that cookies are often enjoyed as an occasional treat rather than a daily staple. You can subtly influence these numbers by choosing dark chocolate with less added sugar, or by opting for reduced-fat butter (though this may affect texture). Balance is key: enjoy your homemade treats in moderation, perhaps alongside a lighter meal or as a small indulgence after a healthy snack. This mindful approach ensures you can savor the decadent success of your baking without guilt. For similar indulgent dessert recipes, check out our collection.