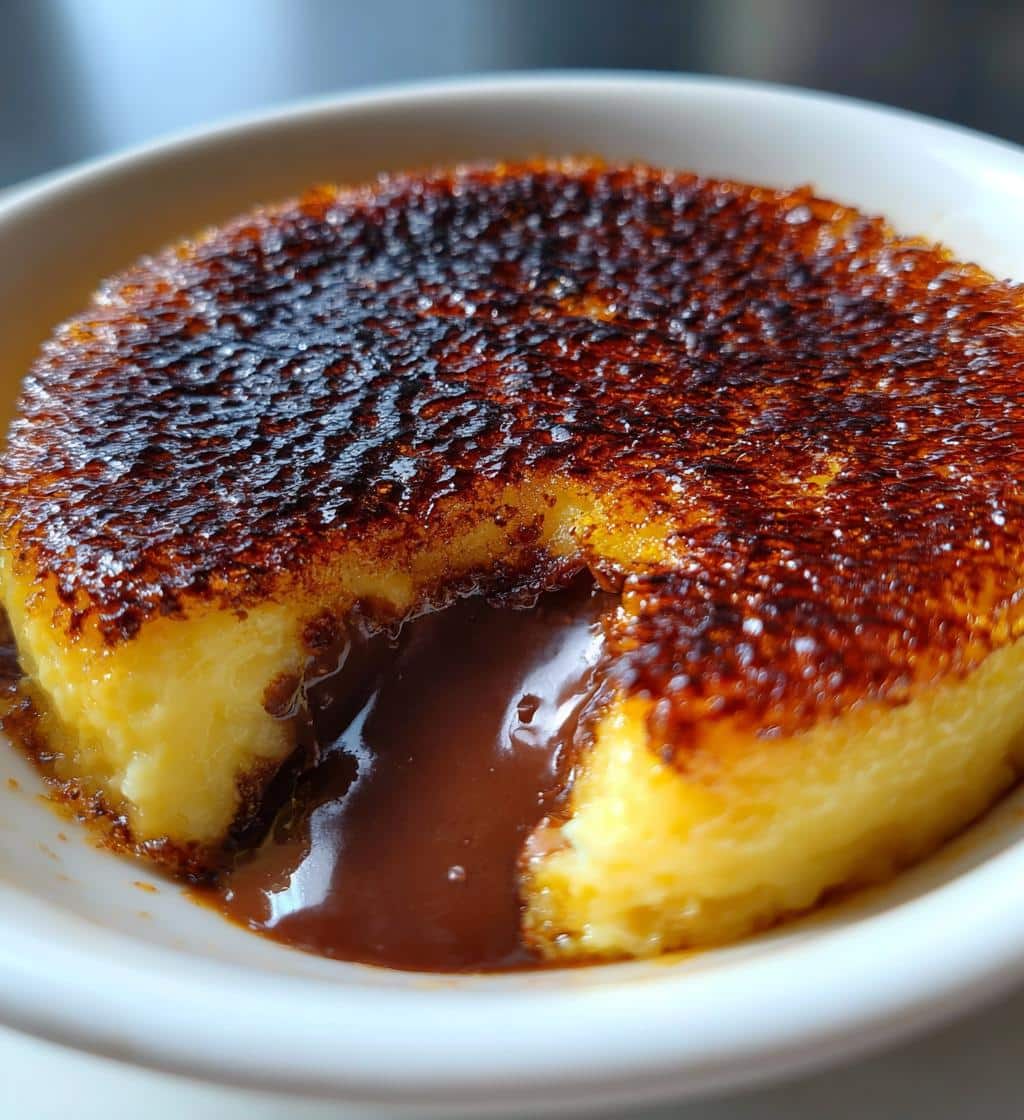
Chocolate Crème Brûlée offers a decadent twist on a classic dessert. This recipe guides you through creating a rich, silky dark chocolate custard with a signature caramelized sugar topping. Impress your guests with this elegant treat, perfect for any special occasion. Get ready to bake a truly irresistible indulgence.
Key Takeaways
- Achieve a silky dark chocolate custard texture.
- Master the delicate process of tempering eggs.
- Learn perfect baking in a water bath.
- Caramelize your sugar topping safely with a torch.
- Understand the importance of complete cooling for optimal results.
This dessert is truly a simple pleasure. Rich chocolate flavors blend beautifully. A crisp sugar shell adds delightful contrast. Cooling enhances its creamy texture. This recipe ensures sweet success.
Gather Your Chocolate Crème Brûlée Ingredients
Creating a truly remarkable chocolate crème brûlée begins with selecting high-quality ingredients. The foundation of this luxurious dessert relies on a delicate balance of rich dairy, intense chocolate, and fresh eggs. Starting with the best components ensures a superior flavor and texture that will impress any palate. Pay close attention to the quality of your dark chocolate, as it forms the heart of this decadent custard. Fresh eggs are also paramount for achieving that perfect, silky smooth consistency.
Cream, Milk, and Dark Chocolate
For the quintessential creamy texture, you’ll need heavy cream and whole milk. The cream provides richness, while a touch of milk lightens the consistency slightly without sacrificing decadence. The star of the show, however, is the dark chocolate. Opt for good quality dark chocolate wafers or a bar with at least 60-70% cocoa solids. This intensity ensures a deep, complex chocolate flavor that isn’t overly sweet. Finely chop the chocolate if using a bar to ensure it melts smoothly and incorporates fully into the warm cream, preventing any clumps that could mar the custard’s perfection. Consider exploring more delightful desserts on our site, like the Quick Italian Cream Cake, for another sweet treat.
Eggs, Sugars, and Vanilla Extract
The custard’s structure and silkiness come from fresh egg yolks. Separate them carefully from the whites, as even a tiny amount of white can affect the custard’s set. Granulated sugar provides sweetness and helps stabilize the egg yolks, contributing to the smooth texture. A hint of vanilla extract, preferably pure, rounds out the flavors, enhancing the chocolate without overpowering it. Some recipes might call for brown sugar in the custard itself, but for the classic, granulated sugar is typically preferred, reserving brown sugar for the iconic caramelized topping. Ensure all your ingredients are at room temperature for optimal mixing and tempering results.
Crafting Your Crème Brûlée Chocolate Custard
The art of making chocolate crème brûlée lies in patiently and precisely preparing the custard. This stage is where the magical transformation of simple ingredients into a rich, velvety dessert truly begins. Taking care with each step ensures a custard that is perfectly smooth, evenly flavored, and free from any unwanted textures. The tempering process, in particular, is critical for achieving that signature silky consistency without scrambling the eggs.
Gently Heating Cream and Chocolate
In a medium saucepan, combine your heavy cream and whole milk. Heat this mixture over medium-low heat until it just begins to simmer around the edges, but do not allow it to boil. Remove the pan from the heat and add your finely chopped dark chocolate. Let it sit undisturbed for a few minutes to allow the residual heat to melt the chocolate. Then, gently whisk until the chocolate is completely smooth and fully incorporated into the cream mixture. This creates a rich, fragrant chocolate base that will be the heart of your custard. Avoid high heat to prevent scorching the chocolate or dairy.
Whisking Yolks with Granulated Sugar
While your chocolate cream cools slightly, in a separate bowl, whisk together the egg yolks and granulated sugar. Whisk vigorously until the mixture becomes pale yellow and slightly thickened. This process, known as “ribboning,” means that when you lift the whisk, the mixture falls back into the bowl in a ribbon-like stream, holding its shape for a few seconds before dissolving. This aeration is important for the final texture of the custard and helps the sugar dissolve properly, preventing a grainy result. Add the vanilla extract at this stage, mixing it in thoroughly.
Tempering Egg Mixture with Warm Chocolate
Tempering is the critical step to prevent your eggs from scrambling. Slowly pour a small amount (about 1/2 cup) of the warm chocolate-cream mixture into the egg yolk mixture while continuously whisking. This gradually raises the temperature of the eggs without cooking them too quickly. Once the egg mixture is warmed, slowly pour the entire tempered egg mixture back into the remaining warm chocolate-cream, again whisking constantly. Strain the custard through a fine-mesh sieve into a large measuring cup or pitcher. This removes any potential cooked egg bits or chocolate lumps, ensuring an impeccably smooth custard. This careful technique is paramount for a flawless crème brûlée.
Baking Your Chocolate Crème Brûlée Correctly
Baking crème brûlée requires a delicate touch to achieve its characteristic creamy interior. The method of using a water bath is not merely a suggestion; it is a fundamental technique that prevents the custard from overcooking too quickly around the edges and developing a rubbery texture. Precision in oven temperature and careful monitoring are key to a perfectly set, yet still luscious, custard. This stage determines the ultimate texture of your decadent dessert.
Preparing a Warm Water Bath
A warm water bath, or bain-marie, is essential for baking crème brûlée. This method creates a moist, even heat environment, preventing the custards from curdling or cracking. Arrange your ramekins in a large baking dish or roasting pan. Carefully pour the strained chocolate custard into each ramekin, filling them almost to the top. Then, place the baking dish into the preheated oven. Once inside, carefully pour hot water into the larger baking dish, making sure it comes about halfway up the sides of the ramekins. This insulation allows the custards to bake gently and evenly, ensuring a silky-smooth finish.
Oven Temperature and Perfect Baking Time
Preheat your oven to 325°F (160°C). This lower temperature is crucial for the slow and gentle baking required for custards. Baking time typically ranges from 35 to 45 minutes, depending on your oven and the size of your ramekins. Resist the urge to open the oven door frequently, as fluctuations in temperature can affect the custards’ setting. Keep an eye on them through the oven window if possible. The goal is a custard that is just set, not overly firm. For other delicious recipes, check out this Creamy Baked Mac and Cheese for a savory alternative.
Knowing When Custard is Fully Set
To determine if your chocolate crème brûlée is perfectly baked, gently jiggle one of the ramekins. The edges should appear set, while the very center, about a 1-inch circle, should still have a slight jiggle, similar to gelatin. It should not be watery or sloshy. The residual heat will continue to cook the custard as it cools. Overbaking will result in a grainy or rubbery texture, so err on the side of slightly underbaked. Once removed from the oven, carefully take the ramekins out of the water bath and place them on a wire rack to cool.
Achieving Your Perfect Custard Texture
The journey to the perfect crème brûlée doesn’t end when it comes out of the oven. In fact, the cooling and chilling phases are just as vital as the baking process for developing the optimal texture. Rushing these steps can result in a custard that is either too soft, too firm, or lacks the desired smooth, creamy consistency. Patience during these stages will be richly rewarded with a truly luxurious dessert that melts in your mouth.
Cooling Completely After Initial Baking
Once your chocolate crème brûlée ramekins are out of the water bath, leave them undisturbed on a wire rack at room temperature. This initial cooling period, typically one to two hours, allows the custards to gradually come down in temperature. This slow cooling helps the custard firm up gently and prevents the formation of condensation, which could make the top watery. Do not attempt to move them to the refrigerator too soon, as the abrupt temperature change can sometimes cause the custards to crack or weep, compromising their smooth surface.
Refrigerating for at Least Two Hours
After the custards have cooled completely at room temperature, cover each ramekin loosely with plastic wrap. Transfer them to the refrigerator for a minimum of two hours, though overnight chilling is highly recommended for the best results. This extended refrigeration period is crucial for the chocolate custard to fully set and achieve its rich, dense, yet silky texture. The cold also intensifies the chocolate flavor, making the dessert even more satisfying. Serve chilled, only caramelizing the topping just before serving.
Mastering the Signature Sugar Topping
The caramelized sugar topping is what truly defines crème brûlée and adds an exciting textural contrast to the smooth, creamy custard. Achieving that perfectly brittle, glassy crust requires a bit of technique and a reliable kitchen torch. This final flourish is not just for show; it adds a delightful smoky sweetness that complements the rich chocolate custard beautifully. Take your time with this step, as a well-executed topping elevates the entire dessert.
Evenly Sprinkling Brown Sugar Crystals
Just before serving, remove your chilled chocolate crème brûlée from the refrigerator. Blot any condensation from the top of the custards with a paper towel. Sprinkle an even layer of brown sugar over the surface of each custard. Brown sugar, with its slightly larger crystals and molasses notes, caramelizes beautifully and provides a richer flavor than granulated sugar for the topping. Aim for a thin, consistent layer that completely covers the custard, but avoid making it too thick, which can result in a burnt taste rather than a crisp, caramelized one. A good, even coating is key for uniform results.
Using a Kitchen Torch Safely
Holding a kitchen torch about 2-3 inches above the sugar, move the flame slowly and continuously in a circular motion. Watch as the sugar melts, bubbles, and transforms into a deep amber caramel. Keep the flame moving to prevent burning in one spot. This process should take about 30 seconds to a minute per ramekin. Allow the caramelized sugar to cool and harden for a minute or two before serving. The resulting crisp, glass-like shell provides a satisfying crack with the tap of a spoon. Always use the kitchen torch in a well-ventilated area and away from flammable materials. For more kitchen inspiration, visit us on Pinterest!
Secret Tips for Chocolate Crème Brûlée
While the basic steps for chocolate crème brûlée are straightforward, a few expert tips can elevate your dessert from good to truly extraordinary. These small adjustments and considerations address common pitfalls and ensure you achieve the best possible flavor and texture. Paying attention to these details can make a significant difference in the final outcome, resulting in a dessert that truly shines.
Choosing High-Quality Dark Chocolate Wafers
The quality of your dark chocolate is arguably the most crucial factor in this recipe. Invest in high-quality dark chocolate wafers or a premium dark chocolate bar with at least 60-70% cocoa solids. Cheap chocolate often contains more fillers and less cocoa butter, which can affect both the flavor depth and the texture of your custard. Higher quality chocolate melts more smoothly and incorporates more seamlessly, yielding a richer, more nuanced flavor. Consider the origin and percentage of the chocolate to select one that suits your taste preference for intensity, ensuring your dark chocolate custard is truly exceptional.
Why Cooling Completely Matters
It cannot be stressed enough: do not rush the cooling and chilling process. Cooling completely at room temperature allows the custard to set gently, preventing cracks and ensuring an even texture. Refrigerating for at least two hours, preferably overnight, is essential for the custard to fully firm up and develop its dense, yet silky consistency. This extended chill time also allows the flavors to meld and deepen, making for a more satisfying dessert. A well-chilled custard provides the perfect foundation for that signature crisp caramelized topping, offering a delightful temperature and texture contrast.
Crème Brûlée Preparation and Cook Times
While the actual “active” preparation time for chocolate crème brûlée isn’t excessively long, it’s crucial to factor in the significant chilling period required for the custards to set properly. This is not a dessert you can whip up last minute, but rather one that rewards thoughtful planning. Understanding the time commitment will help you schedule your baking and ensure your dessert is perfectly ready when you want to serve it.
Quick Prep for Longer Chill Required
The hands-on preparation time for the chocolate crème brûlée custard is relatively quick. You can expect to spend about 20-30 minutes gathering ingredients, heating cream, whisking yolks, and tempering the mixture. The baking time in the oven typically takes around 35-45 minutes. However, the most time-consuming aspect is the chilling. After baking, the custards need to cool completely at room temperature for 1-2 hours, followed by a minimum of 2 hours of refrigeration, though 4 hours or overnight is highly recommended for optimal texture. This makes it an ideal make-ahead dessert.
Total Time for Best Flavor
To achieve the best flavor and texture for your chocolate crème brûlée, plan for a total process that spans approximately 6-8 hours, or even longer if chilling overnight. This includes the initial prep (30 minutes), baking (40 minutes), room temperature cooling (2 hours), and refrigeration (at least 4 hours). While it might seem like a long wait, the passive chilling time is essential for the custard to fully develop its rich, smooth consistency and deep chocolate flavor. The sugar topping is applied and torched just moments before serving, adding a fresh, crisp finish to this wonderfully prepared dessert.
How Many Servings Will You Get?
This chocolate crème brûlée recipe is designed to yield a specific number of portions, making it perfect for entertaining or enjoying as a special treat. The quantity is typically generous enough to satisfy a small gathering without being overwhelming to prepare. Understanding the serving yield helps you plan your ingredients and ramekin requirements accordingly, ensuring everyone gets a decadent portion of this delightful dessert.
Perfect for Six Delicious Portions
This recipe is typically portioned to yield six individual servings. Using standard 4-ounce ramekins, you’ll find that the custard fills them perfectly, creating elegant and satisfying individual desserts. These portions are rich and decadent, making six servings an ideal amount for a dinner party or a week of luxurious treats. If you need to serve more guests, simply scale the recipe up, ensuring you have enough ramekins and a large enough baking dish for the water bath. Each portion is designed to be a delightful indulgence.
Chocolate Crème Brûlée Nutritional Information
While this decadent chocolate crème brûlée is certainly a treat, it’s helpful to understand its general nutritional profile. As a rich dessert, it naturally contains higher amounts of calories, sugar, and fats, largely due to the heavy cream, dark chocolate, and sugar. This information can help you enjoy your indulgence mindfully, especially if you are monitoring dietary intake.
Calories, Sugar, and Fat Content
Given the ingredients like heavy cream, egg yolks, dark chocolate, and sugar, a single serving of chocolate crème brûlée will be relatively high in calories. The sugar content comes from both the granulated sugar in the custard and the caramelized topping. Fats primarily originate from the heavy cream and the cocoa butter in the dark chocolate. While specific numbers vary based on exact ingredient brands and quantities, expect each serving to contribute a significant portion to daily caloric and fat intake, making it a luxurious occasional dessert.
Protein and Cholesterol Details per Serving
Each serving will also contain some protein, primarily from the egg yolks and a small amount from the dairy. The egg yolks are also a source of dietary cholesterol. While current dietary guidelines have shifted focus from dietary cholesterol, it’s still a component to be aware of. Overall, while chocolate crème brûlée is not a source of significant daily nutrients beyond energy, it offers a truly delightful sensory experience worth savoring. Enjoying it in moderation ensures you can appreciate its richness without overdoing it.
Essential Kitchen Tools for Crème Brûlée
Having the right tools can make all the difference in the successful preparation of chocolate crème brûlée. While many kitchen items are standard, a few specialized pieces are particularly beneficial for achieving that iconic crème brûlée finish. Equipping yourself with these essentials will streamline your baking process and help you create a professional-looking and tasting dessert with confidence.
Ramekins and Appropriate Baking Dishes
Individual ramekins are indispensable for crème brûlée. Standard ceramic ramekins, typically 4-6 ounces in capacity, are perfect for this recipe. Their shallow, wide design ensures the custard bakes evenly and provides a good surface area for the sugar topping. You’ll also need a larger, oven-safe baking dish or roasting pan to create the crucial water bath. Ensure this dish is deep enough to hold several ramekins and allow water to come halfway up their sides. The size of your baking dish should comfortably accommodate your ramekins without them touching each other, allowing for even heat circulation. For more baking ideas, visit our baking method category.
The Importance of a Torch
A kitchen torch is truly the most crucial specialized tool for crème brûlée. While some methods suggest using a broiler, a torch offers far greater control, allowing you to caramelize the sugar evenly and precisely without heating the custard underneath. This results in the perfect crisp, glass-like sugar shell that is characteristic of a well-made crème brûlée. Look for a refillable butane torch with an adjustable flame for optimal performance. Safety is paramount; ensure you read the instructions and use it in a well-ventilated area. Don’t forget to follow us on Instagram for more delicious recipes and kitchen tips!
Why This Chocolate Crème Brûlée Recipe?
Among countless dessert options, this particular chocolate crème brûlée recipe stands out for its balanced richness, straightforward steps, and utterly irresistible outcome. It’s designed to be approachable for home bakers while still delivering a sophisticated, restaurant-quality dessert. This recipe celebrates the deep flavors of chocolate while honoring the classic techniques of crème brûlée, making it a true crowd-pleaser for any occasion.
Irresistible Indulgence from Simple Steps
This recipe provides a simple yet effective path to an incredibly indulgent dessert. The clear, step-by-step instructions ensure that even those new to baking custards can achieve a velvety smooth chocolate crème brûlée. The combination of rich dark chocolate with the creamy custard, topped with a crisp, caramelized sugar shell, creates a multi-textured experience that is both comforting and exciting. It’s a dessert that feels luxurious without requiring overly complex techniques, proving that elegance can indeed be achieved through straightforward, well-executed steps. Enjoy other delightful treats like Vanilla Bean Crème Brûlée Cheesecake Cupcakes for more inspiration.
Serving Your Decadent Crème Brûlée Dessert
The final act of preparing chocolate crème brûlée is its presentation and serving. While the bulk of the work is done in advance, the moments just before serving are crucial for creating that signature crisp sugar topping and ensuring the dessert is enjoyed at its peak. The contrast of the warm, brittle caramel against the cool, silky custard is what makes this dessert so uniquely satisfying.
Best Enjoyed Freshly Torched and Warm
For the ultimate experience, chocolate crème brûlée is best enjoyed shortly after the sugar topping has been caramelized. The warmth from the torching process slightly softens the very top layer of the custard, creating a delightful contrast with the cool, firm interior. The freshly torched sugar is still brittle and glassy, providing that satisfying crack when gently tapped with a spoon. This immediate serving ensures the caramel retains its crispness and doesn’t absorb moisture from the custard, which could make it chewy. Serve individually in their ramekins, perhaps with a garnish of fresh berries or a dusting of cocoa powder, for an elegant finish.