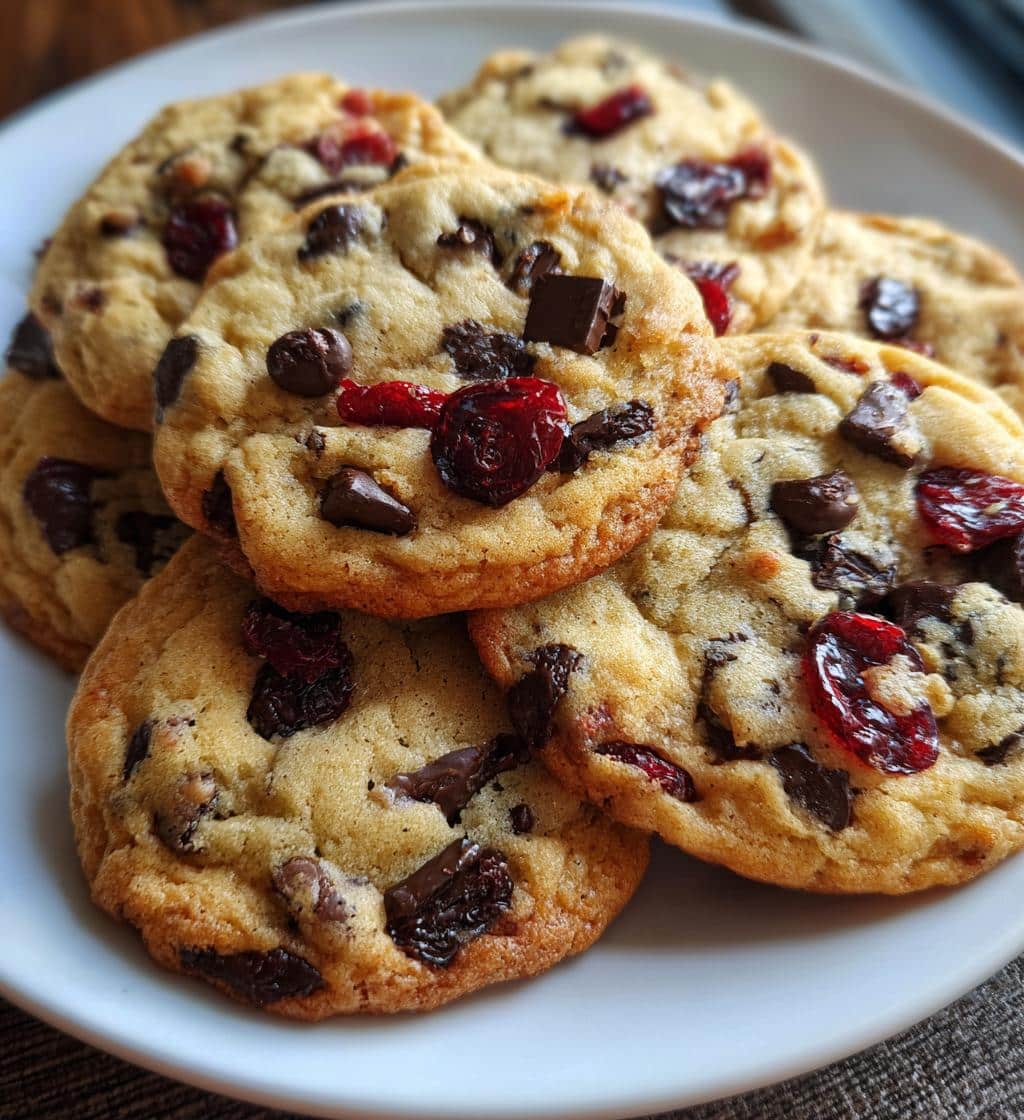
Chocolate Cherry Cookies are a delightful treat, blending rich chocolate with the bright tartness of cherries. This simple recipe ensures soft, chewy results every time. Perfect for any occasion, these homemade delights will surely become a family favorite. Learn how to bake these irresistible cookies with ease and enjoy a wonderful sweet treat.
Key Takeaways
- Master baking delicious chocolate cherry cookies with simple steps.
- Learn tips for achieving the perfect chewy texture every time.
- Discover variations and nutritional insights for these delightful treats.
- Understand proper cooling and storage for maximum freshness.
Cookies bring warmth. They offer pure joy. Baking them is so simple. Share sweet moments with loved ones. Enjoy every delightful bite.
Make Chocolate Cherry Cookies: Get Ready
Embarking on your baking adventure begins with proper preparation. This initial phase is crucial for ensuring a smooth and successful cookie-making process. Taking a few moments to set up your workspace and equipment will prevent last-minute rushes and help you focus on the enjoyable act of baking. A well-organized kitchen makes all the difference, setting the stage for creating perfect chocolate cherry cookies that everyone will adore. Getting ready means more than just gathering ingredients; it’s about creating an optimal environment for baking delicious homemade chocolate cookies with ease.
Preheat Oven to 350°F
Before you even think about mixing ingredients, the first step is always to preheat your oven. Set your oven to 350°F (175°C) and allow it ample time to reach and stabilize at this temperature. This typically takes about 15-20 minutes, depending on your oven. A properly preheated oven ensures that your cookies start baking immediately at the correct temperature, leading to even cooking and the desired texture. If the oven isn’t hot enough, cookies can spread too much and not bake through properly, resulting in a less-than-ideal outcome. Uniform heat is key for achieving those perfectly baked, chewy cookies.
Prepare Your Baking Sheet
While your oven is preheating, prepare your baking sheets. Line baking sheets with parchment paper or silicone baking mats. This crucial step prevents the cookies from sticking, promotes even baking by insulating the bottom of the cookies, and makes cleanup incredibly easy. Avoid using just cooking spray, as it can sometimes cause the bottom of cookies to brown too quickly or unevenly. Having your sheets ready ensures you can quickly transfer the cookie dough to the oven once it’s mixed, maintaining the dough’s temperature and consistency. This attention to detail sets you up for baking success.
Gather All Your Cookie Ingredients
The secret to any outstanding cookie recipe lies in the quality and preparation of its ingredients. For these incredible chocolate cherry cookies, having everything measured and ready before you start mixing will streamline the process and lead to better results. This mise en place approach, where all components are prepared in advance, is a hallmark of efficient baking. You’ll find that having your softened butter, precisely measured flours, and delicious inclusions like dried cherries and chocolate chips at the ready makes the entire experience more enjoyable and far less stressful. These homemade chocolate cookies rely on a harmonious blend of flavors and textures, making each ingredient important.
Softened Butter and Sugars
For the perfect cookie texture, starting with softened, unsalted butter is non-negotiable. Softened butter should be pliable but still cool to the touch, not melted or greasy. It creams beautifully with granulated and brown sugars, incorporating air that contributes to a light and tender crumb. The combination of both sugars adds depth of flavor and moisture; brown sugar contributes to chewiness, while granulated sugar promotes crispness on the edges. Ensure your butter has been at room temperature for at least 30-60 minutes before you begin. This careful attention to butter temperature is a foundational step for many dessert recipes, including these delightful chocolate cherry cookies.
Flour, Baking Soda, Salt
The dry ingredients form the structure of your cookies. All-purpose flour provides the necessary body and chew. Baking soda acts as a leavening agent, helping the cookies rise and achieve their characteristic soft texture, while also reacting with acidic ingredients (like brown sugar) to aid in browning. Salt, often overlooked, is a flavor enhancer that balances the sweetness and brings out the rich notes of chocolate and cherry. Make sure to measure your flour correctly by spooning it into a measuring cup and leveling it off, rather than scooping directly, which can compact the flour and lead to dry, dense cookies. The precise balance of these dry ingredients ensures the perfect base for your sweet treat.
Cherries and Chocolate Chips
The stars of these chocolate cherry cookies are, of course, the cherries and chocolate chips. Opt for good quality dried cherries, as they provide a concentrated burst of tart-sweet flavor that pairs wonderfully with chocolate. You can roughly chop larger dried cherries if preferred. For the chocolate, semi-sweet chocolate chips are a classic choice, offering a balanced sweetness that complements the cherries without being overly rich. However, feel free to experiment with dark chocolate chips for a more intense chocolate flavor or even milk chocolate for a sweeter profile. These inclusions are what make these easy cookie recipe a true family favorite.
Mixing Dough for Irresistible Cookies
Creating the perfect cookie dough is an art that lays the groundwork for irresistibly chewy and flavorful chocolate cherry cookies. The mixing process isn’t just about combining ingredients; it’s about incorporating air, developing texture, and ensuring every component is evenly distributed. Proper technique prevents tough cookies and ensures a consistent bake. Pay close attention to the order and duration of mixing, as these factors significantly influence the final outcome. A well-mixed dough guarantees that each bite of your homemade chocolate cookies delivers a delightful balance of flavors and a wonderfully soft texture, making it an easy cookie recipe to master.
Cream Butter and Sugars
The first crucial step in mixing is creaming together the softened butter with the granulated and brown sugars. Using an electric mixer, beat them on medium speed until the mixture is light, fluffy, and pale in color. This process typically takes 2-3 minutes. Creaming is vital because it incorporates air into the butter, creating tiny pockets that will expand during baking, resulting in a lighter and softer cookie texture. Don’t rush this step, as it sets the foundation for the entire cookie structure. Scrape down the sides of the bowl frequently to ensure everything is thoroughly combined and no pockets of uncreamed butter remain. This technique is key to achieving that perfect chewy cookie.
Add Eggs and Vanilla
Once your butter and sugars are perfectly creamed, it’s time to add the wet ingredients. Beat in the eggs, one at a time, mixing well after each addition until fully incorporated. Eggs provide moisture, richness, and act as a binder, helping the cookies hold their shape. After the eggs, stir in the vanilla extract. Vanilla is a powerful flavor enhancer that complements both the chocolate and cherry notes beautifully, adding a warm, aromatic depth to the cookies. Ensure each egg is fully absorbed before adding the next to maintain the emulsification of the mixture. This step prepares your base for the dry ingredients, leading to a cohesive and flavorful cookie dough.
Adding Cherries and Chocolate Chips
The final stages of dough preparation are all about bringing together the wet and dry elements and then gently folding in your delicious mix-ins. This phase requires a delicate touch to ensure everything is perfectly combined without overworking the dough, which can lead to tough cookies. The goal is to achieve a uniform texture and distribution of cherries and chocolate chips, so every bite is a burst of flavor. Mastering this step is crucial for making these easy cookie recipe shine, ensuring your chocolate cherry cookies are not just tasty but also visually appealing and texturally delightful. It’s an important moment in crafting homemade chocolate cookies.
Combine Wet and Dry Mix
After your wet ingredients are thoroughly mixed, gradually add the dry ingredients to the wet mixture. Do this in two or three additions, mixing on low speed until just combined. Overmixing at this stage develops the gluten in the flour, which can lead to tough, dense cookies. The moment you no longer see streaks of dry flour, stop mixing. A few small lumps are perfectly fine; they will disappear during baking. This gentle approach is essential for maintaining the tender, soft cookie texture you desire. This careful combination technique applies to many fruity cookie recipes.
Fold in Cherries, Chocolate
Once your dough is just combined, it’s time for the stars of the show: the dried cherries and chocolate chips. Gently fold these into the dough using a spatula. Be careful not to overmix, as vigorous stirring can crush the cherries and break down the chocolate chips, especially if they are delicate. The aim is to distribute them evenly throughout the dough so that every cookie gets a generous amount of both. This gentle folding ensures that the texture of your inclusions remains intact and that each chocolate cherry cookie offers a delightful burst of flavor and texture. This step perfects your easy cookie recipe, making it a true sweet treat.
Baking Your Perfect Chocolate Cherry Cookies
Baking is where the magic happens, transforming simple dough into golden, fragrant chocolate cherry cookies. Precision in this stage ensures consistent results and that coveted soft, chewy texture. Every oven is a little different, so it’s essential to pay attention to visual cues rather than relying solely on time. Underbaking slightly is often preferred for a chewier cookie, while overbaking can lead to dry, crumbly results. Mastering the bake time for your specific oven will elevate your homemade chocolate cookies from good to truly exceptional. This careful attention makes a significant difference in delivering a perfect sweet treat every time.
Drop Dough onto Sheet
Once your dough is ready, drop rounded tablespoons or use a cookie scoop to portion the dough onto the prepared baking sheets. Leave about 2 inches between each cookie, as they will spread during baking. Using a scoop ensures uniform cookie size, which helps them bake evenly. If your dough is particularly sticky, you can chill it for 15-30 minutes before scooping, which makes it easier to handle. This careful placement on the baking sheet is crucial for preventing cookies from melding together and ensures each one develops a beautiful, independent shape and crispy edge, making each one a perfect chewy cookie.
Bake Until Golden Edges
Bake the chocolate cherry cookies in your preheated oven for approximately 10-12 minutes. The exact time will vary based on your oven and cookie size. Look for visual cues: the edges should be set and lightly golden brown, while the centers still look slightly soft and puffed. It’s better to underbake slightly for a chewier cookie; they will continue to set as they cool on the baking sheet. Overbaking will result in harder, drier cookies. Rotate the baking sheet halfway through baking if your oven heats unevenly to ensure a consistent bake. This careful timing and observation are key to achieving perfectly baked, delicious homemade chocolate cookies.
Cooling and Storing Your Delicious Cookies
The journey from warm, freshly baked cookies to perfectly set, ready-to-enjoy treats continues even after they leave the oven. Proper cooling is just as important as the baking itself, influencing the final texture and stability of your chocolate cherry cookies. Once cooled, storing them correctly ensures their freshness and deliciousness last as long as possible. A little care in these final steps means you can savor your homemade chocolate cookies for days, or at least until they’re all happily devoured. This careful handling is essential for any dessert recipe you want to preserve, allowing you to enjoy your sweet treat longer.
Cool on Baking Sheet
After removing your chocolate cherry cookies from the oven, resist the urge to move them immediately. Allow them to cool on the baking sheet for about 5-10 minutes. This critical cooling period allows the cookies to set properly, firm up, and finish baking with the residual heat. If you try to move them too soon, they might crumble or lose their shape due to their delicate, warm state. This initial cooling on the baking sheet helps prevent sticking and ensures that they retain their perfect form and texture, leading to wonderfully chewy cookies that hold together beautifully.
Move to Wire Rack
Once the cookies have firmed up slightly on the baking sheet, carefully transfer them to a wire cooling rack to cool completely. A wire rack allows air to circulate around all sides of the cookies, preventing condensation from forming on the bottom, which can make them soggy. Cooling completely on a rack also helps maintain their crispy edges and soft centers. Ensure the cookies are fully cooled before storing them to prevent moisture buildup, which can lead to spoilage or a less desirable texture. For other delightful treats like Snickerdoodle Cobbler, proper cooling is just as important.
Store in Airtight Container
To keep your delicious chocolate cherry cookies fresh, store them in an airtight container at room temperature. For optimal freshness, place a slice of bread in the container; the cookies will absorb moisture from the bread, keeping them soft and chewy for longer. They typically stay fresh for 3-5 days. If you’ve used fresh cherries, they might not last as long. For longer storage, cooled cookies can be frozen in an airtight container for up to 2-3 months. Thaw them at room temperature before enjoying. Proper storage ensures your easy cookie recipe remains a delightful sweet treat for days.
Chocolate Cherry Cookies: Seven Joyful Tips
Baking these chocolate cherry cookies is already an easy cookie recipe, but with a few extra tips, you can elevate your homemade chocolate cookies to a new level of perfection. These joyful baking insights address common concerns and offer creative modifications, ensuring every batch is a resounding success. From achieving that coveted chewy cookie texture to exploring dietary considerations and ingredient swaps, these suggestions empower you to personalize and perfect your sweet treat. Dive into these tips to make your chocolate cherry cookies truly unforgettable, a dessert recipe that will be requested time and time again by family and friends.
Baking Tip: For Chewier Cookies
To achieve an even chewier chocolate cherry cookie, consider chilling your cookie dough for at least 30 minutes, or even overnight, before baking. Chilling allows the flavors to meld and the butter to firm up, which helps the cookies spread less and retain a thicker, chewier texture. Another trick is to slightly underbake them; remove them from the oven when the edges are set but the centers still look a bit gooey. They will continue to cook slightly on the hot baking sheet, resulting in a perfectly soft and chewy interior. This simple adjustment makes a significant difference for those who love a truly chewy cookie.
Use Fresh Cherries Instead
While dried cherries are convenient, using fresh cherries can add a wonderful pop of flavor and juiciness to your chocolate cherry cookies. If opting for fresh, pit and quarter them before adding to the dough. You might also want to toss them lightly with a tablespoon of flour before folding them into the dough; this helps prevent them from sinking to the bottom of the cookies. Keep in mind that fresh cherries will introduce more moisture, which might slightly alter the cookie’s texture and bake time. This creative substitution offers a delightful twist on the classic baking experience.
Dietary Note: Vegetarian Friendly
These chocolate cherry cookies are inherently vegetarian-friendly, as the recipe typically uses standard dairy (butter and eggs) and plant-based ingredients (flour, sugar, cherries, chocolate). For those following a vegan diet, you can easily adapt this recipe by substituting plant-based butter alternatives, flax eggs (1 tbsp ground flaxseed + 2.5 tbsp water per egg), and ensuring your chocolate chips are dairy-free. Always check ingredient labels if you have specific dietary restrictions, especially for chocolate chips, which can sometimes contain dairy products. This makes them a versatile dessert recipe for various dietary needs.
Simple Ways to Vary Your Cookies
One of the joys of baking homemade chocolate cookies is the freedom to experiment and customize. While the chocolate cherry cookies are a spectacular sweet treat on their own, there are countless ways to introduce new flavors and textures, ensuring this easy cookie recipe never gets boring. By making simple substitutions or additions, you can cater to different preferences, seasonal availability, or simply satisfy a craving for something new. This flexibility makes baking even more exciting and allows you to put your unique spin on a family favorite, turning every batch into a delightful discovery.
Try Different Dried Fruits
If cherries aren’t your favorite, or you simply want to try something new, these chocolate cookies are incredibly adaptable. Consider swapping the dried cherries for other dried fruits like cranberries, blueberries, apricots (finely diced), or even orange peel for a citrusy kick. Each fruit will bring its unique flavor profile, creating a whole new experience. For example, dried cranberries paired with white chocolate chips create a festive and tangy contrast. This simple change allows you to enjoy a variety of delicious desserts using the same base recipe, continually expanding your baking repertoire and keeping things fresh and exciting for your taste buds.
Quick Nutritional Facts for Cookies
Understanding the nutritional aspects of your homemade chocolate cherry cookies can be helpful, especially when incorporating them into a balanced diet. While these are undoubtedly a sweet treat, homemade versions offer the advantage of knowing exactly what ingredients go into them, allowing for more control over components like sugar and fat. This section provides a general overview, reminding you that these are estimates for an easy cookie recipe and can vary based on specific ingredients used. Always remember that a delicious dessert recipe can be enjoyed in moderation as part of a healthy lifestyle. Enjoying a family favorite doesn’t mean sacrificing awareness.
Understand Serving Size Details
When looking at nutritional information for cookies, paying attention to the serving size is crucial. Typically, one cookie is considered a single serving, but this can vary depending on the size you bake. Understanding the serving size helps you accurately gauge the caloric and fat content per portion. Since this is a homemade recipe, you have the flexibility to make larger or smaller cookies, which directly impacts the nutritional values per piece. Be mindful that estimated facts are based on average sizes and ingredients. This awareness helps in enjoying these homemade chocolate cookies responsibly.
Calories and Fat Content
Chocolate cherry cookies, like most delicious sweet treats, contain calories primarily from carbohydrates (sugars and flour) and fats (butter and chocolate chips). A typical chocolate chip cookie can range from 80-150 calories per serving, with fat content varying from 4-8 grams. The addition of dried cherries also contributes natural sugars and some fiber. While these figures provide a general idea, exact values depend heavily on the specific brands of ingredients used (e.g., butter fat content, type of chocolate chips) and the exact size of your cookies. Enjoy these chewy cookies as a delightful part of your day, rather than a primary food source.
Achieve That Perfect Cookie Texture
The quest for the perfect cookie texture is a goal for many bakers, and for chocolate cherry cookies, it often means aiming for that ideal balance of crisp edges, soft centers, and a delightful chewiness. Achieving this requires attention to detail at a couple of critical stages in the baking process. It’s about more than just combining ingredients; it’s about understanding how those ingredients interact and how baking time influences the final mouthfeel. By following these essential tips, you’ll consistently produce homemade chocolate cookies that boast the irresistible texture of a true family favorite, making this an easy cookie recipe to perfect. For more baking inspiration, check out our Pinterest page.
Start with Softened Butter
As mentioned earlier, starting with properly softened butter is fundamental for achieving the ideal cookie texture. Butter that is too cold won’t cream effectively with the sugars, leading to a dense dough that doesn’t incorporate enough air. This results in flat, tough cookies. Conversely, melted or overly warm butter will cause the cookies to spread too much, becoming greasy and thin. Softened butter creates the airy pockets that contribute to a light and chewy texture. This simple yet crucial step lays the groundwork for delicious, perfectly textured chocolate cherry cookies, a true sweet treat.
Do Not Overbake Cookies
This is arguably the most important rule for achieving soft, chewy cookies. Overbaking is the quickest way to turn a potentially perfect batch of chocolate cherry cookies into dry, hard pucks. Cookies continue to bake for a few minutes after being removed from the oven due to residual heat, so it’s best to take them out when the edges are just set and lightly golden, and the centers still look slightly soft or even a little underbaked. They will firm up as they cool. Trust your instincts and err on the side of underbaking for that coveted chewy cookie texture. This makes them a truly delightful dessert recipe.
Chocolate Cherry Cookies: Easy Baking Steps
Baking delicious chocolate cherry cookies doesn’t have to be a time-consuming ordeal. This easy cookie recipe is designed for efficiency, ensuring that you can whip up a batch of homemade chocolate cookies without spending hours in the kitchen. The beauty of these sweet treats lies in their straightforward preparation and relatively quick baking time, making them perfect for impromptu cravings or last-minute gatherings. With minimal prep and bake time, you’ll be enjoying warm, fresh cookies in no time, making them a fantastic family favorite. Follow Carina Recipes on Instagram for more quick ideas!
Prep Time: 15 Minutes
One of the most appealing aspects of this chocolate cherry cookie recipe is its minimal prep time. With just about 15 minutes, you can have all your ingredients measured, butter softened, and dough mixed and ready for the oven. This quick turnaround is perfect for busy schedules or when you need a speedy dessert recipe. Having your mise en place (all ingredients ready) beforehand can even shave a few minutes off this estimate. This efficiency means you spend less time preparing and more time enjoying the delightful aroma and taste of your homemade chocolate cookies.
Bake Time: 12 Minutes
The baking time for these chewy cookies is equally impressive, typically ranging from 10 to 12 minutes. This short bake time means you’re just minutes away from enjoying warm, freshly baked chocolate cherry cookies. While the exact duration may vary slightly depending on your oven and the size of your cookies, the key is to watch for those golden edges and slightly soft centers. This quick bake time makes these an ideal sweet treat for an after-school snack, a quick dessert after dinner, or any time you crave a comforting homemade delight without the long wait.
Enjoying Your Warm, Freshly Baked Cookies
There’s something truly special about the moment you pull a fresh batch of chocolate cherry cookies from the oven. The aroma alone is enough to bring a smile to anyone’s face, signaling that a delightful sweet treat is at hand. These homemade chocolate cookies are more than just a dessert; they’re a moment of comfort, a reason to gather, and an opportunity to share joy. Whether you’ve followed every tip for a perfectly chewy cookie or simply enjoyed the process of this easy cookie recipe, the final step is always the most rewarding: savoring the fruits of your labor and sharing them with loved ones.
Serve Warm or Cool
One of the best things about chocolate cherry cookies is their versatility in serving. They are absolutely divine served warm, straight from the oven (after a few minutes of cooling on the baking sheet, of course!). The chocolate chips will be gooey and melted, and the cookies will be wonderfully soft. However, they are equally delicious once completely cooled, offering a firmer, chewier texture. Whether you prefer them warm with a glass of milk or cooled as a grab-and-go snack, these cookies are a delightful treat for any preference. Each bite offers a taste of a true family favorite.
Share with Family, Friends
Baking is often an act of love, and these chocolate cherry cookies are perfect for sharing. There’s immense satisfaction in offering a plate of warm, homemade chocolate cookies to family and friends. They make wonderful gifts, a thoughtful gesture for neighbors, or a comforting addition to any potluck or gathering. The joy of these chewy cookies is multiplied when shared, creating sweet memories and bringing people together. So, bake a batch, spread the cheer, and let these easy cookie recipe become a beloved tradition in your home. Enjoy every moment of this delightful dessert recipe with those you care about.