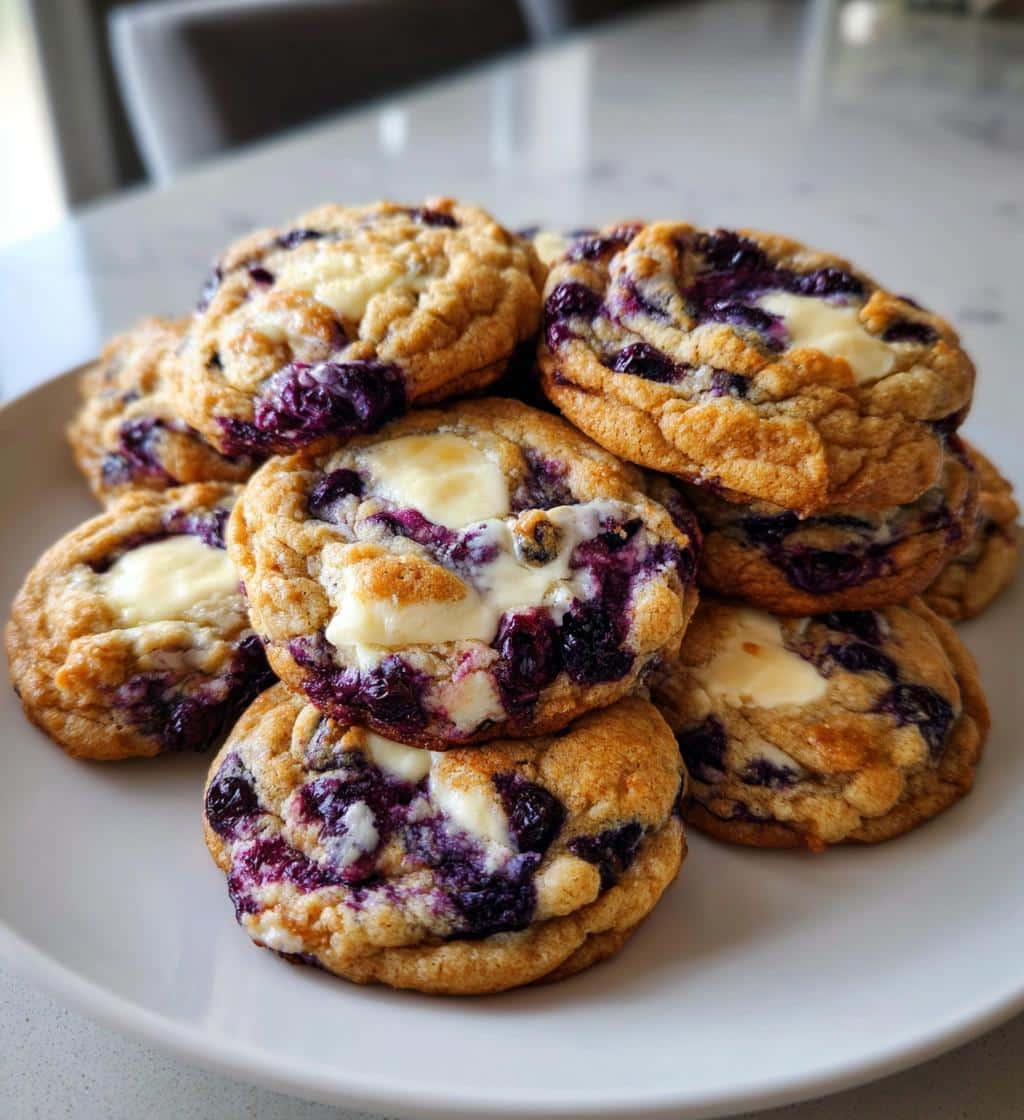
Blueberry Cheesecake Swirl Cookies offer a delightful fusion of tangy blueberries and creamy cheesecake, all wrapped in a soft, sweet cookie. This recipe guides you through each step, from mixing the perfect dough to creating that irresistible swirl. Get ready to bake a batch of homemade cookies that will impress everyone.
Key Takeaways
- Master the dough and cheesecake filling for perfect blueberry swirl cookies.
- Achieve beautiful, appealing swirls with gentle mixing and dolloping techniques.
- Learn expert tips for baking, cooling, and storing your delicious homemade treats.
- Prepare dough ahead of time for convenient, easy future baking sessions.
These cookies are truly special. They combine classic flavors perfectly. Each bite is a sweet delight. Baking them brings pure joy. Share these treats with loved ones.
Welcome to Blueberry Cheesecake Swirl Cookies
Get ready to create a truly spectacular dessert: Blueberry Cheesecake Swirl Cookies. These homemade delights combine the rich, tangy creaminess of cheesecake with the juicy sweetness of blueberries, all nestled within a perfectly soft and chewy cookie. This recipe isn’t just about baking; it’s about crafting an experience, delivering a treat that looks as impressive as it tastes. Whether you’re a seasoned baker or just starting your culinary journey, our detailed instructions will help you achieve baking success. Each cookie is a little masterpiece, showcasing vibrant swirls that promise a burst of flavor in every bite. They’re perfect for special occasions or simply to brighten an ordinary day. Indulge in the magic of these exquisite cookies, a beautiful blend of a classic dessert with a comforting cookie form.
Ingredients You Will Need
To begin your journey towards creating these delightful blueberry cheesecake swirl cookies, gather the following ingredients. Quality ingredients make a noticeable difference in the final product’s flavor and texture. Ensure your butter is unsalted and your eggs are large. For the blueberries, you can use either fresh or frozen, but if using frozen, follow our tips for proper handling to prevent excessive moisture.
- For the Cookie Dough:
- 2 ½ cups all-purpose flour
- 1 teaspoon baking powder
- ½ teaspoon baking soda
- ¼ teaspoon salt
- ¾ cup (1 ½ sticks) unsalted butter, softened
- ½ cup granulated sugar
- ½ cup packed light brown sugar
- 1 large egg
- 1 teaspoon vanilla extract
- For the Blueberry Cheesecake Filling:
- 4 ounces cream cheese, softened
- ¼ cup granulated sugar
- 1 large egg yolk
- ½ teaspoon vanilla extract
- ½ cup fresh or frozen blueberries (see tips for frozen)
Quick Look: Prep & Cook Time
Here’s a brief overview of the time commitment for these wonderful homemade blueberry cheesecake swirl cookies:
- Prep Time: Approximately 30-40 minutes (includes ingredient gathering and initial mixing).
- Chill Time: At least 1 hour (highly recommended for best results, can be done overnight).
- Cook Time: 10-12 minutes per batch.
- Total Time: Roughly 2 hours (with chilling) for a fresh batch of these delightful treats.
Preparing for Delicious Swirl Cookies
Successful baking often begins long before the ingredients are combined. Proper preparation, also known as mise en place, is key to a smooth and enjoyable baking process, especially when making something as intricate and delicious as blueberry cheesecake swirl cookies. Taking a few moments to set up your workspace and prepare your ingredients will make all the difference, helping you avoid last-minute rushes and ensuring everything comes together beautifully.
Preheat Oven and Gather Tools
Start by preheating your oven to the specified temperature. This ensures your oven is consistently hot when the cookies go in, which is crucial for even baking and proper cookie spread. Typically, for cookies like these, you’ll want to preheat to 375°F (190°C). While the oven heats up, gather all the necessary kitchen tools. You’ll need:
- Mixing bowls (at least two: one for wet, one for dry, and one for the cheesecake filling)
- An electric mixer (stand or hand-held) for creaming butter and sugars
- Measuring cups and spoons
- Rubber spatula
- Baking sheets, preferably lined with parchment paper or silicone mats
- A cookie scoop (for consistent sizing)
- A fork or toothpick for swirling
Having everything within reach eliminates interruptions and allows you to focus on the baking steps. This organizational tip applies to many dessert recipes, making your baking experience much more efficient.
Ensure Ingredients Room Temperature
One of the most critical steps for achieving perfectly textured cookies and a smooth cheesecake filling is to ensure certain ingredients are at room temperature. This mainly applies to butter, cream cheese, and eggs. Room temperature butter creams beautifully with sugar, incorporating air that gives cookies their light texture. Cold butter won’t cream properly, resulting in a denser, tougher cookie. Similarly, softened cream cheese will mix smoothly without lumps, creating a silky cheesecake swirl. Take your butter, cream cheese, and eggs out of the refrigerator at least 30-60 minutes before you plan to start baking. If you’re in a hurry, you can quickly soften butter by cutting it into smaller pieces or by gently warming it in the microwave for a few seconds (be careful not to melt it). For eggs, place them in a bowl of warm water for a few minutes. These small details significantly impact the final quality of your cookies.
Mixing the Perfect Cookie Dough
The foundation of any great cookie lies in its dough, and our blueberry cheesecake swirl cookies are no exception. Achieving a tender, flavorful base requires careful attention to mixing techniques, ensuring all ingredients are properly incorporated without overworking the gluten in the flour. This stage is where the magic truly begins, building the structure and taste that will make your cookies unforgettable. By following these steps, you’ll create a dough that’s easy to handle and bakes up beautifully.
Cream Butter and Sugars
In a large mixing bowl, using an electric mixer, cream together the softened unsalted butter with both granulated sugar and light brown sugar. This step is vital for incorporating air into the mixture, which contributes to the cookies’ light and chewy texture. Beat on medium-high speed for 2-3 minutes, or until the mixture is pale, fluffy, and well combined. The brown sugar adds moisture and a hint of molasses flavor, complementing the sweet and tangy notes of the blueberry cheesecake filling.
Add Eggs and Vanilla Extract
Once your butter and sugars are perfectly creamed, it’s time to add the wet ingredients that bind the dough together. Beat in the large egg, mixing until just combined. Be careful not to overmix at this stage; you want to ensure the egg is fully incorporated but avoid excessive aeration. Then, stir in the vanilla extract. Pure vanilla extract enhances the overall flavor profile, providing a warm, aromatic base that pairs wonderfully with the fruit and cream cheese. Scrape down the sides of the bowl as needed to ensure everything is evenly mixed.
Combine Dry Ingredients Separately
In a separate medium bowl, whisk together the all-purpose flour, baking powder, baking soda, and salt. Combining these dry ingredients separately before adding them to the wet mixture ensures they are evenly distributed throughout the dough. This prevents pockets of leavening agents or salt, leading to a consistent texture and flavor in every cookie. Baking powder and baking soda work together to give the cookies their lift and tenderness. A pinch of salt balances the sweetness, making the other flavors pop. Once whisked, set aside, ready to be introduced to the wet ingredients in the next stage of making your delightful blueberry cheesecake swirl cookies.
Creating the Blueberry Cheesecake Filling
The luscious blueberry cheesecake swirl filling is what truly sets these cookies apart, elevating them from a simple treat to an extraordinary dessert. This creamy, tangy, and fruit-infused element provides a delightful contrast to the sweet cookie dough, creating a balanced and irresistible flavor profile. The key to a smooth, uniform swirl lies in properly preparing both the cream cheese mixture and the blueberries. This step-by-step guidance ensures your filling will be perfectly textured and ready to be swirled into your cookie dough.
Soften Cream Cheese for Mix
For a silky-smooth cheesecake filling, it is absolutely crucial that your cream cheese is properly softened. Cold cream cheese will result in a lumpy mixture that is difficult to spread and swirl, leading to an inconsistent texture in your final cookies. In a medium bowl, combine the softened cream cheese with granulated sugar, one large egg yolk, and vanilla extract. Use a hand mixer or a fork to beat these ingredients together until the mixture is completely smooth and creamy, with no lumps visible. The egg yolk helps to bind the filling and provides a richer consistency, while the vanilla extract enhances the overall sweetness and aroma. This creamy base is the heart of your swirl, so take your time to get it right. You can read more about the versatility of cream cheese in various culinary applications.
Prepare Blueberries for Swirl
The blueberries are not just for flavor; they also contribute to the beautiful visual swirl in these cookies. If using fresh blueberries, gently rinse them and pat them completely dry. If you’re using frozen blueberries, there’s a specific technique to handle them to prevent them from bleeding too much color into your filling and dough, which can turn your cookies an unappealing grayish-purple. Our expert tip later in the article will cover this in detail, but generally, you’ll want to add them to the cream cheese mixture without thawing completely or briefly blanch them. Gently fold the prepared blueberries into the softened cream cheese mixture. Be careful not to mash them, as you want whole or mostly whole berries to create distinct pockets of fruity goodness within the swirl. This blend of creamy and fruity makes the cheesecake element truly shine within your blueberry cheesecake swirl cookies, offering a delightful surprise with every bite.
Bringing Dough and Swirl Together
This critical stage involves merging your meticulously prepared cookie dough with the vibrant blueberry cheesecake filling. The process requires a gentle hand and careful attention to detail to ensure both components retain their integrity and contribute perfectly to the final cookie. The goal is to create a cohesive dough while keeping the cheesecake swirl distinct, allowing for those beautiful patterns and bursts of flavor in every bite. Proper mixing here sets the stage for flawless swirling and baking.
Gradually Combine Wet and Dry
With your wet ingredients and dry ingredients prepared, it’s time to bring them together to form the cookie dough. Gradually add the dry ingredient mixture to the wet ingredient mixture in the large mixing bowl. Begin by adding about one-third of the dry ingredients, mixing on low speed until just combined. Repeat with the remaining dry ingredients, adding them in two more additions. It’s crucial not to overmix the dough once the flour has been added. Overmixing develops the gluten in the flour too much, which can lead to tough, dense cookies rather than the soft and chewy texture we’re aiming for. Mix only until no streaks of flour remain. The dough will be thick and slightly sticky, which is perfectly normal for blueberry cheesecake swirl cookies. For another delightful swirl option, check out our recipe for peanut butter brownie swirl cookies.
Gentle Mix: Cream Cheese, Blueberries
Once your cookie dough is ready, set it aside. Now, ensure your blueberry cheesecake mixture is also prepared. If you haven’t already, gently fold the blueberries into your softened cream cheese, sugar, egg yolk, and vanilla extract mixture. Remember, the goal is to incorporate the blueberries without crushing them, preserving their shape and juiciness for the swirl. A light hand will ensure the cream cheese mixture remains smooth and the blueberries are evenly distributed. This specific combination is what will create the signature “swirl” effect and add that unique tangy-sweet element to your cookies. Keep this mixture separate from the cookie dough for now, as they will be combined in a strategic way during the forming stage to achieve the irresistible visual and flavor profile of these homemade treats. This careful preparation ensures each component contributes perfectly to the overall experience of biting into a freshly baked blueberry cheesecake swirl cookie.
Forming Your Blueberry Swirl Cookies
The transformation of dough and filling into individual, artful cookies happens in this stage. Forming the cookies correctly is essential not only for their appearance but also for ensuring even baking and a perfect distribution of the blueberry cheesecake swirl. This step is where your careful preparation really pays off, allowing you to create uniform cookies that look professionally made. Consistency in size also helps in achieving uniform baking times for your entire batch of delicious blueberry cheesecake swirl cookies.
Scoop Dough onto Baking Sheet
Begin by preparing your baking sheets. Line them with parchment paper or silicone baking mats; this prevents sticking and helps with even heat distribution. Using a medium-sized cookie scoop (about 1.5 to 2 tablespoons), scoop portions of the cookie dough onto the prepared baking sheets. Arrange the dough balls about 2 inches apart to allow for spreading during baking. If you don’t have a scoop, you can use two spoons, but a scoop ensures more consistent sizing, which leads to more even baking. For a dough that’s easier to handle and less prone to excessive spreading, consider chilling your cookie dough for at least 30 minutes, or even an hour, before scooping. This firming up of the butter in the dough is a valuable expert tip for cookie success.
Add Cheesecake Dollop on Top
Now comes the exciting part of combining the two main components. Take a small spoon or another small cookie scoop (a teaspoon size works well) and place a generous dollop of the blueberry cheesecake filling directly on top of each scooped cookie dough ball. You want enough filling to create a visible swirl, but not so much that it overwhelms the cookie dough or spills excessively during baking. Aim for about ½ to 1 teaspoon of the cheesecake mixture per cookie. Gently press the dollop slightly into the center of the dough. This creates the canvas for your swirling masterpiece. The contrast of the pale dough and the creamy, blueberry-studded filling will already start to look appealing, hinting at the deliciousness to come. This careful placement is a crucial step towards achieving those beautiful, distinct patterns in your baked blueberry cheesecake swirl cookies, ensuring every bite contains a delightful balance of flavors.
The Art of the Irresistible Swirl
The “swirl” is the signature element of these blueberry cheesecake swirl cookies, providing both a stunning visual appeal and an exciting blend of flavors in every bite. Mastering this technique is simpler than it seems and adds a touch of gourmet flair to your homemade treats. It’s about creating a harmonious distribution of the tangy cheesecake and sweet blueberries throughout the soft cookie base, ensuring each cookie is a small work of art. This step, while artistic, also influences the overall taste experience.
Gently Swirl Cream Cheese Mixture
To create the perfect swirl, take a toothpick, a small skewer, or the tip of a small knife. Starting from the center of the cheesecake dollop, gently drag the tip through the cream cheese and into the cookie dough a few times, creating a spiral or marble pattern. You can make a couple of concentric circles or simply zig-zag across the top. The key is to be gentle and avoid overmixing, which could cause the blueberry filling to disappear entirely into the dough or become too messy. The goal is to see distinct streaks of both the cream cheese mixture and the cookie dough. This technique ensures that each cookie will have a unique, eye-catching design, making every single one a special treat. Remember, slight variations in your swirling technique will only add to the charm of your batch of blueberry cheesecake swirl cookies.
Achieve Beautiful Cookie Patterns
The beauty of the swirl is in its imperfection. Don’t strive for exact symmetry; instead, let each cookie’s pattern be unique. Some might have more prominent blueberry streaks, while others will showcase a creamy white swirl against the golden dough. This organic artistry is what makes homemade cookies so appealing. As the cookies bake, the dough will spread, and the cheesecake mixture will slightly melt and set, further enhancing the marbled effect. The visual promise of tangy cheesecake and juicy blueberries is a significant part of the enjoyment. Taking the time to create these patterns not only makes your blueberry cheesecake swirl cookies more attractive but also enhances the anticipation of biting into their layered flavors. Enjoy the creative process, knowing that each swirl you create contributes to a truly delicious and visually appealing cookie, a testament to your baking efforts. For more inspiring dessert ideas, don’t forget to visit our Pinterest page.
Baking Blueberry Cheesecake Swirl Cookies
Baking is where all your efforts come to fruition, transforming raw ingredients into fragrant, golden-brown cookies. Precision in oven temperature and timing is crucial for achieving the desired texture—a soft, chewy center with slightly crisp edges—and ensuring the cheesecake swirl sets perfectly without drying out. This section guides you through the final step of cooking, ensuring your blueberry cheesecake swirl cookies emerge from the oven as delightful as you’ve envisioned.
Oven Temperature and Time
With your oven preheated to 375°F (190°C), carefully place the baking sheets, laden with your beautifully swirled cookie dough, into the hot oven. It’s often best to bake one sheet at a time, especially if your oven has uneven heating, to ensure consistent results. Bake the blueberry cheesecake swirl cookies for 10-12 minutes. The exact baking time may vary slightly depending on your oven’s calibration and the size of your cookies. Keep a close eye on them, especially during the last few minutes, as cookies can go from perfectly baked to overdone very quickly. Resist the urge to open the oven door too frequently, as this can cause temperature fluctuations that negatively impact baking. Trust the process and your timing, and soon you’ll be enjoying the irresistible aroma filling your kitchen.
Checking for Golden Perfection
Knowing when your cookies are perfectly baked is an art. For these blueberry cheesecake swirl cookies, you’re looking for edges that are lightly golden brown, while the centers still appear soft and slightly puffed. The cheesecake swirl itself should look set, perhaps with a very slight jiggle, but not liquid. If the cookies appear underbaked in the center but the edges are browning too quickly, you might need to adjust your oven temperature slightly for future batches or rotate the baking sheet halfway through. Remember that cookies continue to cook slightly even after they’ve been removed from the oven, so it’s better to err on the side of slightly underbaked than overbaked for a chewier texture. Once you observe these signs of golden perfection, gently remove the baking sheets from the oven and prepare for the next delicious stage.
Cooling and Enjoying Your Treat
After the delightful aroma of freshly baked blueberry cheesecake swirl cookies fills your kitchen, the anticipation builds. However, patience is a virtue when it comes to cooling cookies. Proper cooling is just as important as baking in achieving the perfect texture and allowing the flavors to fully meld. Rushing this step can result in fragile cookies that fall apart. Once adequately cooled, these treats are ready to be savored, offering a burst of flavor in every bite.
Let Cookies Firm Up
When you first pull your blueberry cheesecake swirl cookies from the oven, they will be very soft and delicate. It’s crucial to let them cool on the baking sheet for about 5-10 minutes. During this time, the residual heat from the baking sheet will continue to set the cookies, allowing them to firm up enough to be transferred without breaking. This step is especially important for cookies with fillings, as it gives the cheesecake swirl a chance to stabilize. After this initial cooling period on the baking sheet, carefully transfer the cookies to a wire rack to cool completely. Cooling on a wire rack ensures air circulates around the entire cookie, preventing the bottoms from becoming soggy and promoting an even cooling process. This patient approach guarantees your cookies will hold their beautiful shape and texture.
Serve Fresh from Oven
While patience is key for cooling, there’s nothing quite like enjoying a warm, freshly baked cookie. Once your blueberry cheesecake swirl cookies have cooled enough to handle, they are absolutely divine. The warmth enhances the gooeyness of the cheesecake and the juicy burst of the blueberries, creating an unparalleled taste experience. Pair them with a cold glass of milk, a cup of coffee, or a scoop of vanilla ice cream for an extra special treat. These cookies are perfect for sharing at gatherings, as a thoughtful gift, or simply as a comforting indulgence for yourself. Each bite offers a harmonious blend of sweet cookie, tangy cream cheese, and bright blueberry notes. If you enjoy other fruit-infused desserts, you might also like our blueberry muffin cookies with streusel, which offer a similar fruity delight. Don’t wait too long to savor these wonderful creations!
Expert Tips for Cookie Success
Baking is both an art and a science, and even with the best recipes, a few expert tips can elevate your results from good to absolutely fantastic. These insights address common baking challenges and offer strategies to ensure your blueberry cheesecake swirl cookies turn out perfectly every time. From ingredient handling to oven management, these suggestions will help you achieve cookies that are not only delicious but also consistently beautiful.
Handle Frozen Blueberries Properly
If you’re using frozen blueberries for your cheesecake swirl, it’s crucial to handle them correctly to prevent them from turning your entire dough grey or blue. Never thaw frozen blueberries completely before adding them to the cream cheese mixture. If you add them thawed, they will release too much moisture and color. Instead, add them directly from the freezer. You can also toss them lightly with a teaspoon of flour before folding them into the cream cheese mixture; this helps absorb some of the moisture and prevents sinking during baking. This small trick maintains the distinct color and texture of both the blueberries and the cheesecake, ensuring vibrant and appealing swirls in your finished cookies.
Chill Dough for Better Shape
Chilling your cookie dough is a simple yet incredibly effective step that many home bakers skip. After mixing, cover your cookie dough and refrigerate it for at least 1 hour, or even overnight. This chilling period allows the butter to firm up, preventing the cookies from spreading too much in the oven, leading to thicker, chewier cookies with a better shape. It also gives the flavors a chance to meld, resulting in a richer taste. Furthermore, chilled dough is much easier to scoop and swirl. While this recipe specifically refers to these delicious cookies, chilling dough is a common best practice across many cookie varieties, including those like Italian cream cake cookies if you are adapting a recipe.
Oven Variations and Adjustments
Every oven is unique, and understanding your oven’s quirks can significantly improve your baking. Some ovens run hotter or colder than the temperature displayed, while others have hot spots. If you notice your cookies are baking unevenly (one side browning faster than the other) or taking significantly more or less time than specified, consider investing in an oven thermometer to verify its accuracy. You might also need to rotate your baking sheets halfway through the baking time to ensure uniform browning. If your cookies consistently spread too much, try reducing the oven temperature by 10-15 degrees or increasing the chill time for the dough. These minor adjustments can make a major difference in achieving consistently perfect blueberry cheesecake swirl cookies.
Storing Your Swirl Cookie Goodness
Once you’ve baked a batch of irresistible blueberry cheesecake swirl cookies, you’ll want to ensure they stay fresh and delicious for as long as possible. Proper storage not only preserves their wonderful taste and texture but also extends their shelf life, allowing you to enjoy your homemade treats over several days or even weeks. These storage tips cater to both short-term enjoyment and long-term planning, making sure your effort in the kitchen is well-rewarded.
Airtight Container at Room Temp
For short-term storage, cooled blueberry cheesecake swirl cookies can be stored in an airtight container at room temperature for up to 3-4 days. It’s important that the cookies are completely cool before placing them in the container; otherwise, condensation can form, making them soggy. Place a piece of parchment paper between layers of cookies if stacking them to prevent sticking. While they are delightful at room temperature, some people enjoy the slight chill on the cheesecake swirl, making them a great candidate for refrigerating as well. If refrigerated, they will last a bit longer, up to a week, but ensure the container is truly airtight to prevent them from absorbing fridge odors. Bringing them to room temperature for 15-20 minutes before serving can enhance their texture.
Freezing for Longer Freshness
If you’ve baked a large batch or want to save some blueberry cheesecake swirl cookies for a later date, freezing is an excellent option for long-term freshness. Once the cookies are completely cooled, arrange them in a single layer on a baking sheet and flash freeze them for about 1-2 hours, or until solid. This prevents them from sticking together when stored in a bag or container. After flash freezing, transfer the solid cookies to a freezer-safe airtight container or heavy-duty freezer bag. They can be stored in the freezer for up to 2-3 months without significant loss of quality. To enjoy, simply remove the desired number of cookies from the freezer and let them thaw at room temperature for 30-60 minutes. You can even warm them slightly in the microwave for a few seconds or in a low oven for a “fresh from the oven” experience. This method is perfect for always having a delicious treat on hand.
Make-Ahead Dough for Easy Baking
Life can be busy, but that doesn’t mean you have to forgo the joy of homemade cookies. Preparing your blueberry cheesecake swirl cookie dough in advance is a fantastic strategy for convenient, on-demand baking. This allows you to have fresh, warm cookies whenever the craving strikes or when unexpected guests arrive, with minimal fuss. Having make-ahead dough ready simplifies your baking process significantly, making it easier to enjoy these delicious treats without the full-length preparation each time.
Store Dough in Refrigerator
Once you’ve prepared the cookie dough and even swirled in the blueberry cheesecake filling, you can store it in the refrigerator for future use. Shape the dough into a log or press it into a disk, then wrap it tightly in plastic wrap. For an extra layer of protection against drying out or absorbing fridge odors, you can then place it in an airtight container. Refrigerated dough can be kept for up to 3-5 days. When you’re ready to bake, simply slice the log into individual cookies or scoop portions from the disk, adding any fresh swirls if needed, and bake according to the recipe instructions. You might need to add an extra minute or two to the baking time if baking directly from chilled dough. This method is perfect for having fresh cookies throughout the week.
Freezing Unbaked Cookie Dough
For longer-term make-ahead convenience, freezing unbaked blueberry cheesecake swirl cookie dough is an excellent solution. Scoop the cookie dough, with the cheesecake dollop already on top and swirled, onto a parchment-lined baking sheet. Flash freeze these individual dough portions for about 1-2 hours, or until solid. Once frozen solid, transfer the dough balls to a freezer-safe airtight container or heavy-duty freezer bag. Label with the date and baking instructions. The unbaked dough can be stored in the freezer for up to 2-3 months. When you’re ready to bake, place the frozen dough balls on a prepared baking sheet and bake directly from frozen, adding an extra 2-4 minutes to the baking time. This method ensures you always have a stash of homemade cookies ready to go, making spontaneous baking sessions incredibly simple and enjoyable. For more insights on quick and easy meal preparation, consider exploring other main course recipes on our site.
Follow Carina Recipes on Instagram for daily inspiration!