Classic Coleslaw is a beloved side dish, perfect for any gathering or simple meal. Learning to make homemade coleslaw is straightforward and results in a refreshingly crunchy addition to your plate. Our easy recipe ensures a delicious, tangy, and sweet creamy coleslaw that everyone will enjoy, ideal for summer meals or barbecues.
Key Takeaways
- Homemade coleslaw offers superior flavor and crunch compared to store-bought.
- Simple ingredients and an easy recipe make preparation quick and enjoyable.
- Proper chilling time enhances the dressing’s flavor and overall texture.
- Coleslaw is a versatile side dish, pairing well with various main courses.
- Customize sweetness, tang, and crunch to suit your personal taste preferences.
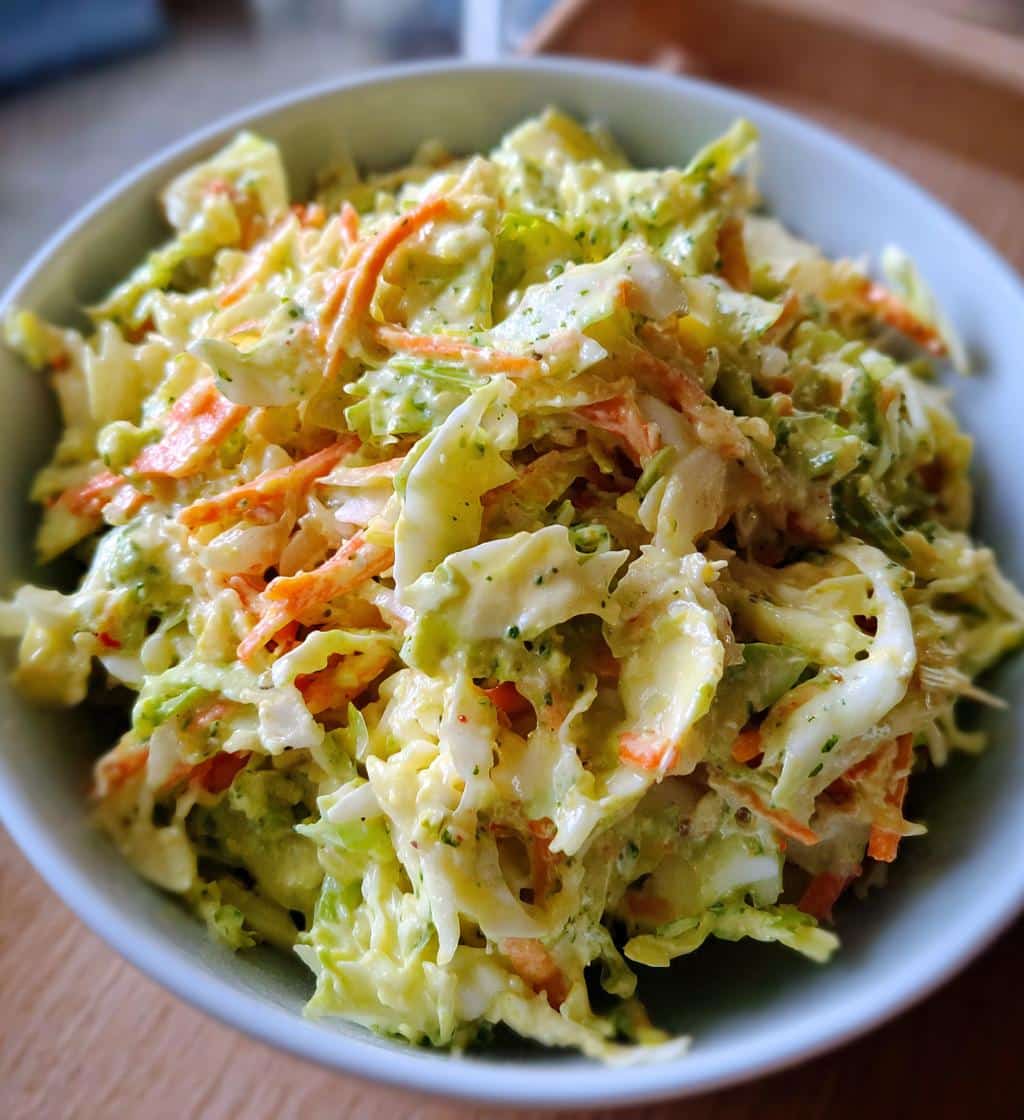
Homemade coleslaw tastes wonderfully fresh. It’s incredibly simple to prepare. Fresh cabbage and carrots make it crunchy. A creamy dressing ties flavors together. This side dish is truly a crowd-pleaser.
Enjoy Delicious Classic Coleslaw
Why Make Homemade Coleslaw?
There’s a unique satisfaction that comes from creating a dish from scratch, and homemade coleslaw is no exception. While store-bought options are convenient, they often lack the vibrant freshness, crisp texture, and balanced flavors that a homemade version provides. When you make your own, you control every ingredient, ensuring you get the perfect balance of tangy and sweet that suits your palate. You can select the freshest cabbage and carrots, leading to an incredibly crunchy coleslaw that truly stands out.
Making coleslaw at home also means avoiding unwanted preservatives and artificial flavors, giving you a healthier and more natural side dish. It’s an easy recipe that builds confidence in the kitchen and allows for endless customization. Whether you prefer a very creamy coleslaw or one with a lighter dressing, the power is in your hands. This simple act elevates a humble vegetable dish into a highlight of any meal, from a casual weeknight dinner to a festive Crispy Parmesan Chicken gathering. Homemade simply tastes better, offering a refreshing and flavorful experience every time.
Gather Simple Coleslaw Ingredients
All You Need for Perfect Crunch
The beauty of classic coleslaw lies in its straightforward ingredient list, primarily featuring crisp vegetables and a rich, creamy dressing. For the base, you’ll need fresh green cabbage and vibrant carrots. Some recipes also call for a touch of red cabbage for color and additional texture. For the dressing, essential items include mayonnaise for that signature creaminess, apple cider vinegar for a pleasant tang, sugar for sweetness (which can be adjusted), and a dash of Dijon mustard, salt, and black pepper to round out the flavors. These basic components come together to form a truly delicious side dish.
Preparing Your Fresh Vegetables
Proper preparation of your vegetables is key to achieving that desirable crunchy coleslaw texture. Start by washing your cabbage and carrots thoroughly. For the cabbage, you’ll want to remove any outer leaves that look wilted or damaged. Then, quarter the cabbage, remove the core, and thinly slice or shred it. A sharp knife or a mandoline can help you achieve consistent, fine shreds. For the carrots, peel them and then grate them using the large holes of a box grater, or finely julienne them. The goal is to have uniform pieces that blend well with the dressing and provide an appealing texture. This meticulous vegetable preparation sets the stage for a truly refreshing and satisfying homemade coleslaw experience, a perfect accompaniment for any of your side dishes.
Preparing Your Easy Coleslaw
Getting Tools Ready
Before you begin assembling your homemade coleslaw, it’s helpful to have all your tools and ingredients laid out. This preparation makes the cooking process smooth and enjoyable, especially for an easy recipe like this one. You’ll need a large mixing bowl – preferably one with plenty of space to toss your ingredients without spillage – a whisk for making the dressing, and various measuring cups and spoons. A cutting board and a sharp knife, or a food processor with a shredding attachment, will be essential for preparing your cabbage and carrots. Having everything ready streamlines the process, allowing you to focus on creating that perfect, crunchy coleslaw.
Measuring Everything Accurately
Accuracy in measuring, particularly for the dressing components, is crucial for achieving a balanced and flavorful creamy coleslaw. While some cooks prefer to eyeball ingredients, especially for seasonings, sticking to the recipe’s measurements initially will help you understand the foundational flavor profile. The ratio of mayonnaise, vinegar, and sugar is what defines the coleslaw’s signature tangy and sweet balance. Use level measurements for dry ingredients and accurate pour for liquids. Once you’re familiar with the basic recipe, you can confidently adjust ingredients to suit your personal taste, perhaps adding a little more sugar for a sweeter profile or a bit more vinegar for extra tang. Precision here ensures consistency and a delicious outcome every time you make this popular Cheesy Chicken and Rice Casserole side.
Making Crunchy Coleslaw: 5 Easy Steps
Follow Our Simple Process
Creating a truly delicious and crunchy coleslaw is a remarkably simple process, designed to be accessible for cooks of all skill levels. This easy recipe ensures a satisfying result without any fuss. The journey to perfect homemade coleslaw can be broken down into five straightforward steps that guarantee both flavor and texture. Starting with meticulous vegetable preparation, you’ll move through the creation of a balanced dressing, careful combination of components, and crucial chilling. Each step plays an important role in developing the signature taste and refreshing quality of this beloved Chicken Bacon Ranch Tater Tot Casserole side dish. Pay attention to each phase, and you’ll be rewarded with a vibrant, flavorful coleslaw ready for any occasion, from casual family dinners to festive summer meals and BBQs. The focus here is on maintaining the crispness of the cabbage and carrots while infusing them with a perfectly seasoned, creamy dressing that makes every bite enjoyable and refreshing.
The first step involves preparing your fresh vegetables, ensuring they are thinly shredded or grated. Second, you will whisk together all the dressing ingredients until smooth and well combined. Third, gently combine the prepared vegetables with the creamy dressing in a large bowl. Fourth, toss everything thoroughly to ensure every piece of cabbage and carrot is coated. Finally, and perhaps most importantly, you’ll chill your coleslaw for a specified period to allow the flavors to meld beautifully and enhance its texture. Following these steps diligently will yield a consistently delicious and crispy side dish that your family and friends will rave about.
Make the Perfect Coleslaw Dressing
Mixing Wet Ingredients
The heart of any truly great creamy coleslaw is its dressing. Achieving the perfect balance of flavors starts with carefully mixing the wet ingredients. In a medium-sized bowl, combine your mayonnaise, which forms the rich, creamy base, with apple cider vinegar for its characteristic tang. Next, add granulated sugar to provide sweetness, balancing the acidity of the vinegar. A teaspoon of Dijon mustard can deepen the flavor profile without overpowering it, adding a subtle zest. Finally, stir in salt and freshly ground black pepper to taste. Whisk these ingredients vigorously until the mixture is completely smooth and all the sugar has dissolved. This creates a homogeneous dressing that will evenly coat your vegetables, ensuring every bite is infused with a harmonious blend of tangy and sweet notes.
Adjusting Your Seasoning
Once your initial dressing is mixed, the critical step of adjusting your seasoning comes into play. This is where you can truly customize your homemade coleslaw to your preference. Taste a small spoonful of the dressing. Is it sweet enough? Add a little more sugar if you prefer a sweeter profile. Does it need more tang? A splash more apple cider vinegar can brighten it up. A pinch more salt or pepper can enhance the overall flavor. Remember that the flavors will meld further once combined with the vegetables and after chilling, so aim for a slightly bolder taste in the dressing alone. This tasting and adjusting process ensures that your easy recipe yields a dressing that perfectly complements the fresh cabbage and carrots, leading to an incredibly satisfying and refreshing side dish. For more tips on sauces and condiments, explore our sauces and condiments category.
Combine Cabbage and Carrots
Use a Large Mixing Bowl
Once your dressing is perfectly balanced and your fresh vegetables are shredded, it’s time to bring everything together. The key to a well-mixed homemade coleslaw, particularly a crunchy coleslaw, is using an adequately sized mixing bowl. A large bowl provides ample room for tossing, allowing you to thoroughly coat every strand of cabbage and every piece of carrot with the creamy dressing without spilling. Attempting to mix in a small bowl often results in uneven coating and a messy kitchen, which defeats the purpose of an easy recipe. So, grab your biggest mixing bowl; you’ll appreciate the extra space when you start combining.
Gently add your shredded green and red cabbage, along with your grated carrots, into the large bowl. The vibrant colors of the vegetables will already begin to promise a visually appealing salad. The freshness of these ingredients is paramount, contributing significantly to the refreshing crunch that defines a good coleslaw. Ensure the vegetables are loose and not tightly packed, which will facilitate easier and more even mixing with the dressing. This step is foundational to creating a uniform flavor throughout your mayonnaise-based dish.
Toss for Ultimate Crunchy Bliss
Ensure All Parts Are Coated
With your fresh cabbage and carrots in the large mixing bowl and your perfectly crafted creamy coleslaw dressing at hand, the next crucial step is to toss everything together. This isn’t just about mixing; it’s about gently folding and turning until every single shred of vegetable is evenly coated with the rich, tangy, and sweet dressing. An even coating ensures that each bite delivers the full spectrum of flavors, creating a consistently delicious experience. Use a large spoon and spatula, or even clean hands, to gently lift and fold the ingredients from the bottom up. Avoid over-mixing or mashing the vegetables, as this can bruise them and compromise the desired crunchy coleslaw texture.
Continue tossing until there are no dry patches of vegetables visible. The dressing should be uniformly distributed, lightly clinging to every piece. This careful process ensures that when the coleslaw chills, the flavors will meld beautifully into the vegetables, infusing them with taste while maintaining their crispness. This step is vital for the overall success of your homemade coleslaw, turning simple ingredients into a harmonious and refreshing side dish. The effort in this stage directly translates to the ultimate crunchy bliss you’re aiming for.
Chill Coleslaw for Best Flavor
Minimum Chill Time Needed
After combining all your ingredients and ensuring every piece of cabbage and carrot is coated with the delicious dressing, the next, often underestimated, step is chilling. While it might be tempting to serve your homemade coleslaw immediately, allowing it to chill significantly enhances its flavor and texture. For optimal results, aim for a minimum chill time of at least 30 minutes to 1 hour. This short period allows the flavors to truly meld, transforming the individual components into a cohesive, more enjoyable dish. Ideally, for the best possible flavor, let your creamy coleslaw chill for at least 2-4 hours, or even overnight. Always cover the bowl tightly with plastic wrap before refrigerating to prevent it from drying out or absorbing other food odors.
Why Chilling Matters
Chilling your classic coleslaw is not just about serving it cold; it’s a critical step in the flavor development process. Firstly, as the coleslaw chills, the dressing has time to penetrate and infuse the cabbage and carrots, softening them slightly while enhancing their flavor without making them soggy. This melding of flavors creates a more harmonious and balanced taste, allowing the tangy and sweet notes to truly shine. Secondly, the cold temperature helps to firm up the vegetables, contributing to that desirable crunchy coleslaw texture. A chilled coleslaw is also far more refreshing, especially when served as a side dish for summer meals, picnics, or BBQs. This essential step transforms a good coleslaw into a great one, delivering a consistently delightful and refreshing culinary experience. For more recipe inspiration, be sure to check out Carina Recipes on Pinterest.
Serve Your Delicious Coleslaw
Perfect Side Dish Pairings
Once perfectly chilled and brimming with flavor, your homemade coleslaw is ready to be served! This versatile side dish is a true crowd-pleaser, complementing a wide array of main courses and making it a staple for various occasions. Its refreshing crunch and creamy texture provide a wonderful contrast to rich, savory meats. It’s an absolute must-have for Easy Honey Garlic Chicken, adding a bright, zesty counterpoint. Imagine it alongside smoky BBQ ribs, pulled pork sandwiches, grilled burgers, or fried chicken; the cool, tangy flavors cut through the richness beautifully.
Beyond traditional pairings, classic coleslaw also shines at picnics, potlucks, and outdoor BBQs, making it an ideal choice for summer meals. Its ease of preparation and ability to be made ahead of time makes it a convenient option for entertaining. Don’t limit it to just meat dishes; it can also add a delightful crunch and creaminess to fish tacos or as a refreshing element in a picnic spread with other salads. Whether you’re hosting a casual backyard gathering or simply looking for a fresh accompaniment to your dinner, this refreshing, main course compatible side never disappoints.
Coleslaw Tips and Simple Variations
Adjusting Sweetness
One of the best aspects of making homemade coleslaw is the ability to customize it precisely to your liking. The balance between tangy and sweet is a personal preference, and adjusting the sweetness is quite simple. If you find your dressing too tart, gradually add a bit more sugar, a teaspoon at a time, until it reaches your desired sweetness. Conversely, if it’s too sweet, a splash more apple cider vinegar or a squeeze of fresh lemon juice can help balance it out. Remember to taste as you go. For those who prefer a less sweet option, you can even reduce the initial amount of sugar in the easy recipe or use a sugar substitute. This flexibility ensures your creamy coleslaw is always perfect for your taste buds.
Adding Extra Crunch
While fresh cabbage and carrots provide a foundational crunch, there are many ways to introduce even more texture to your classic coleslaw. For a nutty bite, consider toasting a handful of slivered almonds, sunflower seeds, or even chopped walnuts and stirring them in just before serving. Finely diced bell peppers (red, green, or yellow) or thinly sliced red onion can also add both extra crunch and a pop of color and flavor. For a slightly different twist, some people enjoy adding a few chopped celery stalks or even jicama for an extra layer of crispness. These simple additions can transform your crunchy coleslaw, making it even more dynamic and engaging for any summer meals or picnic.
Storing Leftover Coleslaw Safely
How Long Coleslaw Lasts
Proper storage is essential to maintain the freshness and safety of your homemade coleslaw. If stored correctly, leftover coleslaw can be enjoyed for a few days after preparation. Always transfer any unused portions to an airtight container and refrigerate it promptly. The airtight seal prevents the coleslaw from drying out and helps to keep it from absorbing other odors in the refrigerator. Generally, classic coleslaw, especially those with a mayonnaise-based dressing, will last safely in the refrigerator for about 3 to 4 days. After this period, the vegetables tend to soften significantly, and the dressing can start to separate or lose its optimal flavor and texture.
It’s important to note that the shelf life can be slightly affected by how long the coleslaw was left at room temperature, for instance, during a BBQ or picnic. To ensure maximum safety and quality, minimize the time it spends outside of refrigeration. If it’s been sitting out for more than two hours in warm weather, it’s best to discard it to prevent any food safety risks. By following these simple storage guidelines, you can enjoy your delicious, refreshing, and crunchy coleslaw for a few days, making it a convenient make-ahead side dish for multiple meals.
Classic Coleslaw Nutrition Details
Quick Look at Serving Size
Understanding the nutritional value of your homemade coleslaw can be helpful for meal planning. A typical serving size for classic coleslaw is generally about ½ to ¾ cup. This amount provides a satisfying portion as a side dish without being overly indulgent. It’s important to remember that nutritional details can vary significantly based on the exact ingredients used, especially the type and quantity of mayonnaise, sugar, and any additional mix-ins like nuts or seeds. Our easy recipe aims for a balanced profile, but customization will naturally impact the final nutritional count.
Understanding Key Nutrients
Coleslaw offers a range of nutrients primarily from its fresh vegetable base. Cabbage and carrots are excellent sources of vitamins and fiber. Cabbage provides Vitamin C and K, while carrots are rich in Vitamin A and antioxidants. The mayonnaise contributes healthy fats, though it also adds calories. Sugar, used for the sweet element, primarily adds carbohydrates. While creamy coleslaw can be higher in calories and fat due to the dressing, it remains a valuable source of vitamins and dietary fiber. For a lighter version, consider using light mayonnaise or a portion of Greek yogurt in the dressing. This refreshing side can be a healthy addition to your summer meals when enjoyed in moderation and prepared with mindful ingredient choices.