Key Takeaways
- These breadsticks use a simple yeast dough for a soft texture.
- The key to flavor is the garlic-butter and Italian seasoning brush.
- Use a combination of cheeses for the best melt and taste.
- They pair perfectly with any tomato-based sauce or soup.
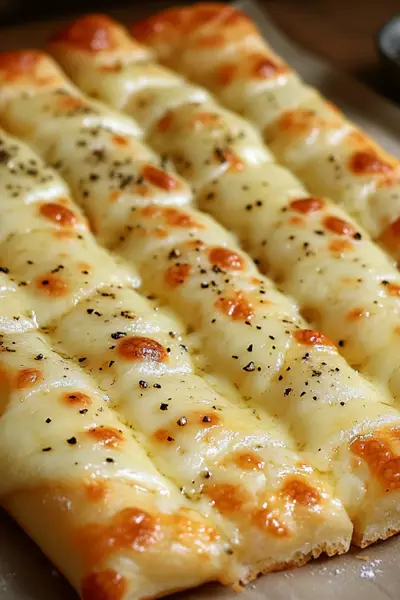
To make Homemade Cheesy Breadsticks, you first prepare a simple yeast dough and let it rise until doubled in size. Then, roll it out, brush with melted garlic butter, and cover it generously with mozzarella cheese. Bake the breadsticks at 425°F (220°C) for about 12-15 minutes until they turn golden brown and the cheese is bubbly.
Mastering the Yeast Dough for Homemade Cheesy Breadsticks
Working with yeast is the first step to creating soft, fluffy breadsticks at home. You need to ensure your active dry yeast is properly proofed before mixing the dough. Warm water that is around 110°F (43°C) is ideal for waking up the yeast and sugar mixture. If the mixture bubbles and gets foamy after 5-10 minutes, you know your yeast is alive and ready to go.
The Importance of Warm Water Temperature
The water temperature is critical when you are activating your yeast for baking success. If the water is too cold, the yeast will not wake up and the dough won’t rise properly. Conversely, if the water is too hot, it can kill the yeast, resulting in a dense, flat batch of breadsticks. Aim for a temperature that feels like a warm bath on your wrist, which is typically between 105-115°F.
Kneading Techniques for a Soft Crumb
Kneading the dough for Homemade Cheesy Breadsticks develops the gluten needed for that signature soft crumb. You should knead the dough for five to seven minutes until it feels completely smooth and elastic to the touch. This process creates strength in the dough, allowing it to hold the air bubbles during the rising period. Proper kneading prevents your breadsticks from becoming tough or chewy.
Achieving the Perfect Rise for Fluffy Breadsticks
The rising time, also known as proofing, is where the magic happens and your dough doubles in size. A long, slow rise at a consistent, warm temperature is what gives the breadsticks their incredible light texture. A warm spot in your kitchen, like near a preheating oven or in a sunny window, is a great place to let the dough rest. This allows the yeast to produce the gases needed for aeration.
Selecting the Best Rising Location
You can encourage a perfect rise by finding a draft-free and warm spot for your dough. Many people like to use an oven that’s been lightly warmed and then turned off to create a cozy environment. Covering the bowl with a damp cloth or plastic wrap also helps trap moisture, preventing the surface of the dough from drying out. This ensures an even and complete rise for your Homemade Cheesy Breadsticks.
Preparing the Rich Garlic-Butter Topping
The garlic-butter mixture is what takes these Homemade Cheesy Breadsticks from simple bread to irresistible comfort food. Melting unsalted butter and infusing it with freshly minced garlic is the essential step for maximizing flavor. Using fresh garlic, rather than powdered, will give you a much more pungent and authentic Italian-inspired taste. You’ll want to brush this mixture liberally over the dough before you add the cheese.
Choosing the Best Cheese Blend for Melting
While shredded mozzarella is the classic choice for its superior melt, you can greatly improve the flavor by mixing in a secondary cheese. Mozzarella provides the stretch and the gooey texture everyone loves when eating a breadstick. Consider using a small amount of cheddar or Gruyère cheese for a richer, nuttier flavor profile in your bake. This blend of cheeses ensures both an excellent melt and a boost of savory depth.
Different Cheese Options to Consider
Feel free to experiment with different varieties to change the profile of your Homemade Cheesy Breadsticks. For example, provolone adds a sharper, saltier note that works well with marinara sauce. Some bakers enjoy adding Monterey Jack for its extremely high melt point and mild, creamy flavor. Remember to shred the cheese yourself for the best results, as pre-shredded cheese often contains anti-caking agents which inhibit a smooth melt.
Why Shredding Your Own Cheese is Recommended
When you shred cheese at home, it melts more smoothly and incorporates better into the overall topping mixture. Pre-shredded cheeses often include starches to prevent clumping, which can give your finished product a slightly gritty or grainy texture. Taking the time to shred your own mozzarella will give you that glorious, effortless pull when you break a breadstick off the sheet.
The Ideal Baking Temperature and Timing
Baking the breadsticks at a high temperature, specifically 425°F ($220^\circ C$), is essential for a short cook time. This high heat ensures that the dough quickly puffs up and the outer edges crisp perfectly, while the cheese melts and becomes bubbly. You are looking for a beautiful golden-brown color around the edges and on the melted cheese. It’s best to keep a close eye on the oven to prevent the garlic from burning on the surface.
Rolling the Dough to the Correct Thickness
For the fluffiest Homemade Cheesy Breadsticks, you should roll your proofed dough into a rectangle that is roughly 9×13 inches in size. This thickness is just right to maintain a soft interior texture after baking. If you roll the dough too thinly, your breadsticks will become dry and crispy, resembling crackers instead of the soft, pillowy side dish you desire. Always start rolling from the center and push outwards to maintain an even shape.
Adding Flavor Variations and Customizations
Once you’ve mastered the basic recipe, you can start customizing your Homemade Cheesy Breadsticks with extra flavor components. You can mix in a pinch of red pepper flakes with the garlic butter for a subtle kick of heat. Consider sprinkling a layer of dried herbs like oregano or fresh chopped parsley before baking for an enhanced aroma. For something savory, try adding finely grated Parmesan cheese on top of the mozzarella before baking.
For an even more intense flavor, you might try adding some finely diced pickled jalapeños before baking, as suggested in the notes. Another great twist is incorporating everything bagel seasoning right onto the melted butter base. Remember that you can freeze any baked breadsticks and reheat them later, making them an excellent meal-prep option. You’ll love having this versatile appetizer ready to go.
Troubleshooting Common Breadstick Baking Issues
If your dough doesn’t rise, the most common reason is that your yeast was either too old or your water was too hot or cold. You can easily prevent this by always checking that your yeast mixture is foamy before proceeding. Another common issue is breadsticks that are too dry; this happens if you over-knead the dough or roll it too thin before the final bake. Be sure to check your oven temperature to ensure consistent, reliable results.
Dealing with burnt garlic is another frequent problem when baking cheesy breadsticks at high heat. To avoid this, you should melt the butter but not cook the garlic in it before brushing the dough. The heat from the oven will gently roast the garlic during the short baking time. If you notice any signs of burning, try loosely placing a sheet of foil over the breadsticks for the last few minutes of baking.
Serving Suggestions: Dips and Pairings
These warm, tender Homemade Cheesy Breadsticks are meant for dipping and pair well with so many meals. The classic choice is a rich marinara sauce, which perfectly complements the garlic and cheese flavors. You can find a fantastic recipe for a simple sauce on our main course section here. Another popular choice is a cool, tangy ranch dressing, creating a delicious contrast in temperature and taste.
Beyond dipping, the breadsticks also serve as an excellent side dish for hearty meals. They are a wonderful accompaniment to a cozy bowl of homemade wonton soup or a rich, baked pasta dish. Consider serving them alongside a vibrant beet salad with feta for a lighter meal. The breadsticks are truly versatile and elevate almost any main course you might prepare.
Storing and Reheating Your Breadsticks
If you happen to have any leftovers, these breadsticks can be stored in an airtight container at room temperature for up to two days. For longer storage, you can easily freeze them, as mentioned in the recipe notes. Reheating is best done in a preheated oven to bring back the original crispy exterior and soft interior. Avoid microwaving, as this tends to make the breadsticks rubbery and changes their delightful texture.
Freezing Baked Breadsticks for Later Use
To freeze the baked Homemade Cheesy Breadsticks, let them cool completely after baking, then wrap them tightly in foil before placing them in a freezer bag. They will keep well for up to three months. When you are ready to enjoy them, simply remove the foil wrapping and reheat them directly from frozen. A quick 10-minute bake at 350°F (175°C) is usually enough to warm them through perfectly.
The Culinary History of Breadsticks and Grissini
The concept of a breadstick has a surprisingly long and fascinating history that you might not expect. The soft, American-style cheesy versions are quite different from their Italian ancestors. The original breadsticks, known as grissini, originated in Turin, Italy, in the 17th century. They were created to be long, thin, and crispy—more like a cracker—to be easier to digest for a young Duke of Savoy who was often ill.
These traditional Italian grissini were hard, dry, and intended to last a long time without spoiling. The Americanized version, which is soft and topped with garlic butter and cheese, evolved much later in the United States, likely inspired by the popularity of pizza and Italian-American cuisine. You can see how this recipe is a delicious marriage of that ancient Italian bread form and modern American flavors. You can learn more about the different types of Italian bread, such as focaccia, by checking out this article on Wikipedia.
Conclusion
Homemade Cheesy Breadsticks are a highly rewarding and simple baking project that results in a crowd-pleasing appetizer or side dish. By focusing on proofing your dough correctly and applying a generous layer of that garlicky cheese blend, you’ll achieve a perfect, soft-baked texture every time. You won’t believe how much better these taste compared to any store-bought or restaurant version.
We encourage you to mix up the cheese and seasonings to make these truly your own signature side. They are the ideal, comforting addition to any meal, from a simple pasta night to a large family gathering. For more easy and delicious side dish ideas, be sure to visit our appetizer section at https://carinarecipes.com/course/appetizers/. Be sure to share your creations on social media by following our updates on Pinterest and Instagram.
Print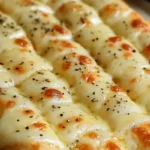
Homemade Cheesy Breadsticks
- Total Time: 1hour 30minutes
Description
These Homemade Cheesy Breadsticks are soft, buttery, and loaded with melty cheese. Made from a simple scratch dough, brushed with garlicky butter, and baked until golden — they’re perfect for pizza night, soups, pasta, or dipping into your favorite sauce. Warm, cheesy comfort in every bite!
Ingredients
For the Dough:
-
- 2¼ tsp active dry yeast (1 packet)
- 1 cup warm water (about 110°F)
- 1 tsp sugar
- 2½ cups all-purpose flour
- 1 tsp salt
- 2 tbsp olive oil
For the Topping:
- 1½ cups shredded mozzarella
- ¼ cup cheddar or Gruyère cheese (optional, for flavor boost)
- 3 tbsp unsalted butter (melted)
- 2 cloves garlic (minced)
- 1 tsp Italian seasoning
- Optional: pinch of red pepper flakes or flaky salt
Instructions
- In a large bowl, mix warm water, sugar, and yeast. Let sit for 5–10 minutes until foamy.
- Stir in flour, salt, and olive oil until dough comes together. Knead for 5–7 minutes until smooth and elastic.
- Cover with a towel and let rise in a warm spot for 45–60 minutes, or until doubled in size.
- Preheat oven to 425°F (220°C). Line a baking sheet with parchment paper.
- Roll the dough into a rectangle (about 9×13″). Transfer to the baking sheet.
- Brush dough with melted butter, sprinkle garlic and Italian seasoning evenly. Top with mozzarella and other cheese if using.
- Bake for 12–15 minutes, or until the cheese is bubbly and edges are golden brown.
- Brush with more butter if desired. Slice into breadsticks and serve warm with marinara, ranch, or garlic sauce!
Notes
Cheese Variety: Mozzarella is classic, but feel free to play with cheddar, Gruyère, or even Munster cheese for a fun twist.
Rising Tip: Let the dough rise fully — it’s the key to soft, fluffy breadsticks.
Freezer Tip: Freeze baked breadsticks and reheat in the oven at 350°F for 10 minutes.
Make it Spicy: Add jalapeños or red pepper flakes before baking!
- Prep Time: 15minutes
- Cook Time: 15minutes
Nutrition
- Calories: 170kcal
- Sugar: 1g
- Sodium: 334mg
- Fat: 6g
- Saturated Fat: 3g
- Trans Fat: 0.1g
- Carbohydrates: 11g
- Fiber: 0.4g
- Protein: 5g
- Cholesterol: 14mg
Keywords: Homemade Cheesy Breadsticks, appetizer, side dish, garlic bread, mozzarella