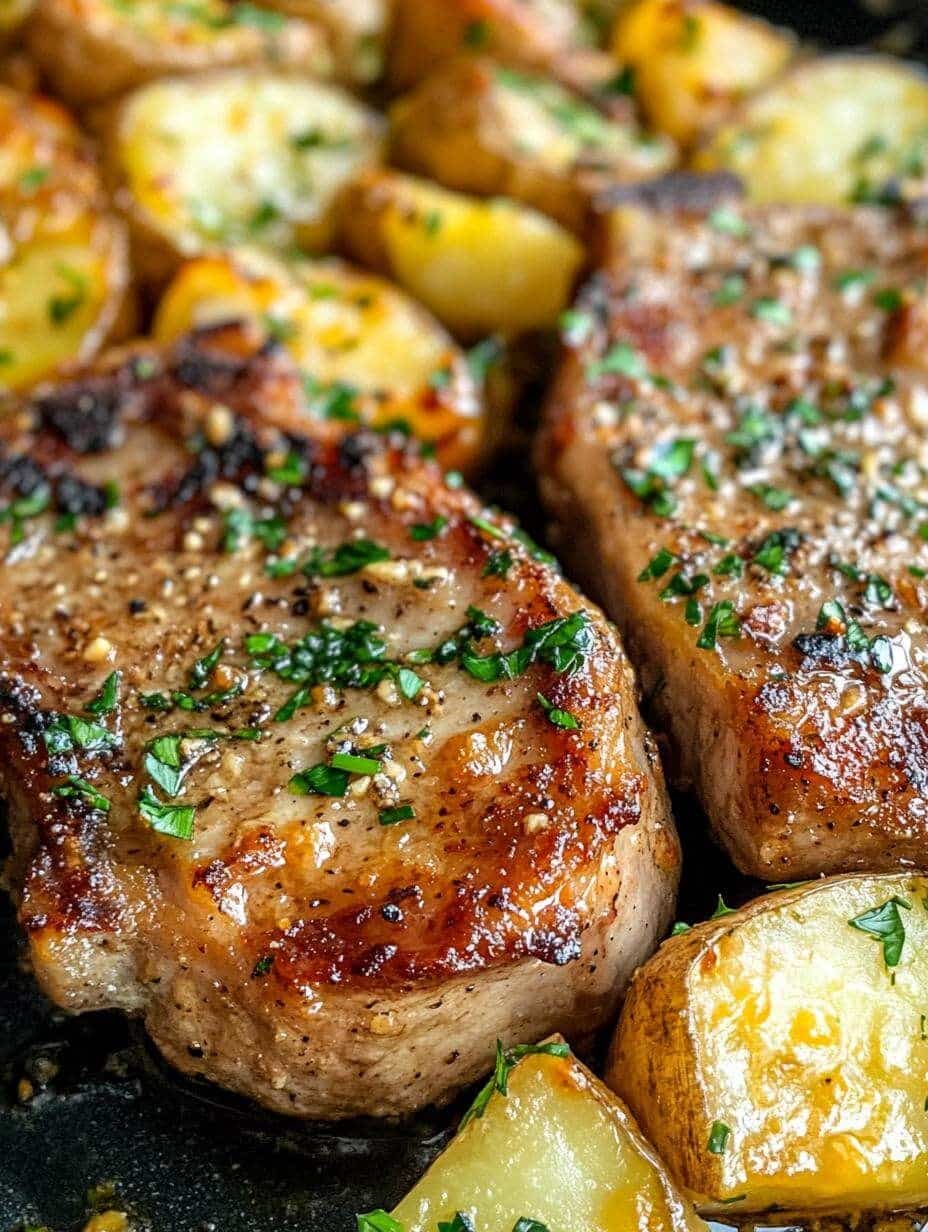
Easy Ham and Cheese Sticks are a fantastic choice for a quick snack or delightful appetizer. This simple recipe combines tender chicken, savory ham, and melty cheese into irresistible `fried chicken snacks`. Perfect for busy weeknights or entertaining, these golden, `crispy texture` treats are sure to become a `family favorite`. Get ready to enjoy a truly `homemade delicious` `savory finger food`.
Key Takeaways
- These savory ham and cheese sticks are perfect as appetizers, snacks, or light meals.
- Utilize simple ingredients and common kitchen tools for a straightforward preparation.
- Proper breading and `frying methods` are key to achieving a `crispy texture` and golden finish.
- Discover `flavor variations` and healthier baking options to suit your preferences.
- Learn effective storage and reheating techniques to keep your leftovers fresh and delicious.
Crafting perfect cheese sticks is simple. Gather your ingredients for delicious snacks. Mix the filling, then shape carefully. Bread for a `crispy texture` experience. Fry golden and serve warm.
Introducing Easy Ham and Cheese Sticks
Easy Ham and Cheese Sticks are a delightful addition to any meal plan, offering a versatile and incredibly tasty option that appeals to all ages. Imagine a warm, golden crust encasing a gooey, flavorful interior packed with tender chicken, savory ham, and rich, melted cheese. This `easy cheese sticks` recipe is designed for both novice and experienced cooks, promising a satisfying outcome with minimal fuss.
What makes them so great?
What sets these ham and cheese sticks apart is their irresistible combination of flavors and textures. The `crispy texture` of the fried exterior gives way to a soft, cheesy, and meaty filling. They are remarkably satisfying, making them an ideal `savory finger food` for parties, game nights, or even as a comforting treat after a long day. The process of making them is straightforward, ensuring you can whip up a batch whenever a craving strikes. Plus, making them at home means you control the quality of ingredients, resulting in a fresher, more delicious product than store-bought alternatives. These truly are `homemade delicious` and offer a rewarding cooking experience.
Perfect for any meal
The versatility of these `ham and cheese recipe` sticks is truly remarkable. They can serve as a fantastic appetizer to kick off a dinner party, a quick and satisfying snack during the day, or even a fun, light lunch or dinner when paired with a fresh salad. Children especially love these `fried chicken snacks`, making them a `family favorite` for school lunches or after-school treats. Whether you’re hosting guests, preparing a `meal prep ideas` spread, or simply looking for something comforting and easy, these cheese sticks fit the bill. Their engaging taste and convenient size ensure they’re always a hit, no matter the occasion.
Gather Ingredients for Chicken Sticks
To create these mouth-watering Chicken Ham and Cheese Sticks, you’ll need a selection of fresh and pantry staples. The quality of your ingredients directly influences the final taste, so opt for good quality ham and your favorite cheeses. This `ham and cheese recipe` is quite forgiving, allowing for some flexibility based on what you have on hand, but sticking to the core list will yield the best results for a truly `homemade delicious` treat.
List of all you’ll need
- Cooked Chicken: About 1.5 cups, finely shredded or diced. Leftover rotisserie chicken works wonderfully for `quick preparation`.
- Ham: 1 cup, finely diced. Choose a good quality deli ham or leftover baked ham for the best flavor.
- Cheese: 1 cup, shredded. A blend of cheddar and mozzarella offers excellent melt and flavor. Other `flavor variations` include Monterey Jack or Gruyere.
- Cream Cheese: 4 oz, softened. This acts as a binder and adds creaminess to the filling.
- Flour: 1 cup all-purpose flour for dredging.
- Eggs: 2 large eggs, lightly beaten for the egg wash.
- Breadcrumbs: 1.5 cups Panko breadcrumbs for extra `crispy texture`. Regular breadcrumbs can also be used.
- Seasonings: Salt, black pepper, garlic powder, and onion powder to taste. A pinch of paprika can add color and subtle spice.
- Oil for Frying: Vegetable oil, canola oil, or peanut oil, sufficient for deep frying.
These ingredients come together to form a rich and savory core, ensuring every bite of your `easy cheese sticks` is packed with flavor.
Tools for preparation
Having the right tools will make the preparation process smooth and efficient, especially for `frying methods`. You won’t need any specialized equipment, just standard kitchen items. This ensures the `quick preparation` aspect of the recipe remains true to its name.
- Large Mixing Bowl: For combining the chicken, ham, cheese, and cream cheese.
- Shallow Dishes or Trays: Three separate dishes for your breading station (flour, eggs, breadcrumbs).
- Measuring Cups and Spoons: For accurate ingredient quantities.
- Whisk or Fork: For beating the eggs.
- Heavy-Bottomed Pot or Deep Fryer: For frying the chicken cheese sticks. A Dutch oven works well.
- Slotted Spoon or Spider Skimmer: For safely removing the fried sticks from the hot oil.
- Wire Rack with Paper Towels: For draining excess oil after frying, which helps maintain a `crispy texture`.
- Meat Thermometer (Optional but recommended): To monitor oil temperature for consistent frying results.
- Tongs: For handling the sticks during breading and frying.
Gathering these items beforehand will streamline your cooking process and help you achieve perfectly cooked `fried chicken snacks` every time. For more dinner ideas, explore other dinner recipes on our site.
Mixing the Ham and Cheese Filling
The heart of these delicious `easy cheese sticks` lies in their well-combined and flavorful filling. Taking the time to properly mix the ingredients ensures that every bite offers a harmonious blend of savory ham, tender chicken, and gooey cheese. This step is crucial for achieving that irresistible `homemade delicious` taste and making sure your `fried chicken snacks` are perfectly balanced.
Combining chicken, ham, cheese
Start by preparing your main components. Ensure your cooked chicken is finely shredded or diced. This provides a smoother texture that holds together well when shaping. The same applies to the ham; small, uniform pieces will integrate better into the mixture. In a large mixing bowl, combine the shredded chicken, diced ham, and shredded cheeses (cheddar and mozzarella work wonderfully, but feel free to experiment with `flavor variations` like Monterey Jack for a milder profile or a hint of smoked gouda for depth). Add the softened cream cheese to this mixture. The cream cheese acts as a binder, helping all the ingredients stick together and providing an extra layer of creaminess that makes these `ham and cheese recipe` sticks incredibly rich and satisfying. Use a sturdy spoon or your hands to thoroughly combine everything until it forms a cohesive, uniform mixture. You want to make sure there are no dry spots and that the cream cheese is evenly distributed throughout.
Adding spices and flavor
Once your chicken, ham, and cheeses are combined, it’s time to infuse the mixture with delightful seasonings. These spices will elevate the overall flavor profile of your `savory finger food`. A good starting point includes salt, black pepper, garlic powder, and onion powder. Adjust these to your personal preference; if you like a little kick, a pinch of cayenne pepper or red pepper flakes can be added. For an herbaceous touch, consider incorporating finely chopped fresh chives or dried parsley. Mix the seasonings thoroughly into the chicken and cheese mixture. Taste a small portion of the mixture (if it contains no raw ingredients) to ensure the seasoning is just right before moving on to shaping. Remember, the goal is a well-balanced flavor that complements the richness of the ham and cheese without overpowering it. This attention to detail in seasoning contributes significantly to making these `easy cheese sticks` a `family favorite`.
How to Shape Chicken Cheese Sticks
Once your flavorful chicken, ham, and cheese filling is perfectly mixed, the next step is to shape it into uniform sticks. This stage is important for both presentation and ensuring even cooking when you move to the `frying methods`. Proper shaping makes these `fried chicken snacks` easy to handle and visually appealing as a `savory finger food`. This simple technique is part of what makes this an `easy cheese sticks` recipe.
Forming logs for frying
Take about a tablespoon or two of the mixture into your hands. Gently press and roll the mixture between your palms to form a log shape. Aim for sticks that are roughly 3-4 inches long and about 0.5-0.75 inches in diameter. Consistency in size is key here, as it ensures all your `ham and cheese recipe` sticks cook at the same rate, resulting in that desirable `crispy texture` across the batch. If some sticks are thicker than others, they might not cook through evenly, or some might brown too quickly while others remain pale. You can lightly dampen your hands with water if the mixture becomes too sticky, which helps in shaping. As you form each log, place it on a parchment-lined baking sheet. Once all the mixture has been shaped, it’s beneficial to refrigerate the formed sticks for at least 20-30 minutes. This chilling period helps the sticks firm up, making them easier to handle during the breading process and less likely to fall apart when they hit the hot oil. This crucial `recipe tips` step ensures your `homemade delicious` sticks maintain their form and cook beautifully. For another cheesy chicken dish, consider making Cheesy Chicken and Rice Casserole.
Breading Your Ham and Cheese Sticks
Breading is a critical step for achieving the perfect `crispy texture` on your `easy cheese sticks`. This three-stage process ensures a beautiful, golden-brown crust that seals in the flavorful chicken and cheese filling. Taking care during this stage will prevent soggy sticks and contribute significantly to the overall deliciousness of your `fried chicken snacks`. It’s a key part of our `ham and cheese recipe` that guarantees a delightful crunch.
Flour, egg, and breadcrumbs
Set up a breading station with three shallow dishes or plates. In the first dish, place your all-purpose flour, seasoned with a pinch of salt and pepper. In the second dish, whisk two large eggs until well combined. In the third dish, spread your Panko breadcrumbs. Panko is highly recommended for its coarser texture, which results in a superior `crispy texture` compared to standard breadcrumbs. If you desire extra flavor, you can mix in some grated Parmesan cheese or a dash of garlic powder into the Panko. This careful setup for your `frying methods` ensures a smooth and efficient breading process.
Coating for crispiness
To bread each ham and cheese stick, follow these steps methodically. First, gently roll a shaped stick in the seasoned flour, ensuring it’s completely coated. Tap off any excess flour, as too much will create a thick, doughy layer. Next, dip the floured stick into the beaten egg, allowing any excess egg to drip off. The egg wash acts as a glue for the breadcrumbs. Finally, transfer the egg-coated stick to the Panko breadcrumbs, pressing gently to ensure the crumbs adhere evenly to all sides. You want a generous and uniform coating for the best `crispy texture`. Place the breaded sticks back on your parchment-lined baking sheet. Repeat this process for all the remaining sticks. Once all sticks are breaded, it’s a good `recipe tips` practice to refrigerate them again for at least 15-30 minutes. This helps the breading set, which further ensures it stays on during frying and contributes to a firmer, more `crispy texture` upon cooking. This step is essential for perfectly golden and crunchy `savory finger food`.
Frying Golden Chicken Cheese Sticks
Frying is where the magic happens, transforming your breaded ham and cheese sticks into golden, crispy perfection. Achieving the ideal `crispy texture` relies heavily on correct oil temperature and proper `frying methods`. This stage of the `easy cheese sticks` recipe is quick but requires attention to detail to ensure your `fried chicken snacks` are cooked beautifully and safely.
Heating the oil correctly
Pour enough vegetable oil, canola oil, or peanut oil into a heavy-bottomed pot or deep fryer to reach a depth of about 2-3 inches. Place the pot over medium-high heat. The ideal oil temperature for frying these ham and cheese sticks is between 350°F and 375°F (175°C – 190°C). Using a kitchen thermometer to monitor the temperature is highly recommended. If the oil is too cold, the sticks will absorb too much oil and become greasy and soggy, losing their `crispy texture`. If the oil is too hot, the breading will burn before the interior has a chance to heat through and the cheese to melt properly. Allow the oil to heat gradually. Once it reaches the desired temperature, it’s crucial to maintain it throughout the frying process. You can test the oil by dropping a tiny pinch of breadcrumbs; if they sizzle immediately and float to the surface, the oil is ready. This is a vital `recipe tips` for perfectly fried `homemade delicious` treats.
Frying till golden brown
Carefully lower the breaded ham and cheese sticks into the hot oil, working in batches. Do not overcrowd the pan, as this will drop the oil temperature and lead to uneven cooking and a less `crispy texture`. Fry 3-4 sticks at a time, depending on the size of your pot. Fry for about 2-3 minutes, turning occasionally with a slotted spoon or tongs, until they are golden brown and `crispy texture` on all sides. The internal ingredients (cooked chicken, ham, cheese) only need to be heated through and the cheese melted, as they are already cooked. The goal is to achieve that perfect exterior. Watch them closely, as they can brown quickly. This `quick preparation` step, though fast, demands your full attention to prevent burning and ensure even cooking. For more inspiration on `main course` recipes, consider adding Crispy Parmesan Chicken with Garlic Sauce to your repertoire.
Draining excess oil
Once the chicken cheese sticks are beautifully golden and crispy, carefully remove them from the oil using a slotted spoon or spider skimmer. Immediately transfer them to a wire rack placed over a baking sheet lined with paper towels. The wire rack allows air to circulate around the sticks, preventing the bottom from becoming soggy, while the paper towels absorb any excess oil. This draining step is essential for maintaining their `crispy texture` and ensuring they are not greasy. You may also lightly blot them with additional paper towels. Allow them to cool for a few minutes on the rack before serving, as the internal cheese will be very hot. This brief cooling period also helps the crust to set, enhancing the crunchiness of your `savory finger food`. These `frying methods` ensure your `family favorite` `fried chicken snacks` are perfectly executed.
Serving Your Delicious Ham and Cheese Sticks
After all the effort of preparing and frying your `easy cheese sticks`, the grand finale is serving them. Presentation and the right accompaniments can truly `elevate` this `savory finger food` from a simple snack to a memorable dish. Whether for a casual gathering or a special occasion, these `fried chicken snacks` are sure to be a hit, especially with the right `serving suggestions`.
Dipping sauce ideas
While delicious on their own, ham and cheese sticks truly shine when paired with complementary dipping sauces. Offering a variety of sauces caters to different tastes and adds another layer of flavor to your `homemade delicious` creation. Here are some popular and delightful options:
- Classic Marinara Sauce: The tangy sweetness of marinara is a perfect counterpoint to the rich, savory filling.
- Ranch Dressing: Creamy and herby, ranch offers a cooling and familiar flavor that kids and adults alike love.
- Honey Mustard: For a sweet and tangy kick, honey mustard dressing provides a lively contrast.
- Spicy Sriracha Mayo: Mix sriracha with mayonnaise for a simple, spicy dip that adds a thrilling element.
- Garlic Aioli: A homemade garlic aioli brings a sophisticated, rich garlic flavor that pairs wonderfully with the ham and cheese.
Provide small bowls of each sauce for a fun and interactive dipping experience. This `recipe tips` for diverse sauces makes the dish even more engaging.
Garnishing for presentation
A little garnish can go a long way in making your ham and cheese sticks look as appealing as they taste. Simple garnishes can transform your `savory finger food` into an elegant appetizer. A sprinkle of freshly chopped parsley or chives adds a pop of color and a fresh, herbaceous aroma. You can also dust them lightly with grated Parmesan cheese right after frying for an extra cheesy touch and a more vibrant look. Arrange the golden `crispy texture` sticks neatly on a platter, perhaps with a small bowl of fresh mixed greens on the side for a fresh element. For a `family favorite` meal, consider serving these alongside Creamy Chicken Alfredo Lasagna Rolls for a truly indulgent spread. Remember, presentation is key to enjoying this `ham and cheese recipe` fully.
Quick Prep for Easy Cheese Sticks
One of the many appealing aspects of this `easy cheese sticks` recipe is its relatively quick preparation and cooking time, making it an ideal choice for busy schedules or when you need a `savory finger food` in a pinch. Understanding the breakdown of timings can help you plan your `meal prep ideas` efficiently and ensure a smooth cooking experience for these `fried chicken snacks`.
Total time and servings
From start to finish, including prep, chilling, and frying, you can expect to have these delicious ham and cheese sticks ready in approximately 45-60 minutes. This makes them a perfect `quick preparation` option for a `family favorite` snack or appetizer. The recipe typically yields about 18-24 sticks, depending on the size you shape them, which is ample for a family dinner or a small gathering. These numbers are based on average kitchen efficiency, and with a little practice, you might even shave off some time. The key is to have all your ingredients measured and ready before you begin, a critical `recipe tips` for any quick dish.
Preparation and cooking times
Let’s break down the individual stages to give you a clearer picture:
- Ingredient Gathering and Mixing: This initial step typically takes about 10-15 minutes. This includes shredding chicken, dicing ham, and combining all the filling ingredients in a bowl.
- Shaping and Initial Chilling: Forming the logs usually takes about 10-15 minutes. The first chilling period, which is crucial for firming up the sticks, is an additional 20-30 minutes. This downtime is perfect for preparing your breading station or cleaning up the initial prep.
- Breading: The three-stage breading process (flour, egg, breadcrumbs) for all sticks takes around 10-15 minutes. This can be done while the oil is heating.
- Frying: Frying in batches is the quickest part, usually taking about 2-3 minutes per batch. For 18-24 sticks, this might mean 4-6 batches, totaling around 10-15 minutes of active frying time. This `frying methods` ensures a consistent `crispy texture`.
- Draining and Cooling: Allow another 5 minutes for draining excess oil and cooling slightly before serving.
Totaling these times confirms the efficient nature of this `ham and cheese recipe`, making it an excellent choice for a `homemade delicious` treat on any day.
Tips for Perfect Chicken Cheese Sticks
Achieving perfectly golden and `crispy texture` ham and cheese sticks consistently requires a few key `recipe tips`. These pointers will help you avoid common pitfalls and ensure every batch of your `fried chicken snacks` turns out `homemade delicious` and a `family favorite`. Mastering these techniques will make your `easy cheese sticks` even more enjoyable.
Prevent soggy sticks
Soggy sticks are often the result of incorrect oil temperature or improper draining. To prevent this, always ensure your frying oil is at the ideal temperature of 350°F to 375°F (175°C – 190°C) before adding the sticks. If the oil is too cool, the breading will absorb too much fat, leading to a greasy, soft exterior. Once fried, immediately transfer the sticks to a wire rack set over paper towels. This allows air to circulate around them, helping to maintain their crispiness while excess oil drains away. Avoid placing them directly on paper towels for extended periods, as this can trap steam and soften the crust. The initial chilling of the shaped and breaded sticks also helps the coating adhere better, forming a stronger barrier against oil absorption during the `frying methods`.
Don’t overcrowd the pan
This is a crucial `recipe tips` for any deep-frying endeavor. When you overcrowd the pot or fryer, the temperature of the oil drops significantly. This temperature drop extends the cooking time, causing the sticks to absorb more oil and become greasy, just like with too-cool oil. Overcrowding also prevents the sticks from browning evenly, leading to pale spots and an inconsistent `crispy texture`. Fry in small batches, typically 3-4 sticks at a time, depending on the size of your pot. Give each stick enough space to cook freely. Allow the oil to return to the correct temperature between batches before adding the next set of `fried chicken snacks`. Patience in this step is rewarded with beautifully golden and uniformly crispy results for your `ham and cheese recipe`.
Allow cooling time
While the temptation to bite into a fresh-from-the-fryer cheese stick is strong, it’s important to allow them a few minutes to cool down. The filling, especially the melted cheese, will be extremely hot and can cause burns. A brief cooling period of 3-5 minutes on the wire rack not only makes them safer to eat but also helps the crust set further, enhancing the `crispy texture`. As they cool slightly, the internal ingredients stabilize, making for a more enjoyable and less messy eating experience. This short waiting period is part of the `serving suggestions` for truly perfect `homemade delicious` `savory finger food`. For another quick chicken idea, check out our Chicken Caesar Sandwich.
Flavorful Twists for Ham and Cheese
While the classic `easy cheese sticks` recipe with ham and cheese is undeniably delicious, there’s always room for creativity! Experimenting with `flavor variations` can lead to exciting new `savory finger food` experiences, keeping your `meal prep ideas` fresh and engaging. These `recipe tips` allow you to personalize your `homemade delicious` treats to suit any palate.
Experiment with other cheeses
The beauty of this `ham and cheese recipe` is its adaptability. Don’t feel limited to just cheddar and mozzarella. Consider mixing in other cheeses to create unique `flavor variations`. Here are a few ideas:
- Swiss or Gruyère: For a nutty, more sophisticated flavor profile that pairs wonderfully with ham.
- Pepper Jack: If you enjoy a bit of a spicy kick, Pepper Jack cheese will add a pleasant warmth to the filling.
- Smoked Provolone: Offers a smoky depth that complements both the chicken and ham beautifully.
- Feta (in moderation): A small amount of crumbled feta can introduce a tangy, salty element, particularly good if you’re leaning towards more Mediterranean flavors.
- Cream Cheese blends: Instead of plain cream cheese, try a cream cheese with chives or a jalapeño flavor for an extra zing.
You can also use a combination of two or three cheeses for a more complex `family favorite` flavor. Just ensure the cheeses melt well to maintain that gooey interior in your `fried chicken snacks`.
Baking for a healthier option
If you’re looking for a lighter alternative to deep-frying, baking these `easy cheese sticks` is an excellent choice. While the `crispy texture` might be slightly different, they will still be incredibly flavorful and `homemade delicious`. To bake them, preheat your oven to 400°F (200°C). Arrange the breaded sticks in a single layer on a parchment-lined baking sheet. Lightly mist or brush them with olive oil or cooking spray. Bake for 15-20 minutes, flipping them halfway through, until they are golden brown and heated through. The cheese should be perfectly melted, and the exterior should be crisp, albeit a bit less intensely crunchy than their fried counterparts. Baking is a fantastic `quick preparation` method that doesn’t compromise much on taste, making it a great `meal prep ideas` option. For more `appetizers`, check out other delicious selections on Carina Recipes’ appetizers category.
Store and Reheat Cheese Sticks
Making a larger batch of `easy cheese sticks` for `meal prep ideas` or simply having leftovers is a great way to enjoy this `savory finger food` later. Knowing how to properly store and reheat them ensures that your `homemade delicious` `fried chicken snacks` maintain their `crispy texture` and wonderful flavor. These `recipe tips` will help you enjoy your `ham and cheese recipe` treats for days.
Keeping leftovers fresh
To keep any leftover ham and cheese sticks fresh, allow them to cool completely to room temperature after frying. This is crucial; putting warm sticks directly into an airtight container can create condensation, leading to sogginess. Once cooled, place them in an airtight container or a resealable freezer bag. Store them in the refrigerator for up to 3-4 days. If you plan to freeze them, place the cooled sticks on a baking sheet in a single layer and freeze until solid (this prevents them from sticking together). Once frozen, transfer them to a freezer-safe bag or container. They can be frozen for up to 1-2 months. When freezing, label the container with the date to keep track of freshness. This `quick preparation` storage method is perfect for keeping your `family favorite` snacks ready to go.
Best reheating methods
Reheating is key to regaining that delightful `crispy texture`. Avoid the microwave, as it will make them soggy. The best methods involve dry heat:
- Oven: Preheat your oven to 375°F (190°C). Place the cheese sticks in a single layer on a baking sheet. Bake for 10-15 minutes (or 20-25 minutes if reheating from frozen), flipping them halfway, until they are heated through and the exterior is crisp again. This is generally the best method for maintaining a `crispy texture`.
- Air Fryer: If you have an air fryer, this is an excellent option for quick and crisp reheating. Preheat your air fryer to 350°F (175°C). Place the sticks in a single layer in the air fryer basket (do not overcrowd). Cook for 5-8 minutes (or 10-15 minutes from frozen), shaking the basket halfway, until hot and crispy. The air fryer mimics the `frying methods` without additional oil.
- Toaster Oven: A toaster oven works similarly to a regular oven for smaller batches.
Always ensure the internal temperature is hot before serving. These `serving suggestions` for reheating will ensure your `homemade delicious` snacks taste almost as good as fresh, making them a true `family favorite` for later enjoyment. Learn more about the history of ham on Wikipedia’s ham page.
Enjoy This Easy Cheese Sticks Recipe
With all the `recipe tips` and detailed instructions, you are now fully equipped to create a batch of truly `homemade delicious` `easy cheese sticks`. This `ham and cheese recipe` is more than just a list of steps; it’s an invitation to bring joy and `savory finger food` delight into your home. The combination of tender chicken, savory ham, and gooey cheese, all encased in a golden, `crispy texture` crust, makes these `fried chicken snacks` utterly irresistible. They are a testament to how simple ingredients can yield extraordinary results, proving that `quick preparation` doesn’t mean compromising on flavor or quality.
Your family will love it
Prepare for rave reviews! These ham and cheese sticks are destined to become a `family favorite` in your household. Their approachable flavors and fun-to-eat format make them a hit with both kids and adults. Whether served as a delightful appetizer for your next gathering, a satisfying snack after school, or a creative addition to your `meal prep ideas` repertoire, they promise smiles all around. The joy of cooking this recipe is in seeing your loved ones savoring every bite of this `homemade delicious` treat. Don’t be surprised if requests for “more cheese sticks, please!” become a regular occurrence. Share your creations and find more inspiration on our Pinterest and Instagram pages. We encourage you to try out different `flavor variations` and `serving suggestions` to make this recipe uniquely yours. From the initial mixing to the final `frying methods` and draining, every step contributes to a snack that embodies comfort and deliciousness. Explore the fascinating world of cheese by visiting the Wikipedia page on cheese for more insights.