DIY Aroma Stones are simple, non-toxic air fresheners you can craft with pantry staples and essential oils, providing gentle, lasting scent to small spaces easily.
DIY Aroma Stones are a beautiful and simple craft you can make to introduce gentle, natural scents into your living space. You’ll create these small, decorative diffusers using common household ingredients, making this project accessible and fun. They are perfect for freshening small areas like drawers, closets, or bathrooms without needing heat or electricity. This simple project helps you personalize your home’s scent profile easily.
Key Takeaways
- Crafted using baking soda and cornstarch.
- Naturally diffuses essential oils without heat or flame.
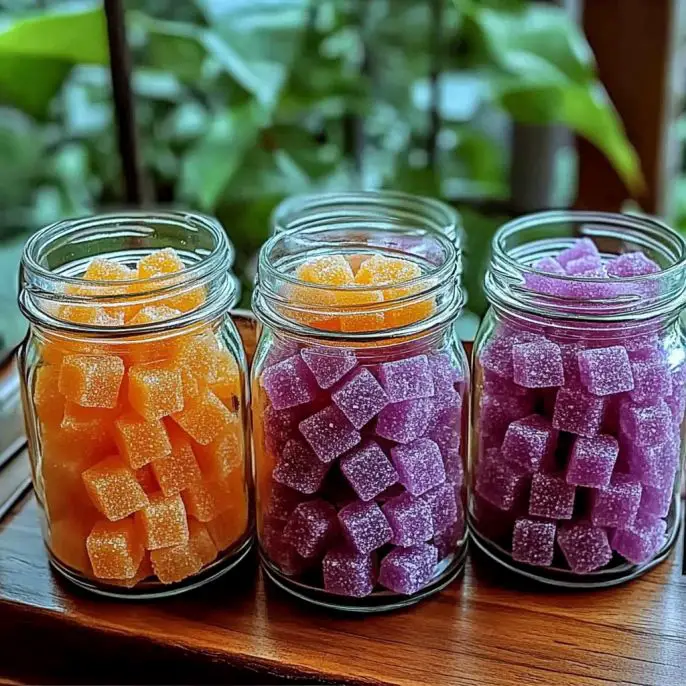
- Completely customizable with colors and scents.
- Excellent for gifting and freshening small spaces.
To make DIY Aroma Stones, combine baking soda, cornstarch, and water to form a thick, moldable paste. Mix in your favorite essential oils and food coloring (optional). Shape the mixture and allow the stones to air dry completely for 24–48 hours until they are hard and non-tacky.
What Are DIY Aroma Stones and How Do They Work?
DIY Aroma Stones are natural scent diffusers made from a simple mixture that hardens into a porous, chalky stone. This texture allows the stone to absorb and slowly release the fragrance of the essential oils you add. This flameless method of scent diffusion is safer than candles and less intense than some electric diffusers.
Using pantry staples like baking soda and cornstarch makes this a very budget-friendly craft. You can easily adjust the quantity to make a small batch for yourself or a larger batch for handmade gifts. It is a mindful activity that results in a beautiful, functional item for your home.
Gathering Your Simple Pantry Ingredients for DIY Aroma Stones
The foundation of these aroma stones comes from two key kitchen ingredients: baking soda and cornstarch. Baking soda helps neutralize odors, while cornstarch acts as a binder. Together with water, they form the basic, moldable paste.
You will need two cups of baking soda, one cup of cornstarch, and about one and a quarter cups of water. Essential oils, of course, are what provide the scent. You can choose any oils that bring you peace, such as Lavender for calm or lemon for a bright, clean smell.
Mixing the Base Paste: Achieving the Correct Consistency
Start by thoroughly whisking your dry ingredients, the baking soda and cornstarch, in a large mixing bowl. A complete mix here prevents lumps later. This initial step ensures a smooth, uniform final product for your DIY Aroma Stones.
Next, slowly pour in the water, stirring constantly with a spoon or spatula. The mixture should quickly transition from a wet powder to a thick, wet-sand consistency. If it feels too crumbly, add water a tablespoon at a time. If it is too wet, add a little more cornstarch until the paste is moldable.
Customizing Your Stones with Color and Essential Oils
To add color, divide the paste into separate bowls if you plan on using multiple shades. Use food coloring drops and mix well until the color is evenly distributed. Remember that the color will appear lighter once the stones are completely dry.
This is the moment to infuse your DIY Aroma Stones with fragrance. Add 10–15 drops of your chosen essential oil per batch. Gently stir to incorporate the oil. Try an energizing blend like eucalyptus and mint, or a cozy scent like orange and clove, as you prepare your next main course dinner.
The Shaping Process: Molding and Pressing Your Stones
You have two main options for shaping your aroma stones. The simplest method is to mold them by hand into rustic, organic stone-like shapes. You can also use silicone molds to create intricate shapes like stars, hearts, or flowers.
Press the paste firmly into the molds or gently shape by hand. Ensure you place the shaped stones on wax paper or a drying rack immediately to prevent sticking to your work surface. Handle the fresh shapes carefully as they are still soft and easily misshapen.
Drying Your DIY Aroma Stones for Optimal Hardness
Patience is key during the drying phase. Set your stones aside in a dry area with good airflow, away from direct sunlight or heat. Allowing them to air dry slowly is crucial for preventing cracks and ensuring uniform hardness.
The drying time is generally 24 to 48 hours, depending on the size of your stones and the humidity level in your home. They are ready when they feel completely hard and dry to the touch, with no tackiness remaining on the surface. Try not to rush this step to preserve their integrity.
Creative Variations for Enhanced DIY Aroma Stones
Adding Texture and Visual Appeal to DIY Aroma Stones
Before the paste fully dries, you can add extra visual interest. Try rolling the edges of your stones in a fine powder like mica or glitter for an extra shimmer. This small detail adds a lot of pop and makes them look more polished for gifting.
You can also incorporate a small pinch of finely ground herbs like dried rosemary or lavender buds into the mix for a natural, rustic look. These small additions don’t significantly change the scent but make the stone visually captivating. Consider following my Pinterest for more visual inspiration.
Tips for Refreshing the Scent of Your Aroma Stones
The scent of your DIY Aroma Stones will naturally fade over time. The porous nature of the stone means it can be easily refreshed. When you notice the fragrance becoming weaker, simply add a drop or two of your favorite essential oil directly onto the stone’s surface.
The oil will soak in immediately, and the scent will be revitalized. This ability to refresh the scent indefinitely makes them a very sustainable and long-lasting air freshener solution. You can even change the scent each time you refresh them for variety, like making a cheesy chicken casserole for dinner.
Safety Considerations for DIY Aroma Stones in Your Home
While the base ingredients are non-toxic, you should use essential oils safely, especially if you have children or pets. Always research which oils are safe for use around different household members. Some oils are toxic to pets and should be avoided in areas they frequent.
Ensure the finished stones are kept out of reach of curious young children and pets to prevent accidental ingestion. Since the stones are made with food-grade ingredients, they may look tempting, so placing them in high areas or within decorative jars is best. Follow my Instagram for placement ideas.
The Versatility of DIY Aroma Stones as Gifts and Decor
These aroma stones make wonderful, thoughtful gifts. You can package a set of stones in a small, decorated pouch or jar, perhaps with a tiny bottle of essential oil for easy refreshing. They are a personalized gift perfect for housewarmings or thank you presents.
For home decor, place them in decorative bowls on side tables or shelves. You can tuck them into linen closets, gym bags, or even your car’s cup holder for a natural scent boost. Placing them in a drawer is a fantastic way to keep your clothes smelling fresh and clean.
Comparing Aroma Stones to Other Natural Diffusers
Unlike reed diffusers, aroma stones require no liquid and pose no tipping risk. They are also superior to simple cotton balls because the hardened stone provides a larger, more durable surface area for oil absorption and slower release. For other helpful ideas, consult the Wikipedia page on Aromatherapy.
Compared to electric diffusers, DIY Aroma Stones use no electricity and are completely silent. This makes them ideal for bedrooms, offices, or other quiet spaces where you want gentle, consistent background fragrance without noise or vapor. Consider them a simple, effective tool in your overall home fragrance strategy.
Adding Your Finished DIY Aroma Stones to Your Space
Once your stones are fully cured and hardened, you are ready to place them. Think about where you need a gentle fragrance most. The scent will be subtle, making them ideal for small, contained areas rather than large open rooms, like when you make a delicious quesadilla for lunch.
Place a few stones in a small dish next to your bed to help promote restful sleep if you use lavender oil. For a bathroom, a few eucalyptus stones on the counter can provide a refreshing spa-like scent. Grouping several stones in one area will increase the noticeable fragrance.
DIY Aroma Stones are a rewarding craft that brings natural fragrance and calm into your home simply and beautifully. You now have the knowledge to create your own personalized, non-toxic air fresheners, choosing the perfect scents and colors to suit your mood and decor. This project is a gentle reminder that the best things in life are often the simplest ones we make ourselves.
DIY Aroma Stones offer a sustainable and delightful way to maintain a fresh environment without harsh chemicals or complex gadgets. Whether you make a batch for personal use or to share, these little stones are sure to bring a smile and a fresh breath to any space. You can find more simple and fragrant projects in the Desserts category.